Showing posts with label Save the Date. Show all posts

Tuesday, March 9, 2010

Head over Feet

This week's challenge over at Sketches! {by tamara} is a Recipe Challenge from Rachel - use the following items on your project:
*Vellum or Transparency
*Felt
*Embossing
I used the following sketch from Imaginisce...
...and created this layout. My journaling is hidden behind the pic on the left - just pull the tag to read. This page is about one of "Our Songs" - Head over Feet by Alanis Morissette.
Since the transparency and embossing is hard to see in the picture - here is an attempt to give you a close-up ;-P I heat embossed a line of circles around the edge of the transparency circle using clear embossing powder.
CTMH Products Used: Caprice paper (retired), Heartfelt Wonder Die-Cuts (brown felt scallop circle), Large Coluzzle Circle, Clear Embossing Powder, Circle Around stamp set, Chocolate Marker, Chocolate ink pad, Save the Date stamp set, 3-D foam squares
Other Products Used: SU! tag punch, Brown Thickers, Office Transparency
***
Thanks for looking - don't forget to check out what the rest of the Design Team has created this week!

Friday, February 19, 2010

One of a Kind

Here is a page I did of Trysten a while ago using the Felicity papers. Sorry for the crooked/flash/fingerprint covered pics, but you get the idea.
ETA: I forgot to mention that I got this layout from the October 2009 PageMaps.
I used the new Noted Background stamp set to Stamp Kiss the ONE in the title. There is hidden journaling behind the picture on this page.
Thanks for looking!

Friday, November 27, 2009

Am I going to make it?

Since I am WAY behind on reaching my layout goal for the end of the year, I pulled out a couple of pages that I did a few years ago for swaps or gatherings and finally added some pictures. Do you think I can still reach my goal by the end of the year? There's not much time left! Here are some super quick pages that helped my numbers a little! I only count pages that I keep for myself that have pictures and journaling on them - if I counted gifts, I think I would already be at my goal ;-P
***
These pages were for a club gathering in Spring of 2008
I did have to create the right page for this one since all I had was the left page - but it still went together super fast.
These pages were for a Themed Swap that I was invited to participate in about 2 years ago, hosted by Tiffany Cheney. At that time I never thought I'd have use for boy pages ;-) Swap participants received the following boy themed projects from me:
...and I created a companion page for myself.
And here it is with pictures!
And since I have LOTS of pictures of this little boy and his busy-ness, I put the extra pictures on a photo storage page and used flip flaps to fit them all.

Monday, October 19, 2009

Spudd

I came across this picture when I was printing off the pictures for my November Word Puzzle pages that I posted here. This is my 'little' brother, Spudd. For some reason when I saw this picture of him, it just brought tears to my eyes - he's not so little anymore! I was so touched by this picture that I decided to scrap it immediately. And now after talking to him on the phone yesterday, this page is even more touching to me!


Products Used: SU! Night and Day paper, CTMH Dimensional Element letters, CTMH Weathered Background stamp set (stamped on the DE letters), CTMH Black Hemp, CTMH All You Need stamp set (for the word 'brother'), CTMH Save the Date stamp set, CTMH Black ink, CTMH Vanilla Cream ink, Memo Notebook card and small alphabet stickers from Jenni Bowlin Studio
***
The only thing I don't like about this page is the letter 'S' - I was sponging on Vanilla Cream ink on the letters before I stamped the background, and on this letter I accidentally started sponging on the black ink instead, so I used a different background stamp on that letter to cover it up and it just seems to get lost on the page. Yet, I didn't do anything to fix it...yet...so for now this is how it's going to stay!
***
Thanks for looking!

Saturday, October 17, 2009

December Word Puzzle

As I mentioned before, I got a LOT of projects done when David was out of town for a couple weeks and I had nights to myself - here is more proof! I got my NOVEMBER workshop samples done and October is barely halfway over - that's like a record for me! PLUS, I added pictures to my layouts - I'm so proud of myself ;-)
***

Anyway, here are my workshop creations. I used the *new* Jingle Level 2 paper pack AND the *new* Jingle Creative Basics paper with the ribbon, the December Word Puzzle, November SOTM Around the Block, and Posterboard Alphabet stamp set. And don't forget, if you're unable to attend my workshop on the assigned day, you can purchase the Workshop Kit that includes cutting guides and instructions to create them on your own!


12x12 Option - you will get to pick from the 'girly' layout or the more 'neutral' layout - you will obviously use the title of your choice - this is just what I picked for my pages.


I am saving this page for pictures of Trysten and his first Christmas. I don't know if you can tell in the picture here, but I used the word 'merry' from the Word Puzzle stamp set and just stamped the 'm' and the 'y' before the word 'first' and then 'Christmas' from the same Word Puzzle stamp set is stamped just underneath and to the right of the word 'first', so the title says 'My First Christmas'.

And here are my pages with pictures and the companion layout! For mine I used the *new* On Target Dimensional Elements for the circles - I just sponged on the Tulip color. Workshop participants who order the Exclusive Plus kit will also get to use these fun Dimensional Elements. And how perfect is this paper with my girls and their jammies!


Once I got my pages in the page protectors, I used my Flip Flaps to add even more pictures! I added 6 extra pictures to this page - they were just too funny and I had to include them ;-) Sorry the color is off - I had to turn off my flash to avoid the glare and the coloring looks weird now - but you get the idea!


6x6 Option - I used the scrap dimensional element from the right page of my layout to add to one of these pages, but workshop attendees will be using a circle cut using the Coluzzle instead. Also - the right page shown here has a 'reverse' mat - so the picture will actually attach to the back of the page but show through the front - make sense?


Card Option


Here are the layouts and cards exactly as they are created in the Workshop Guide - you can see that I changed mine a bit. I didn't get the Exclusive Workshop Kit once again this month, so I didn't use the stamp set that comes in the kit on my samples. You can click HERE to request more information on this month's featured kit.


The Jingle Exclusive Workshop Kit that I will be featuring next month is only $29.95 (retail value $35.85) and includes the Jingle Level 2 Kit, Exclusive B-size stamp set - Somethin' Special, Twinkle Brads Jolly Assortment, and a Workshop Guide. What a great deal! But there are also other pricing options for the workshop - ranging from $5 to $43, so don't forget to check out my workshop details HERE.
Thanks for looking!

Monday, September 28, 2009

Cheeky

Here is another quick layout that I did last week. I took the pictures on Thursday morning after Trysten's bath, picked them up that night at Walgreens, and created the page the next day! Thanks to Marjorie for the title idea - you can see her inspiration piece here. As I was taking the pictures of Trysten that morning, I thought back to her layout and knew this title would be perfect. I used the following sketch from Scrappy Sunday.

I just remembered I was going to add some hand-written journaling at the top, but now I'm not sure if I really need it or not. Sometimes the pictures just say enough! What do you think?


CTMH Products Used: Tinkerin paper, Wonder felt shapes (twilight circles for bubbles - covered in Liquid Glass), Save the Date stamp set, Twilight and Sunny Yellow stamp pads

Other Products Used: Thickers

Here is a close-up of the felt circles covered with Liquid Glass to look like bubbles. It took a couple of layers to get the smooth look - the first layer just soaks into the felt, but after that dries you can add a second layer to give it a smoother surface. Some of them still didn't turn out as smooth as I would have liked, but it still works for me!


Thanks for looking!

Thursday, September 24, 2009

Grow...With Love!

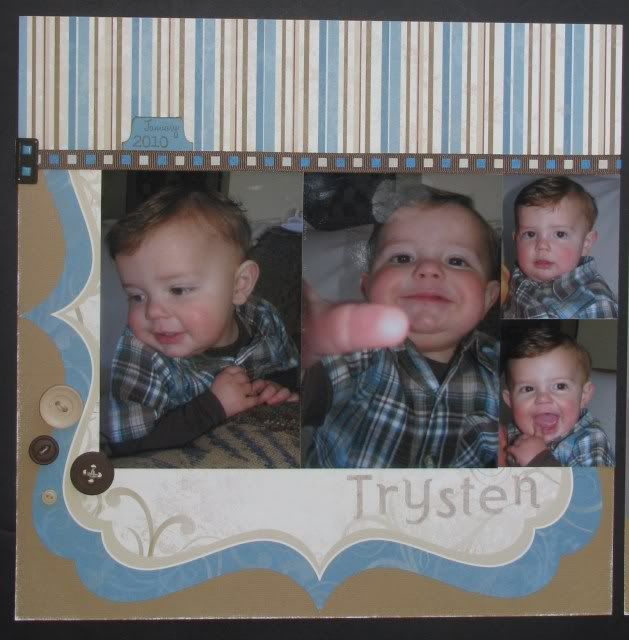
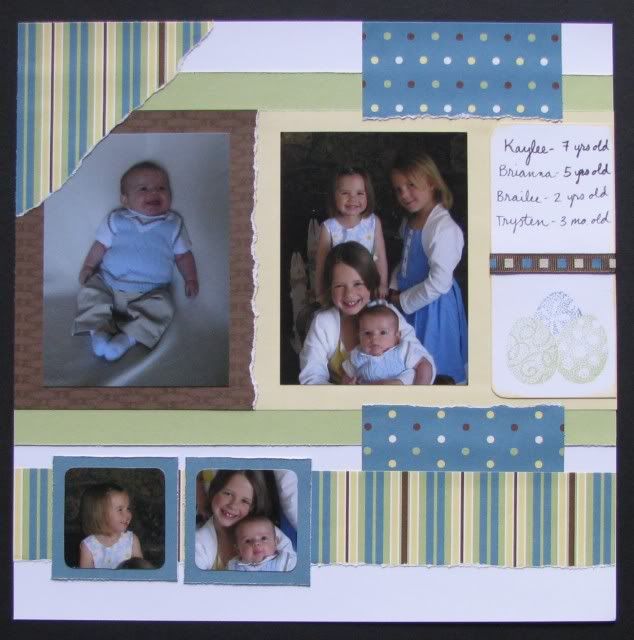
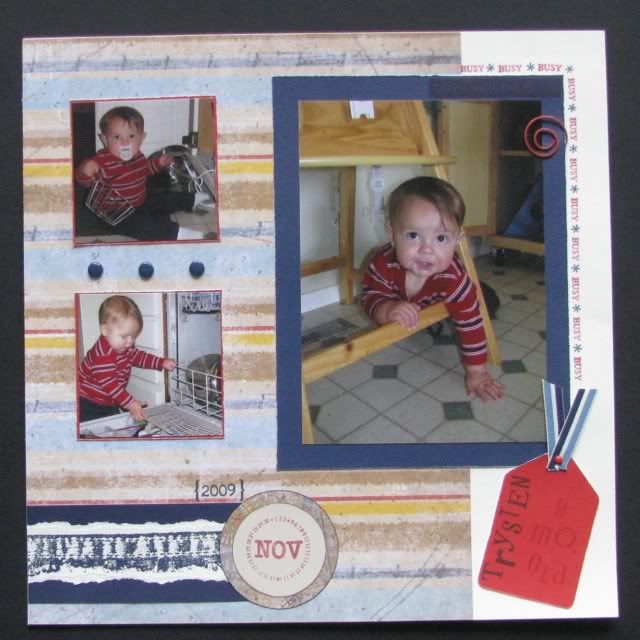
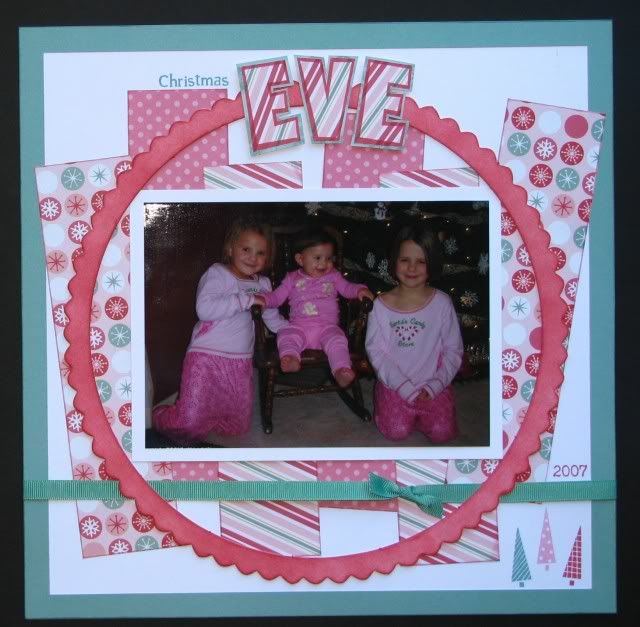
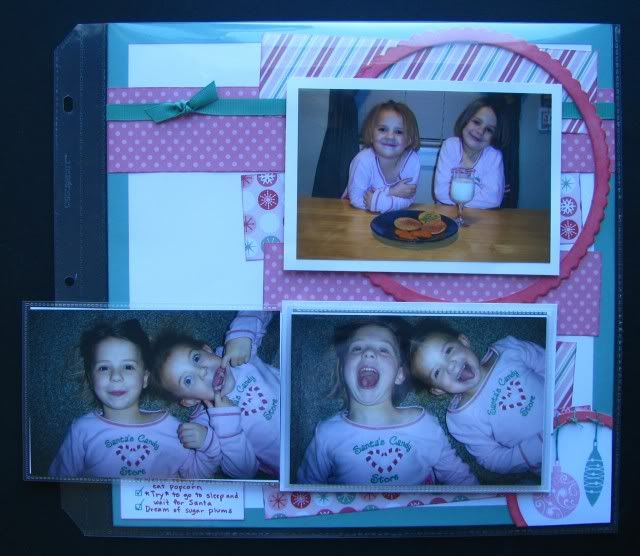
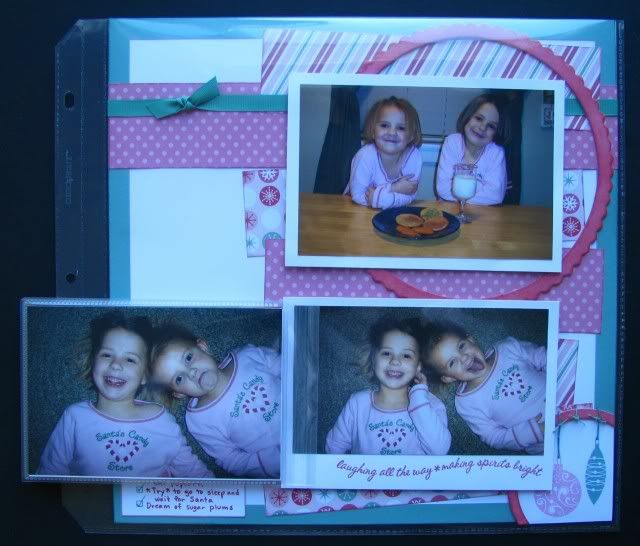
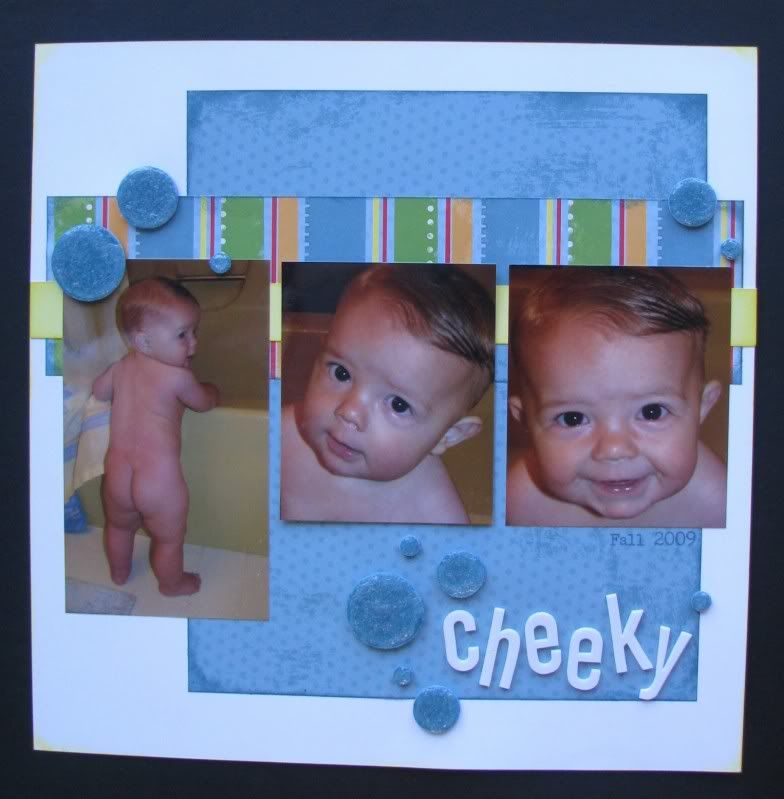
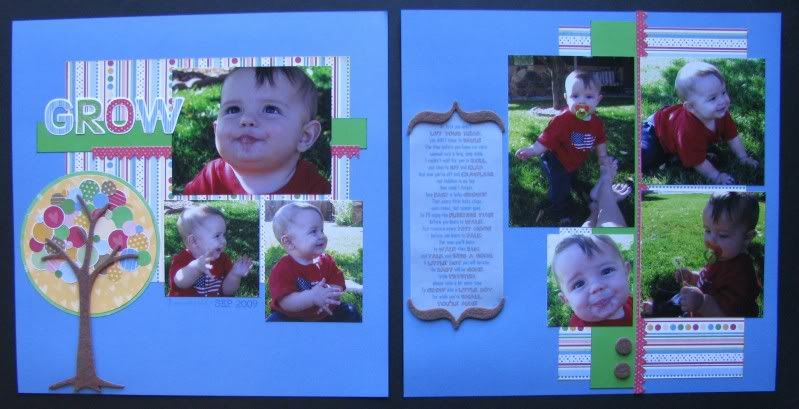
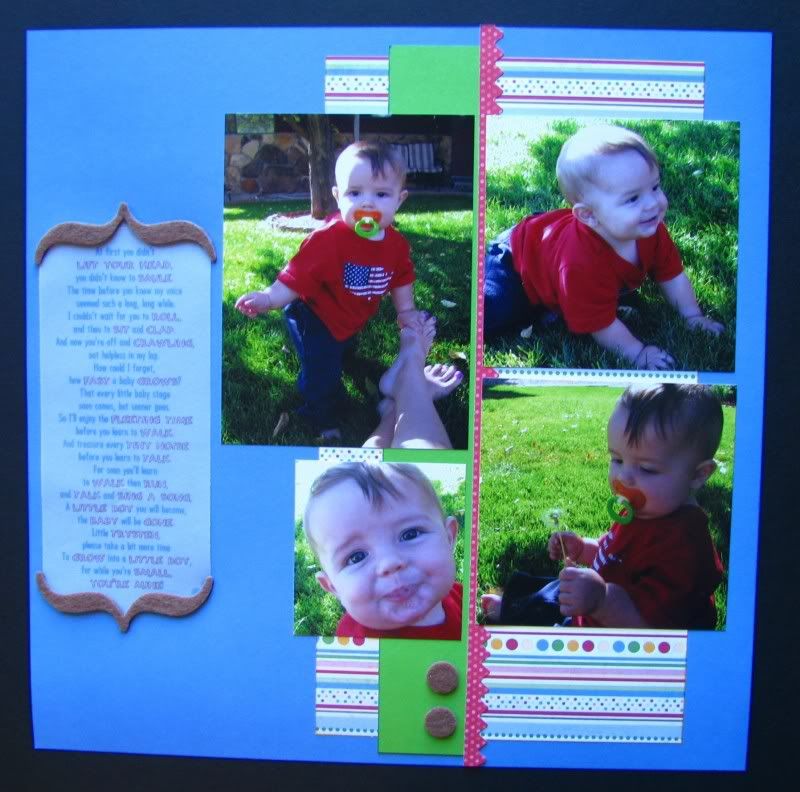
Trysten is 8 months old today! He is growing up too fast - he is crawling everywhere, climbing over obstacles, and pulling up on everything! He likes to play 'So Big' and he loves to clap his hands so he enjoys 'Patty Cake'. I took these pictures last week and couldn't wait to scrap them. When I saw the 
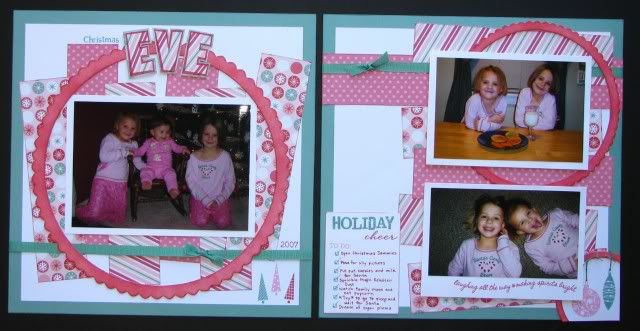
weekend sketch contest at Practical Scrappers on Saturday, I knew I wanted to do something fun with the tree where the circle element was on the page. Then once 
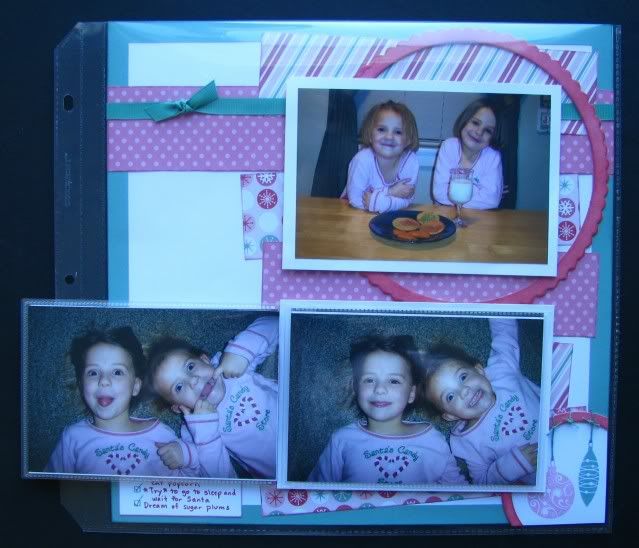
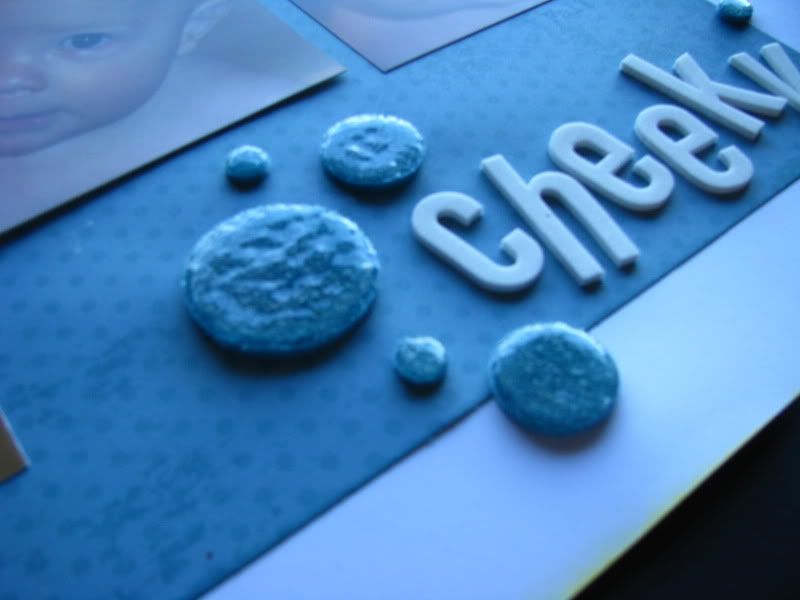
this week's sketch over at 52 Sketches posted, I knew they would be perfect together and it would give me a chance to use all (or most) of the pictures that I took. I was going to use my Grown With Love stamp set, but the felt was funner to play with ;-)
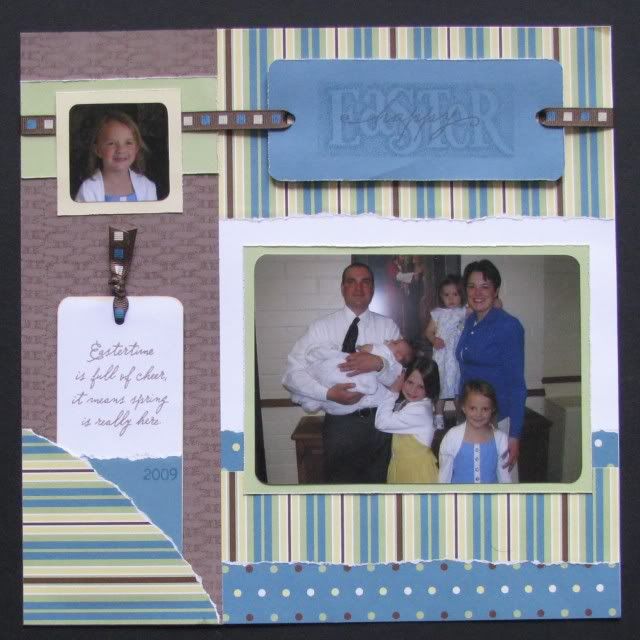
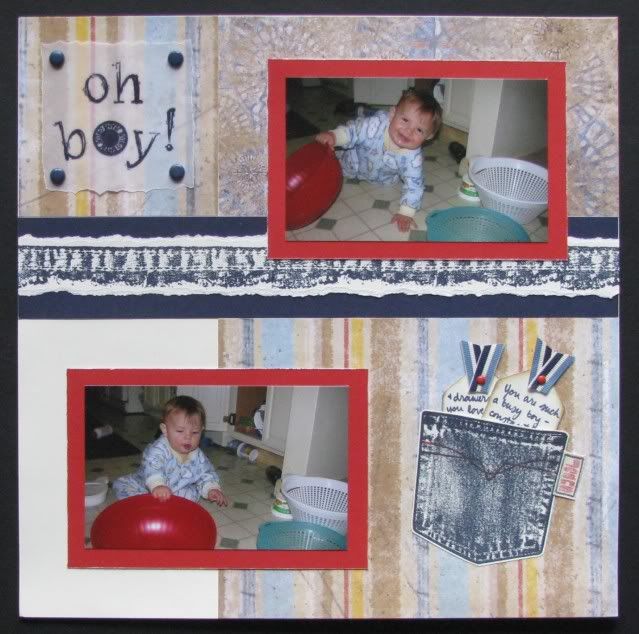
I had this poem that I had saved and knew it was a perfect fit. The original poem is by Diane Woolley, but I changed a few parts to make it work better. Here is what it says:

At first you didn't lift your head, you didn't know to smile. The time before you knew my voice seemed such a long, long while. I couldn't wait for you to roll, and then to sit and clap. And now you're off and crawling, not helpless in my lap. How could I forget, how fast a baby grows? That every little baby stage soon comes, but sooner goes.So I'll enjoy the fleeting time before you learn to walk. And treasure every tiny noise before you learn to talk. For soon you'll learn to walk then run, and talk and sing a song. A little boy you will become, the baby will be gone. Little Trysten, please take a bit more time to grow into a little boy, for while you're small, you're mine!
***
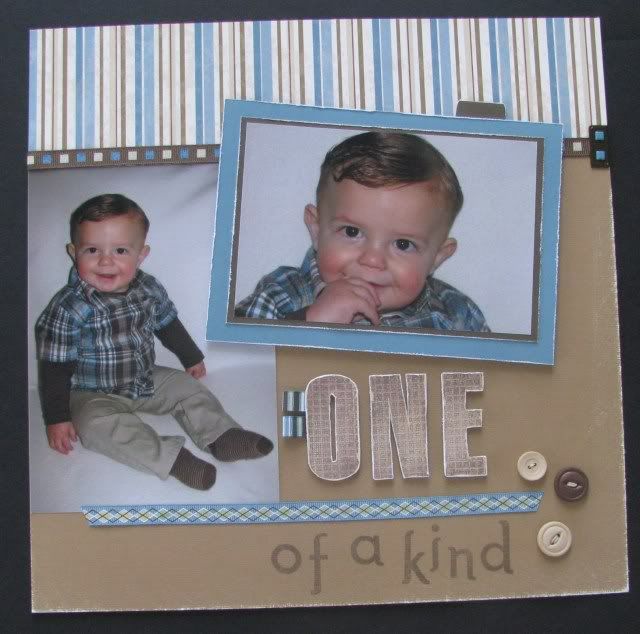
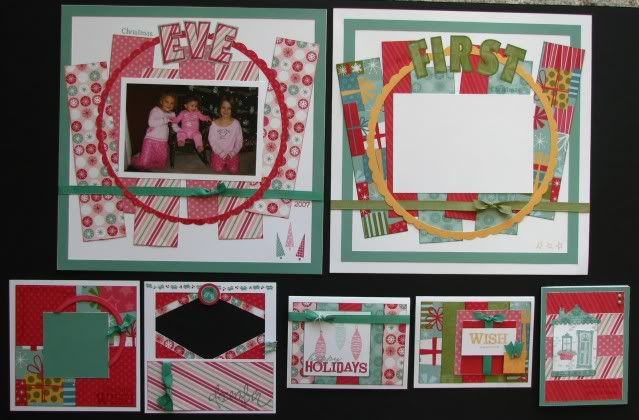
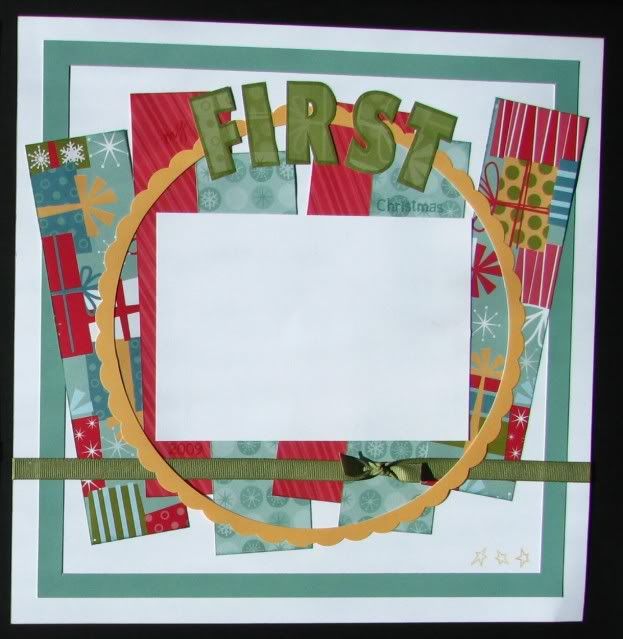
This is the sketch from Practical Scrappers - even though I didn't get mine done on time for their contest, I still had fun playing along!


Here is the sketch from 52 Sketches


CTMH Products Used: Animal Cookies paper pack and stickease, Heartfelt Wonder felt pieces (brackets, tree trunk, circles), Circle Coluzzle, 1/4" circle punch, Vellum, Font CD
Other Products Used: 1/2" circle punch, 3/4" circle punch
***
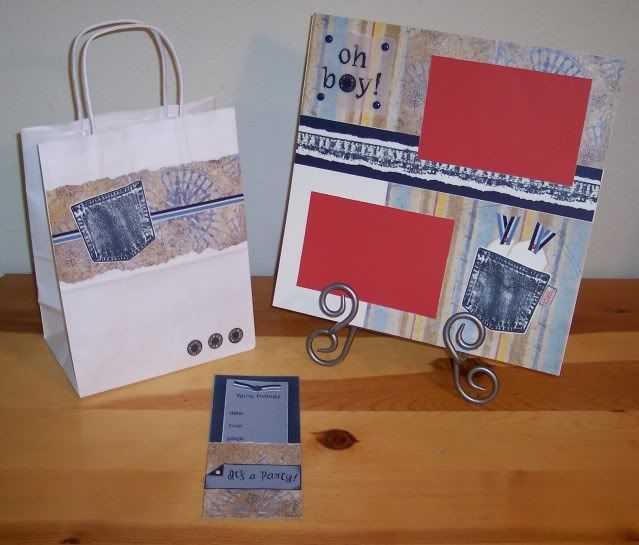
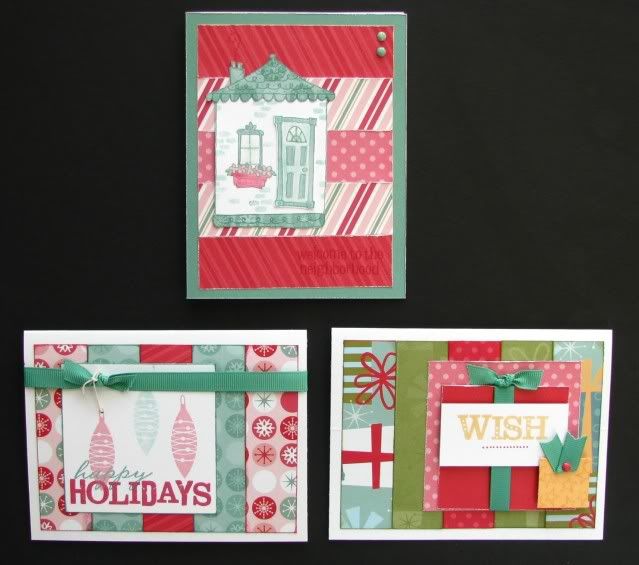
Are you ready for more trees? Here are a couple of cards I made last week. I LOVED this Grown With Love stamp set when it came out and got it right away, but this was the first time I've finally used it - now I have so many more ideas running through my head, I can't wait to play with it some more!
***
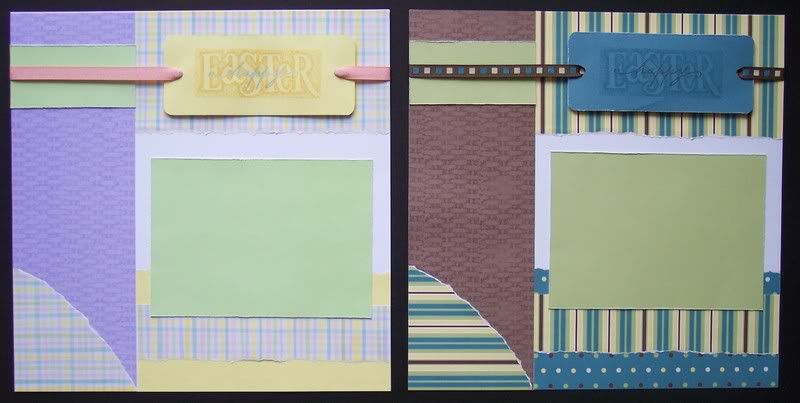
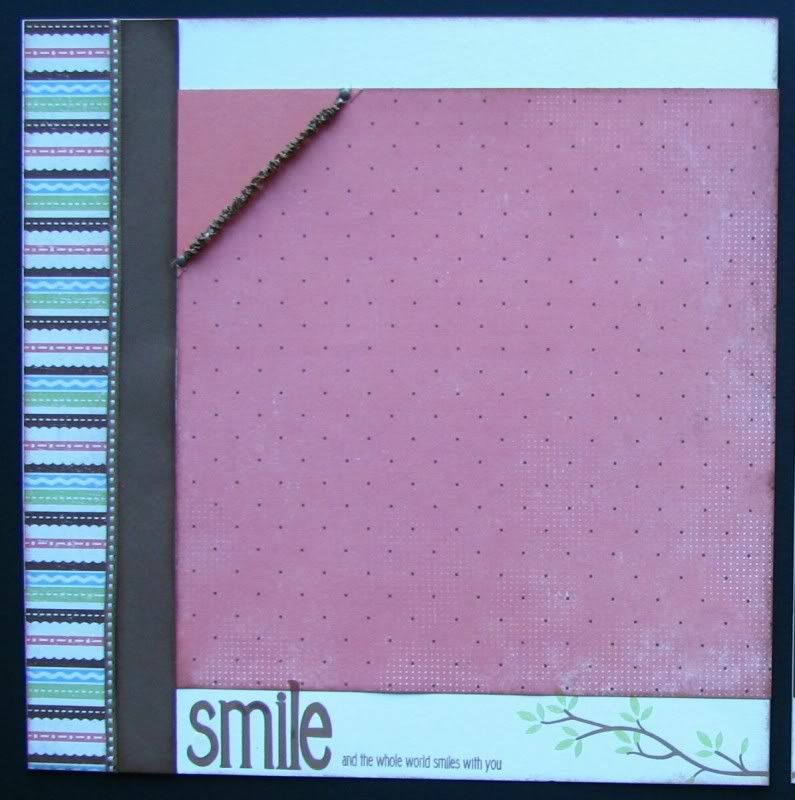
This was the card I made for my SIL Hannah - using the beautiful Grace papers I made this fun Tri-fold card. I started one of these fun folding cards back in June - it's super easy, I just never got around to 'decorating' it until now. I will definitely be doing more of these. You can find the instructions HERE.
Here is the card closed...

And open...

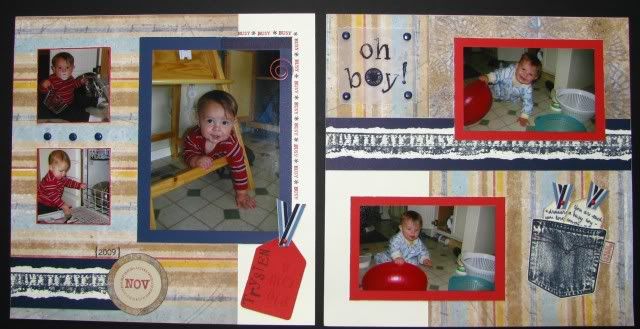
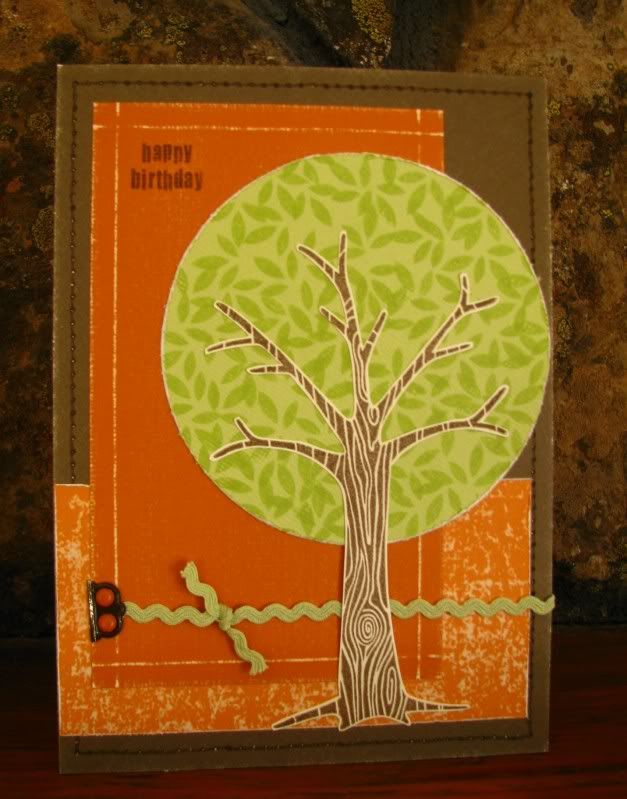
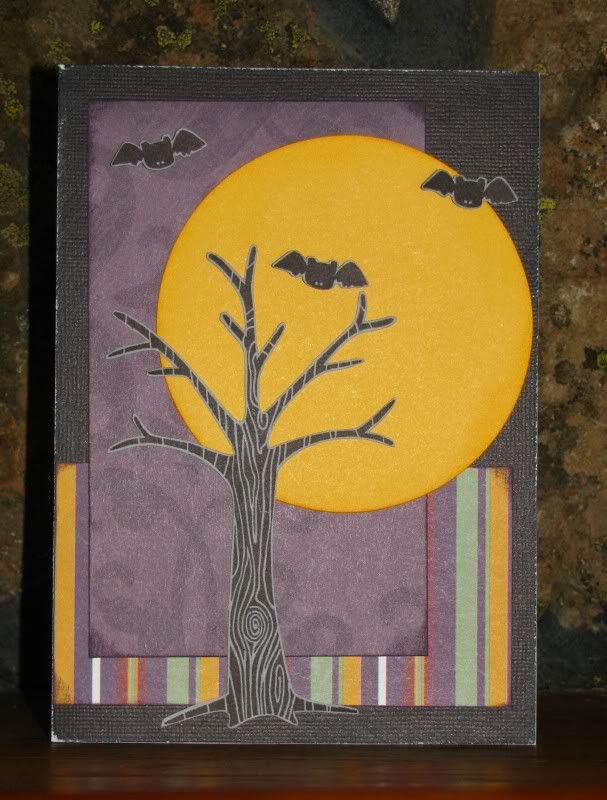
Then this one was the first card I made with this stamp set - I tried something different by turning the circle in the pattern of the card (from Wishes - Bullseye) into the tree top by stamping the leaves all over. I used Jeanette Lynton's color combo from last week's Color Me Monday. Maybe it's just the colors or the circle behind the tree like that, but it seems really 'Halloween-y' to me - if that were a word ;-)

So after that card - I had to play with the Halloween idea, using the Enchanted paper back with some Black Textured CS. I think it turned out cute! The cute little bats came from the retired Fall stamp set and they are popped up with pop dots. I used the same Bullseye pattern from Wishes, but this time I turned the circle into a moon.
Wow, I didn't expect this to be such a long post, but there's no turning back now! If you've stuck with me this long, thanks for looking!

Thursday, September 17, 2009

Cousins

Here is a quick layout I did earlier this week using Sketch #37 from 52 Sketches. This is an older picture, from more than 5 years ago - but it's always been a favorite of mine. I just love the look on Hunter's face as Kaylee is trying to give him a kiss ;-) When I first got my Treasures stamp set I went looking for this picture and any others that I took that day because I remember lots of dandelions/wishes from that day. Unfortunately, this is the only picture I still have, but it still worked with this stamp set!
***
Click on the picture to view it larger.


CTMH Products Used: Tinkerin' paper pack, Twilight Textured CS, Green staples, Treasures stamp set, Save the Date stamp set, Holiday Red buttons, White Hemp, White Daisy pigment ink, Holiday Red ink, Twilight ink, Clover Meadow ink
Other Products Used: Zig Marker, White Thickers
***
Thanks for looking!

Wednesday, August 19, 2009

Same papers - totally different look!

So, do you remember this page that I posted yesterday for my Word Puzzle Workshop?


Well, I haven't had a chance to add pictures to the originals yet, but I did do something a little different. I took the exact same papers and used the BACK side of them to create this totally different look - I just used Cocoa instead of Chocolate since it matched his jammies better ;-) Have I mentioned how much I LOVE this feature of CTMH paper! It just gives you so many more possibilities. I did a little different stamping - in addition to the September Word Puzzle that I used on the original, I used Picture Perfect, Baby Steps, Save the Date, and You're a Hoot. On the *new* Basic Buttons I added a bit of Moonstruck Waxy Flax to coordinate with Trysten's jammies in these pictures. I love these pictures of Trysten when he first started smiling - and he hasn't stopped smiling!
***
I was going to add some ribbon along the left side like there is in the original, but I forgot to find some that would go with the new layout. Now that I look at it, I don't really think it needs it. What do you think - any suggestions?
Remember - you can click on the picture to view it larger. Thanks for looking!

Monday, August 17, 2009

Laugh

Here is another page that I've been wanting to do for a while and finally got a chance to put it together last week. It was a super simple page using a sketch from beggahuna - I just simplified my take on the sketch.
***
You can click on the picture to view it larger.
It went together rather fast thanks to the Stickease used for the title and the strips at the bottom. I used Emporium papers and Stickease and used Liquid Glass on the title. I used a Voice Recorder to capture Brailee's laugh, covered it and attached it next to her picture. I also used a new stamp set from the upcoming Fall/Winter CTMH Idea Book, it's called Save the Date, and I have a feeling I will be using this one a LOT! I usually don't do many single picture layouts but they have been super easy for me lately - not good for my growing stash of pictures!
***
Thanks for looking!