Showing posts with label Other Projects. Show all posts

Friday, April 27, 2012

Jewelry Creations

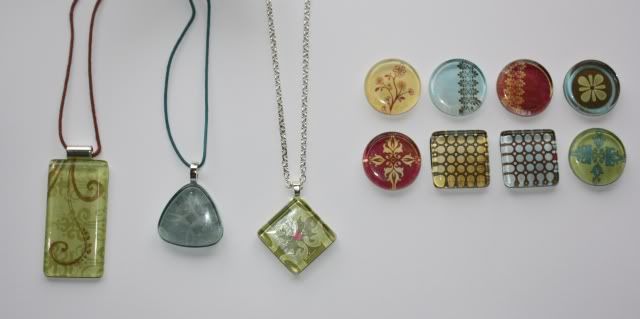
Once I put away my sewing mess from my last creative buzz, I decided to get out my jewelry making mess ;-)  Thanks to some ideas I found on Pinterest (click HERE to view my Jewelry Board to see my inspiration pieces) I've had a lot of fun creating.
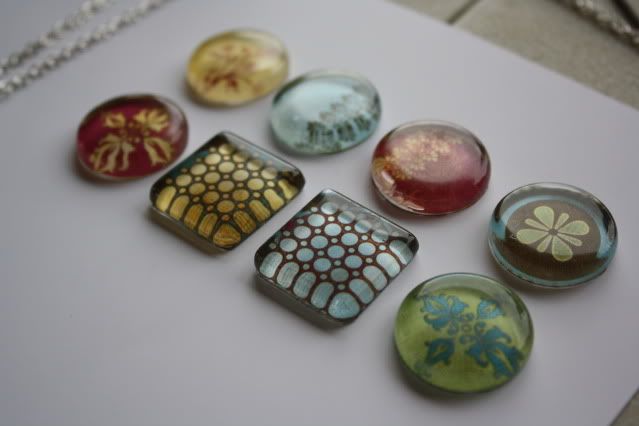
These ones are so simple and the possibilities are endless since you can use any paper and colors you want.  I ordered my glass tiles and bails from Amazon and used Liquid Glass to put them together.
I think I am going to turn these ones into magnets instead of jewelry.
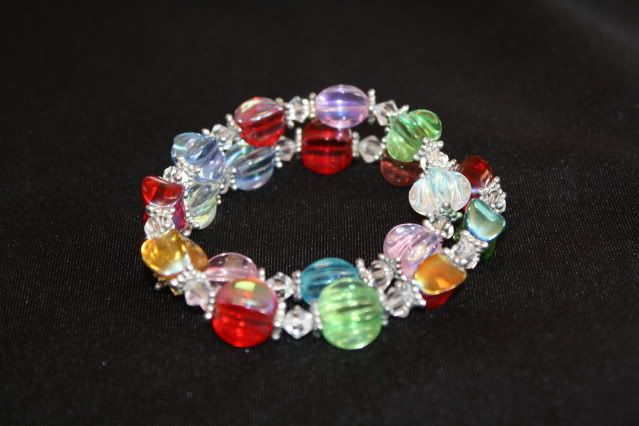
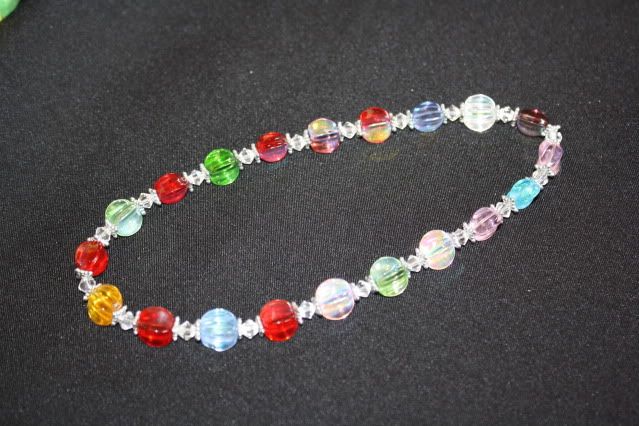
Here is a simple birthstone bracelet that I made for my mom.  It has all of my family's birthstones plus my brother's family.
Kaylee wanted to make a birthstone bracelet as well, but she wanted to include grandparents and great grandparents from both sides of the family too, so hers can be a double wrap bracelet OR a necklace.
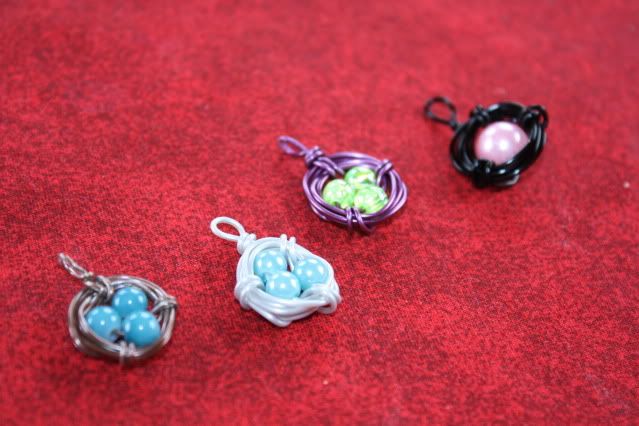
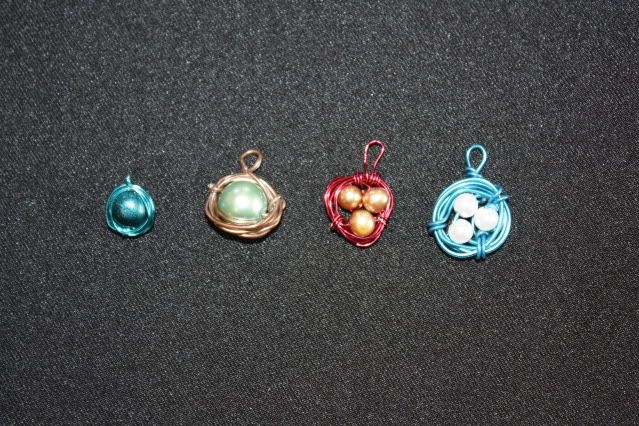
I also had fun with the nest jewelry that I've seen all over - I had a good variety of wires in my stash, so it's been fun to mix and match.  My pictures are not good but you get the idea.
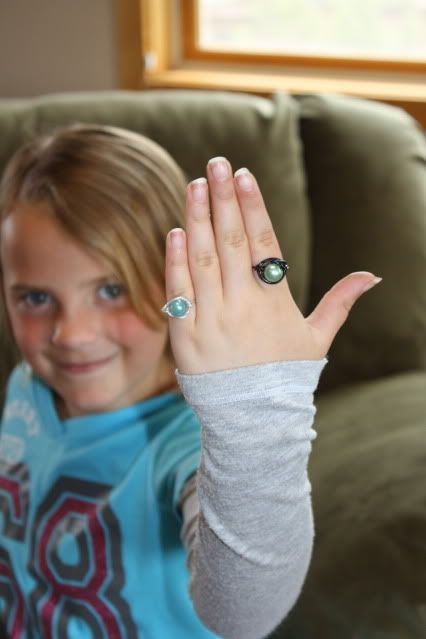
Brianna loved these and wanted to join in so here are the rings she started with:
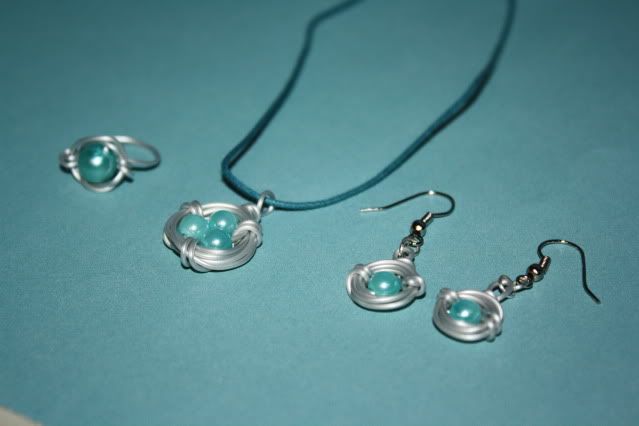
Then she wanted to make a matching set which turned out super cute.
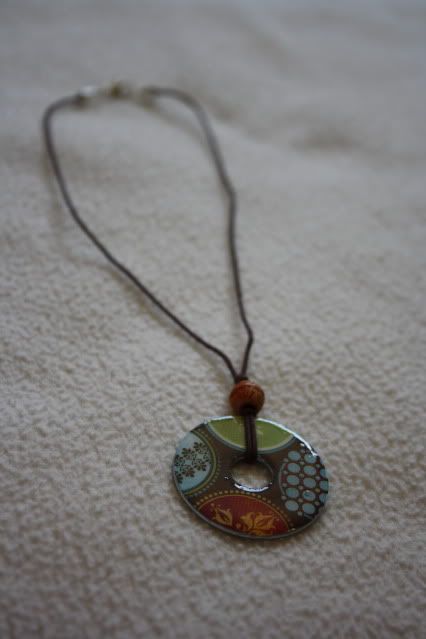
I remember wanting to do these Washer necklaces a couple of years ago when I first saw them but then I forgot about them until I saw them pop up on Pinterest.  So fun and simple, and like the tile necklaces, you can really customize with the papers and colors you want.
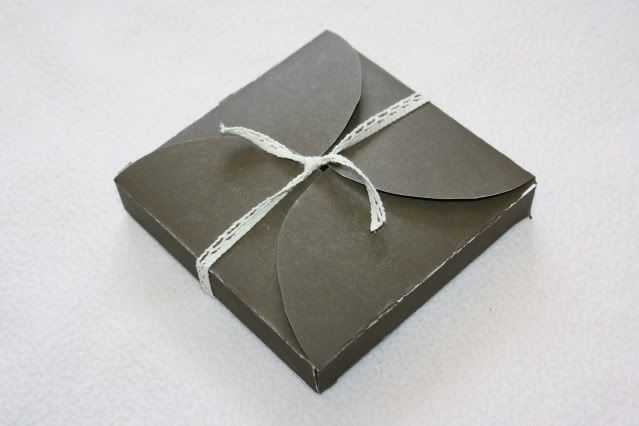
I made this one for a friend's birthday last month, so I decided to make a little gift box to put it in. I cut the box using my CTMH Art Philosophy Cricut Cartridge.  I kept the box simple, just sanded the cardstock and tied with a ribbon - here it is closed...
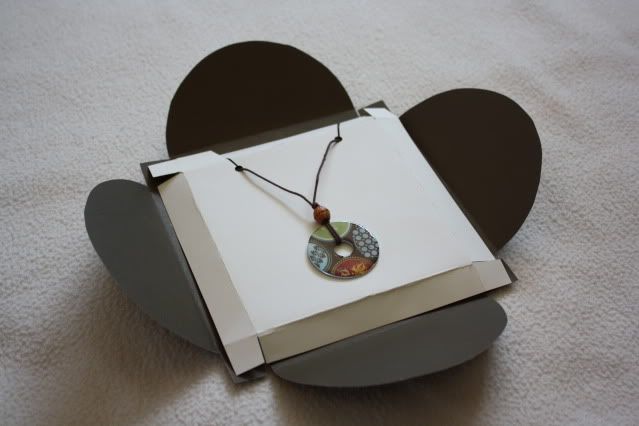
...and open.
For the inside piece I cut another box, just 1/4" smaller and trimmed off the half circle edges. Then I punched holes with my Crop-a-dile and cut to the holes to hold the cording.  Here it is before I put each piece together to give you an idea. 


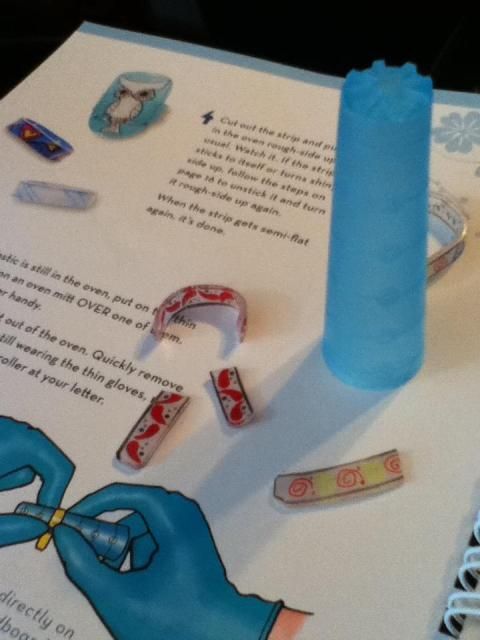
Another thing we've been playing with are Shrinky Dinks - but I will share those pics in another post.  I have been attempting to make rings from it but so far no luck, they cool too fast and break as I'm bending them :-(


Thursday, April 26, 2012

Sigh...where does the time go?

It seems like I say this all the time, but seriously?  I have been a poor blogger lately, which was more than obvious when I logged in this morning and noticed the changes to blogger!  I have just been staying busy, but since I use this blog as an attempt at a journal, I feel really bad that I haven't been keeping up with it.  I am hoping to do better.  I have some catching up to do with March happenings, and since April is almost over, I will have those events to record as well.  For now I will start with some of the projects that I have been up to lately, and then I found some old projects that I forgot to share so hopefully I will get around to those, too ;-)

Sew Busy - part 3 (if you missed them before, check out part 1 and part 2).  I got all my sewing projects done a while ago and put my sewing machine and serger away (for now) but I am finally getting around to sharing the rest of my projects.
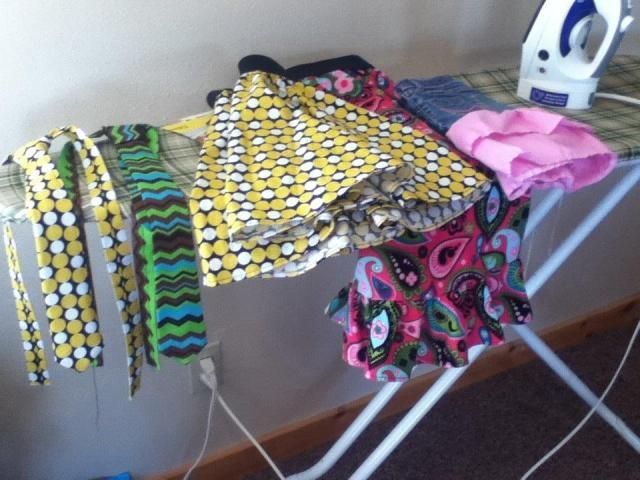
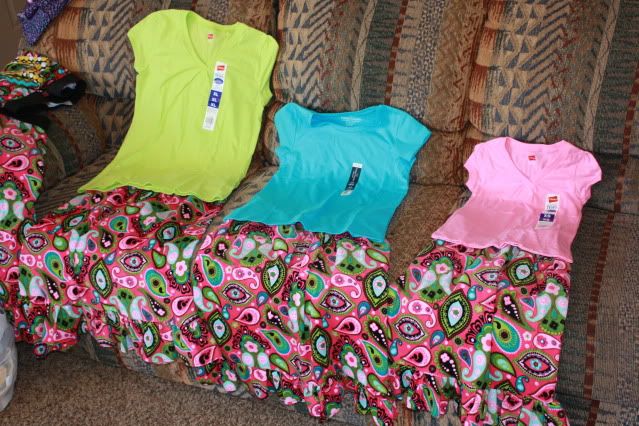
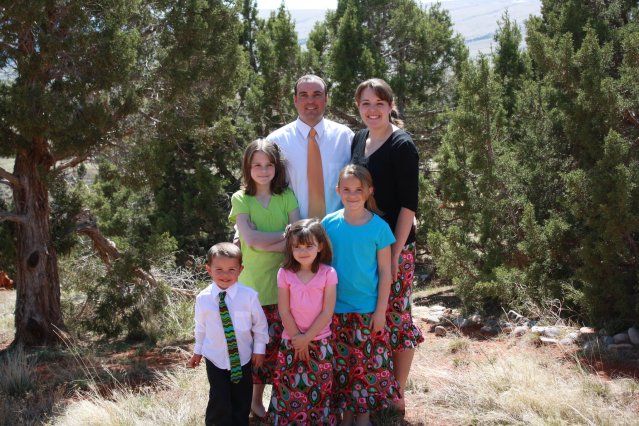
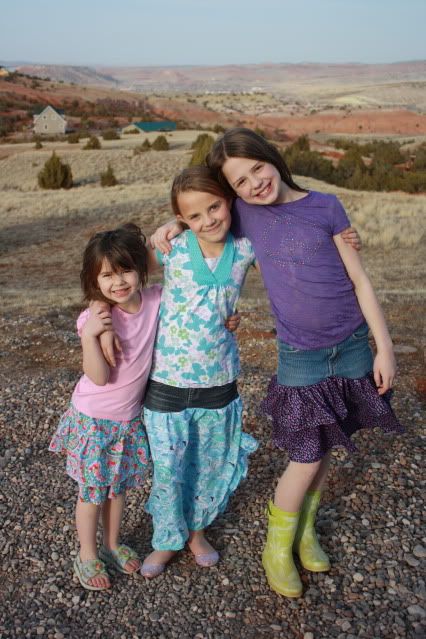
I was determined to make something for Easter this year.  My Mom made Kaylee and Brianna matching dresses a couple of times for Easter, and I have attempted to buy the rest, but it is really hard to find coordinating dresses for all three girls plus something to match for our little guy there at the end.  Luckily my girls are good sports and like to dress alike, so I'll take it as long as I can!  Anyway, after some searching I found this fun bright paisley print that had each girls' favorite color in it.  I didn't have a pattern or even know what I was going to make when I bought the fabric so I just got 5 yards so I would be sure to have enough.  I found t-shirts in each of their favorite colors as well and knew I was good to go.  Well, as it turned out, I had enough fabric to make each of the girls a skirt, plus one for me, and then I even had enough left to make their older cousin Meghan a matching skirt.  She is always passing her clothes down to the girls and they were excited to be able to give her something for a change.  I just made up the pattern as I went - it's just a simple straight skirt with a fun ruffle at the bottom, and a black wide band elastic for the waist.
I found a fun Chevron pattern that had some of the same colors in the material I used in the skirts - I used that to make Trysten's tie.  I wish I'd had more of that fun chevron because David wanted one, too!  You can see Trysten's tie better in the first picture in this post.  Here we are on Easter Sunday.
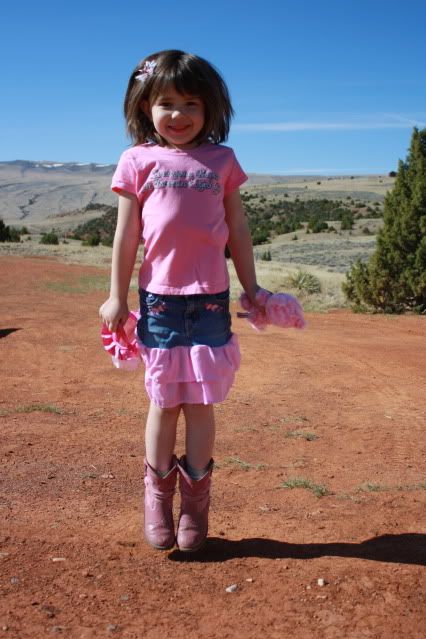
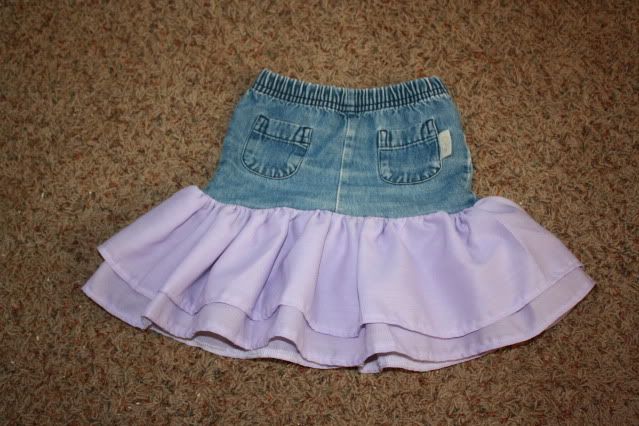
I already posted the big girls' skirts that I made from old jeans - here is the one I did for Brailee.  Gee, I wonder if you can tell what her favorite color is ;-)
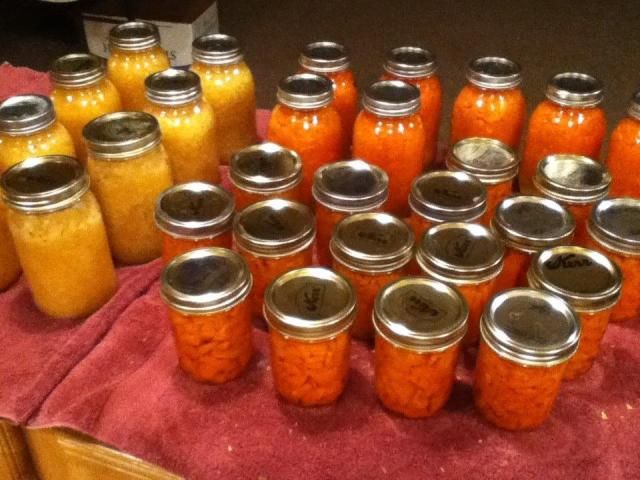
Another new project that I have been up to is canning.  I had never done it before until a friend taught me how back in January.  This was my first attempt at applesauce, tomatoes, and carrots.  This month I have done 15 quarts of applesauce, and 10 quarts of tomatoe sauce.  It's been fun and feels good, I can't wait to try more!
Okay, that's it for now - hopefully I'll be back with more soon!

Sunday, March 25, 2012

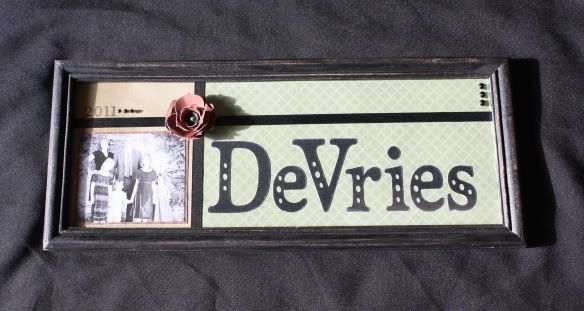
Name Sign

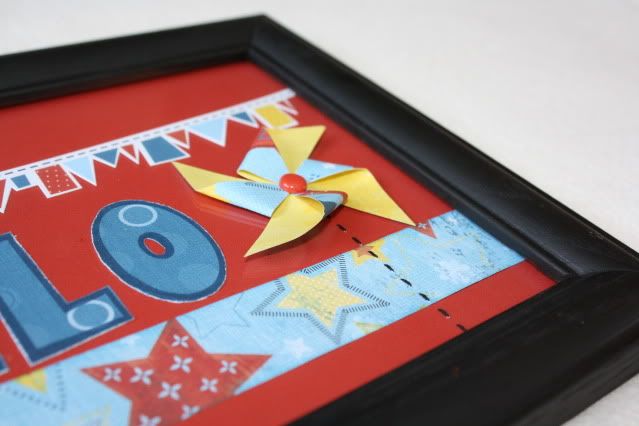
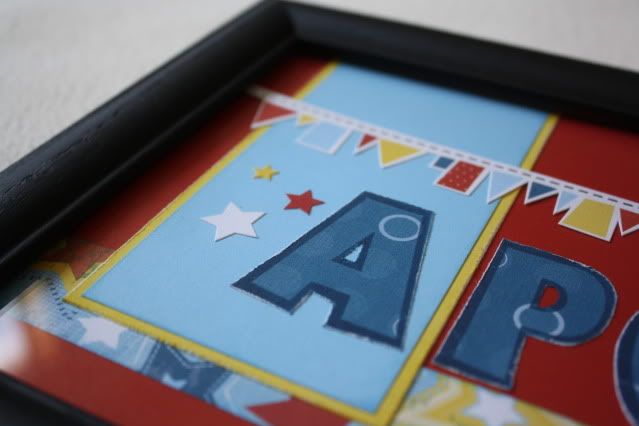
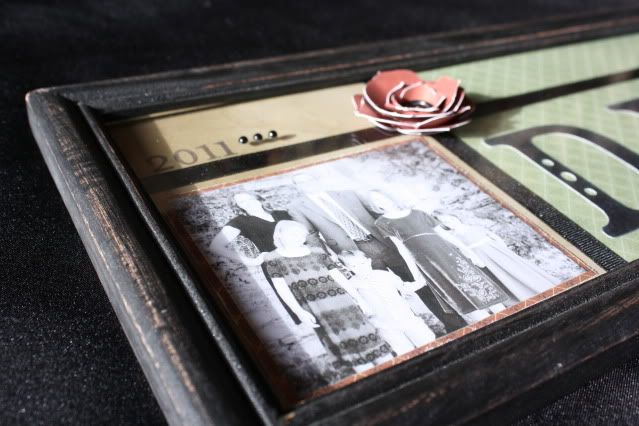
I am going to take a break from posting my latest sewing projects and share this fun little name frame that I made a couple months ago for a friend who recently had a baby.  I love these name frames - they make great Christmas gifts, and are perfect for Newlyweds and New Babies!  I have posted a few that I have done HERE and HERE if you'd like to see more ideas.
I used the retired Fanfare papers and stickease, along with the Posterboard Alphabet stamp set for the name - I also spraypainted the frame black to coordinate with the papers better than the original oak.  I added a paper pinwheel on top of the frame - I sealed it with a clear sealer spray before I attached it to the glass to help protect it.
Thanks for looking!

Saturday, March 24, 2012

Sew Busy - part 2

As I mentioned in my last post, I have been sewing a lot over the last couple of weeks.  I have been complaining lately about not having a fabric store, which is funny because I didn't sew this much when I lived close to one.  Maybe it's good that there's not one close since I don't currently have a designated sewing area so my sewing mess has taken over our living room.  I have a 'craft area' set up in the basement, but it's an unfinished basement and the lighting isn't very good.  Down there I have lots of lamps set up for scrapbooking but I need a lot more light for sewing which is why I have a table set-up in our living room upstairs.  It's been fun to get so many projects done but I would like to get the room back to normal!
***
Here are a few more of my recent sewing projects - lots of fun skirts!
For Kaylee and Brianna's I used some of their old pants for the tops of their skirts.  Kaylee's fun purple and black animal print was in the discounted/leftover bin at WalMart.  Her skirt was inspired by this one found HERE (pinned HERE) I just made it a lot longer for an older girl.  Brianna's skirt I just made up as I went - I thought this one would be a little trickier since I had no pattern and was also adding a lining to the inside, but it went together perfectly.  I haven't taken a good picture of the style of that one and the wind was blowing with this picture, so it's hard to tell but the ruffle goes along the bottom and then up the one side.  Brailee's skirt was super simple - used the pattern found HERE (pinned HERE) only I used the same fabric instead of contrasting patterns.
This was the first skirt I made from old jeans just to make sure I wouldn't mess up.  It's an 18 month pair of pants with some fabric that used to be curtains in Bree's old room.  Turned out super cute, just wish I had a model to try it on.  I will probably give this to my niece who will be turning 2 in July.  These things are so fun and easy and such a fun way to use up old jeans.

Oh, and I'm not leaving Trysten out - I made him these comfy jammie bottoms from an old pair of David's jammie bottoms.  I used the bottom of the legs of the original bottoms so I didn't have to sew the inseam or hem them - just sewed the two legs together, made the exposed Wyoming Cowboy elastic smaller and sewed it to the top.  Super simple!
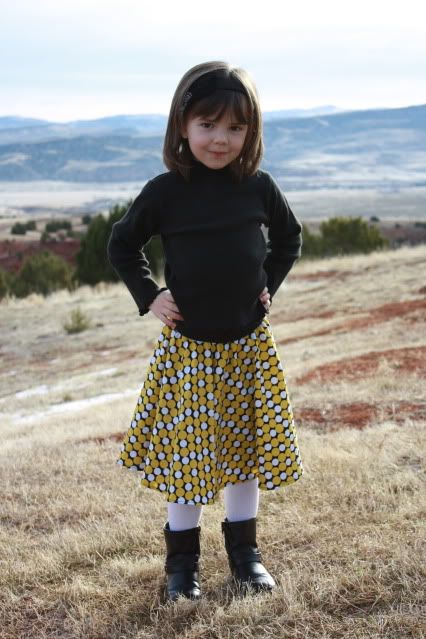
This is one of the latest skirts - I LOVE this fabric (also found in the discounted/leftover bin at WalMart).  There was 1 yard and I got this skirt and a tie for Trysten (that I will share later) out of this piece.  I used this pattern for a fun circle skirt found HERE (pinned HERE).  I wish these didn't take so much fabric, I would love to make one for me and the older girls.  If I find some good material I might do it with the two pieces instead of one circle.

They are perfect twirling skirts ;-)

Well that's it again for today, but I'm not done sharing yet!  Stay tuned and thanks for visiting!

Friday, March 23, 2012

Sew Busy - part 1

I haven't been posting much lately because I've been having too much fun sewing!  I have lots of catching up to do and for now I'll post some of the fun creations I've made.
***
Before I share - I have a little confession.  I recently joined Pinterest.  I know, not a big deal, a lot of people are on Pinterest these days, but to me it was a big deal.  I avoided it for a LONG time.  I already had too many ideas and not enough time to do them all.  Well, I finally caved in and accepted an invitation from my mom to join and oh, boy am I glad I did!  Before, when I would find something online that I liked I would bookmark it or e-mail it to myself, and ocassionally print something.  Well, if I didn't do something with that idea right away it would get filed away, lost, and forgotten.  I don't know how many times I have remembered an idea I had saved but then was never able to find it.  Now, with Pinterest, I have my ideas sorted - I love that.  In less than 2 months since I've joined I have pinned over 2000 ideas (yikes!) but I have deleted almost that many e-mails and bookmarks, and found lots of long lost ideas (and new ones too).  The best part is, I am actually USING those ideas since they are so easy to find!  I haven't pinned much in a while but I have been lurking and liking ideas - once I get done with my sewing projects I will go crazy again until I get another wild hair.  Anyway, enough rambling - here are my creations and links to where I got the idea or pattern.
***
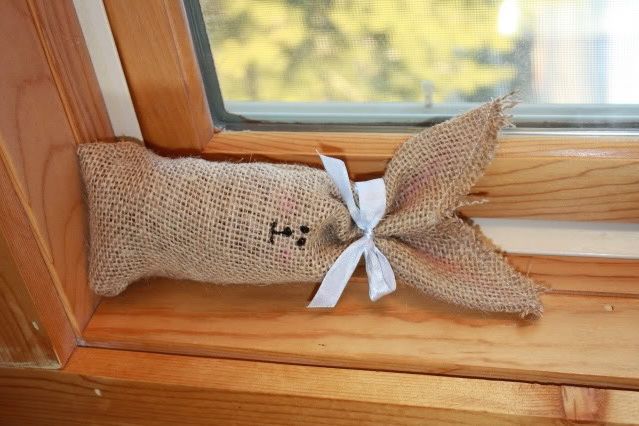
Here are some darling Burlap Bunnies - found HERE (pinned HERE).  Here is the first one I made.

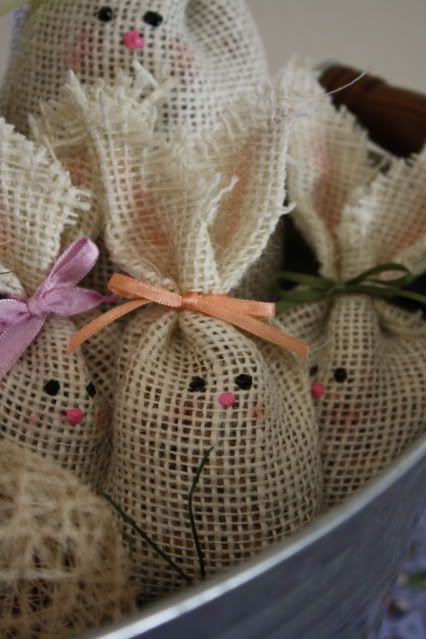
I found some cream burlap and I ended up liking those ones the best so I made a whole family out of them ;-)  My darker burlap bunny is hiding in the back - I originally left him out but the girls insisted that I include him and since he was the first one I made I agreed.  I may have to make more so he doesn't stick out so much.  These are simple and fun to make, the only problem I came across is the burlap is so hard to keep sewed - a few of these bunnies have already burst their seams.  In this little bucket of bunnies I included an old favorite project of mine, string eggs.  I have been making these since I was a kid and never get sick of them.  I made these ones from plain string, I am thinking of dressing them up in some fun new ways - we'll see if that happens this year or not.
The original poster used a Sharpie marker for the faces but I liked the puff paint best.  I used a Q-tip and blush to color the ears and cheeks.  I just realized I never added buttons like the OP but with them all stacked together like this I don't think they need them.  I may or may not add them.

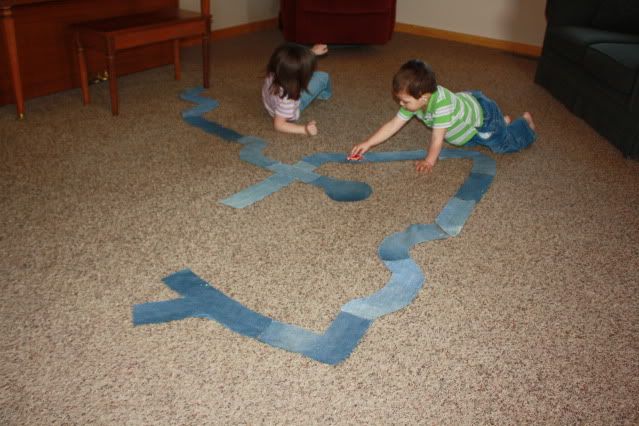
Now this next project didn't involve any actual sewing, but it did use up some old jeans that I have been saving for years!  I found this idea HERE (pinned HERE).  I liked that this project was perfect for David's old work pants so it was okay if some pieces were a little more worn or stained.  I still haven't painted the lines on the road, maybe (hopefully) I will soon (eventually), and the original poster added velcro to the bottoms but I think I'll leave that off.  Trysten loves setting up his road since it's so different every time.  I do plan on adding more pieces.
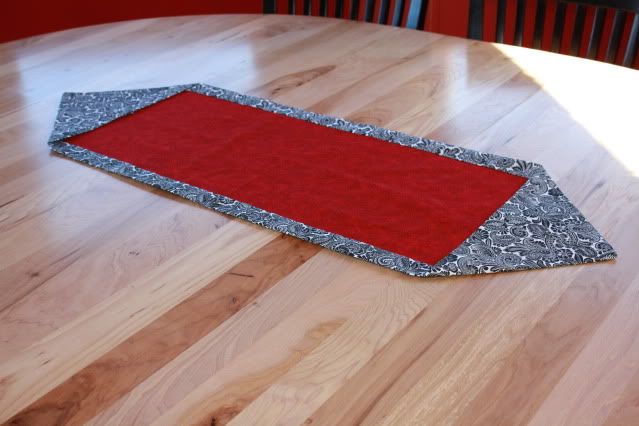
As I have mentioned before, we do not have a fabric store here - at all!  So I took an afternoon a few weeks ago and headed to R-ton and our closest WalMart, which is an hour away.  WalMart and a small Ben Franklin Crafts store are pretty much the only options unless I want to travel 2 hours or more.  The sweet associate in the fabric section gave me this table runner pattern so I picked out some fun fabrics to give it a try.  I just wish I'd known just how easy it really was and I would have bought more fabric to make a bunch of these.  I literally made this in about 20 minutes - so simple!  You don't have to cut anything, and just sew 4 straight lines - it doesn't get any easier than that.  I don't have an online link, but the pattern is by LaRae Bunnell Clark through the Utah State University Weber County Extension - if anyone would like a copy just shoot me a message and I will pass it along.
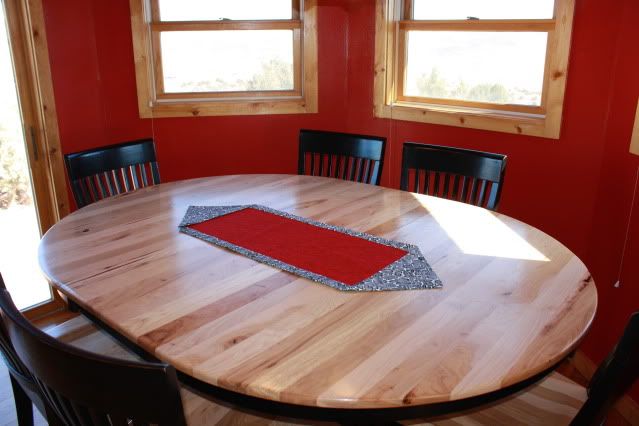
I didn't get a closer picture of the pattern than this so I don't know if you can see it well, but I LOVE the fun black paisley piece.  The pattern says to stitch a decorative button or yo yo at the edge of the short seam to secure in place but I'm not sure I want to add any bulk, and would rather keep it flat and smooth - I may just hide some stitching to secure instead.

That will be all for today, but stay tuned as I hope to post more soon plus some family updates.  Thanks for visiting!
Thursday, March 15, 2012

My Creations Spotlight Blog Hop

I am so happy to be participating in another blog hop - it's been a while!  This month for our Spotlight Blog Hop we are featuring the My Creations 3-D products from Close To My Heart.  Be sure to check out all the inspiration by hopping around to see what everyone created.  If you came here from Haley's blog, you're on the right track!
***
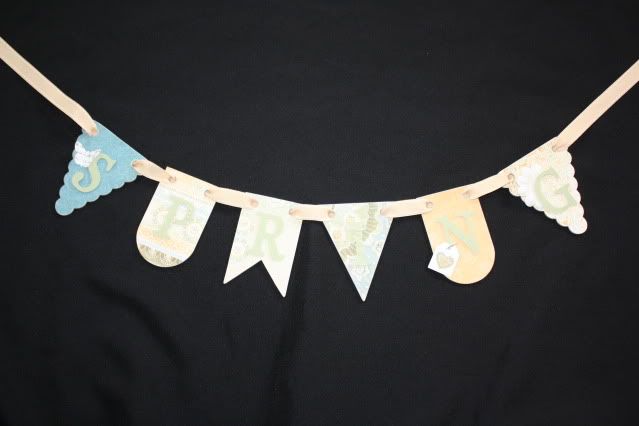
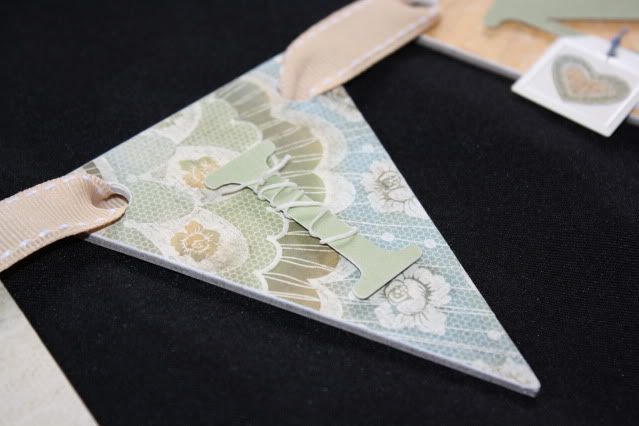
I decided to play with the new My Creations® Mini Banner - it was the first thing that I ordered out of the newest Idea Book and I hadn't done anything with it yet, so it was just the motivation I needed!  We recently got out our Spring/Easter decor and realized I really don't have a lot of stuff so I wanted to add to my collection and decided a 'SPRING' banner would be fun and something new.  The best part is, I still have banner pieces left so I'm not done playing with this product yet - may just have to order a few more when I'm done with this one!
***
Anyway, on to my project...I am not much of a pastel girl so I broke away from the traditional Easter/Spring colors and used the new Florentine papers for my banner - I had (3) 6"x6" sampler pieces of paper from this pack so I was able to use each pattern.  I used the Cricut® Art Philosophy Collection to cut my letters from Garden Green Cardstock - love my Cricut and this cartridge rarely leaves my machine!  Another handy tool I used on this project were my Finishing Files - so handy and I love the look they helped me achieve!
If you are ready to continue along the hop, the next stop is Adeline.  If you would like to check out more of my project, keep reading - but don't forget to see what the rest of the gals in the hop have created! 
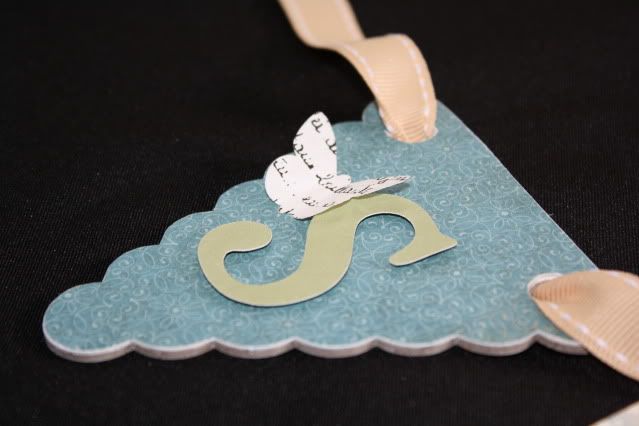
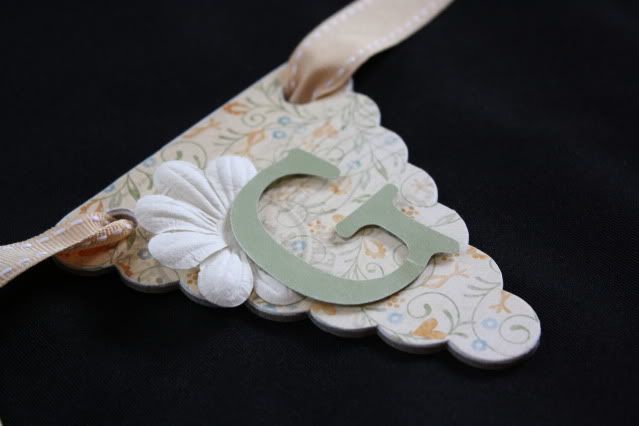
Here is a close-up of each letter so you can see the minor details and the gorgeous papers.
R - used paper pieces that I cut out from some scraps.
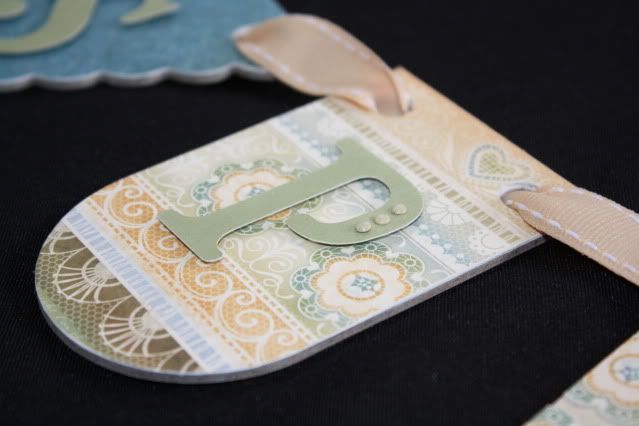
I - this paper has so much pattern that the letter 'I' almost gets lost - I tried to make it stand out by simply wrapping it in Colonial White Waxy Flax - I could have used a different color of cardstock to help this letter stand out more, but I wanted to keep all of the letters the same color.
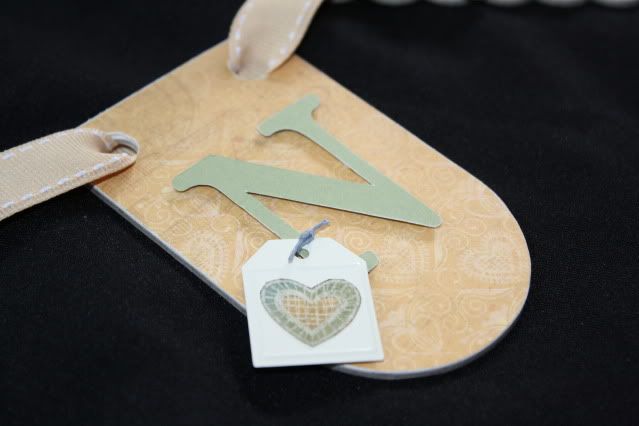
N - used a bit of Indian Corn Blue Waxy Flax to tie on a metal tag from the Colonial White Mini Medleys - the heart was cut from another scrap of patterned paper from Florentine.  I just realized I was planning on covering the heart in Liquid Glass but forgot - I'll have to add that.
G - a simple Just Blooms flower folded and tucked under the letter.

I have been attempting to hang this banner on the mirror above my piano (using removable glue dots) but so far am not having any luck.  Any suggestions on getting it to stay without leaving holes or marks?
***
Thanks for stopping by - don't forget to continue along the hop by checking out the next super talented lady, Adeline!

Wednesday, January 18, 2012

UFO No More!

If you saw my last post, I posted this UFO (Un-Finished Object) that I was going to finish on Tuesday...

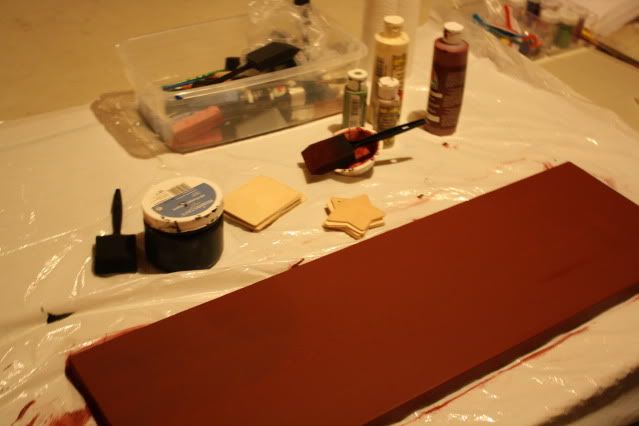
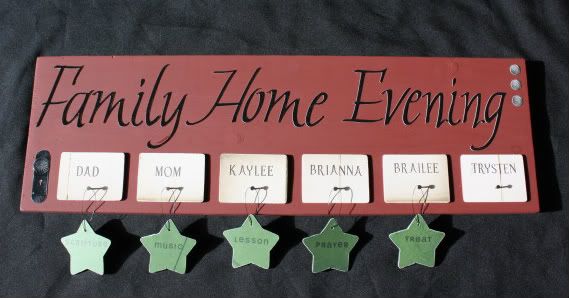
... and I am happy to report that it's done and I'm so thrilled!  I don't remember how the original idea board looked at Super Saturday (it was over three years ago) as I ended up with 3 extra rectangle pieces - I'm thinking they were supposed to go behind the F, H, and E but I wasn't liking how it was looking, so I chose to do it this way.  I was going to add some flourishes and more embellishments like fibers or buttons or something, but I decided to keep it simple, and I'm glad I did.  Here is the finished project:

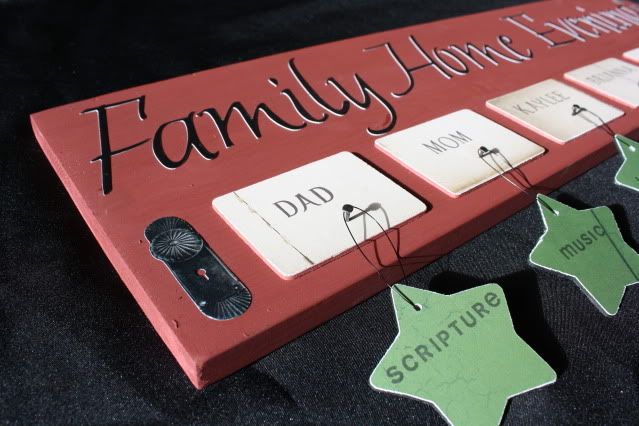
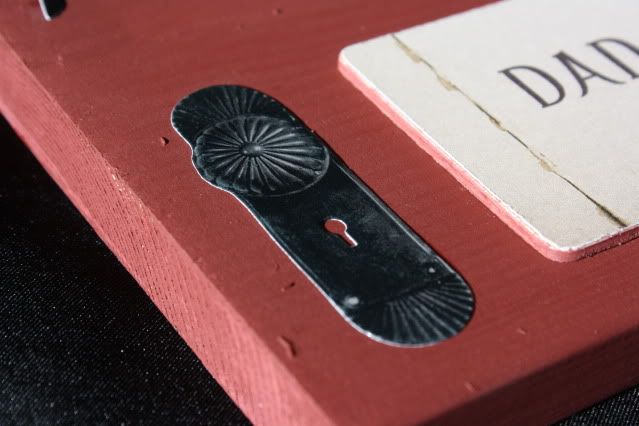
I used Apple Barrel Barn Red paint for the board.  For Christmas I got the Calligraphy Cricut Cartridge, and I used that for my big letters.  I was going to cut the names and other words with the Cricut, also, but decided it would be easier to stamp them.  I used the Felicity stamp set on the names and A Typeface stamp set for the assignment stars.  The papers and Stickease I used came from the retired CTMH Heirloom collection.  After I attached everything I used Liquid Glass to go over the Stickease and the large letters - love the dimension and shine that it adds.

I found another project that I haven't shared here yet.  This was one of my Creative Tuesday projects just before Christmas and I made it for a family gift.
I used the Passages paper and some black grosgrain ribbon.  The name is cut using the CTMH Art Philosophy Cricut Cartridge, and the date is stamped using the Friendship Small Alphabet.  I attached the Opaques Licorice Gems and the rolled flower (also cut from the Art Philosophy Cartridge) directly to the glass.
Thanks for looking!

Sunday, January 15, 2012

Introducing...Terrific Tuesdays!

I haven't been to a "Super Saturday" in a few years, and I miss it. For those of you who don't know what Super Saturday is, it's something we did in our church - we would set aside one Saturday (usually in October or November) and there would be a bunch of projects available - it was always a source of inspiration for homemade Christmas gifts, and a great chance to get them done.  This past November and December I did something similar that I called Creative Tuesdays - it was a great chance to get together and get crafty stuff done with friends, plus it provided me with the motivation to get some gifts done.  This year I want to try something a little different, and going with the Super Saturday name, I'm going to call it Terrific Tuesday!  I am hoping this will help us ALL be more ready with ideas and projects for gifts not just for Christmas, but any occassion all year long.  Every Tuesday anyone is welcome to join me at my house and work on a project - some weeks will have a small, simple, inexpensive project, some will be an 'Open Craft' day, and one week each month I will feature a larger project.  Stay tuned to see what I have planned!  I am also open to suggestions and if there is anything that YOU would like to teach, please let me know - I would really like to get a good variety of projects.

I will officially be starting this week - we will start with a 'UFO' craft day, which stands for Un-Finished Object.  Sue Ellen - I hope you don't mind that I stole your clever name ;-)  If you're like me, you might have a few UFO's around your house. 

Date: Tuesday, January 17th
Time: 10 a.m. - 3 p.m.
Place: My house
Bring: Any project you would like to work on
Lunch: If you will be here during lunch, bring a dish or snack to share and we will have a potluck lunch.

Kids are welcome to come - they can play while we play!  Anybody is welcome to join us so feel free to bring a friend.

Here is a peek at the UFO that I am GOING to finish this week!  I got this at a Super Saturday over 3 years ago a I FINALLY started it today!  That's the only problem I had with Super Saturday, I was usually teaching one or two projects so I had to take the other projects that I signed up for home to finish on my own...which didn't usually happen right away.  Anyway, I can't wait to finish this and share with you.

Thanks for looking!
Friday, January 6, 2012

December Crafty Projects

Okay, lots of posts lately but I am determined to catch-up so I can move on!  Here are just some quick pics of some of the projects we worked on during the month of December.  Sorry for the poor picture quality but they were all taken with the iPod because I was usually in a hurry to get a pic before sending off the gift ;-)  I will post the rest of our projects once I can share!
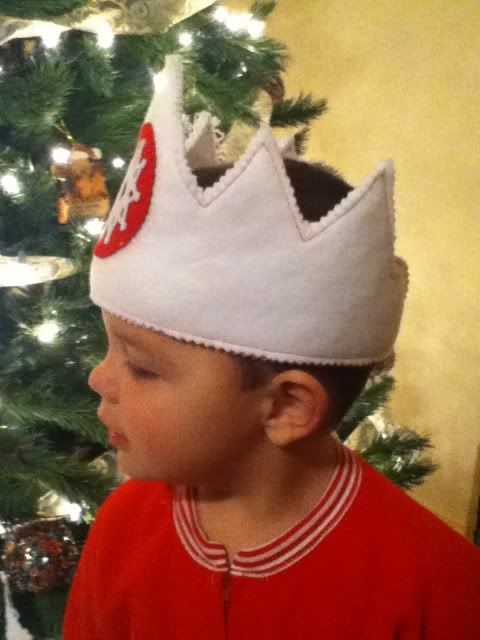
This one was fun - I was asked to make a crown for the Boy winner for a local Snowflake Pageant.  I made it out of felt and it's fully adjustable in the back with velcro.  I came up with my own pattern, cut it with pinking sheers and sewed it with contrasting thread.  Here is Trysten trying it on for me.
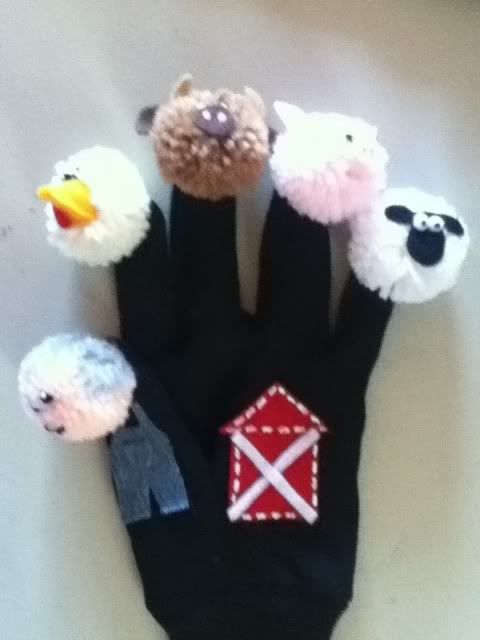
I made a couple custom glove pom pom puppets.  The picture here is really bad, but this is Old McDonald with his chicken, cow, pig, and sheep.
I already posted the pic of the can Brailee and Trysten took to their preschool teacher, but here are the cans the older girls took to their teachers.  The big tall one was for the ladies in the office so we could fit all three of their gifts inside.
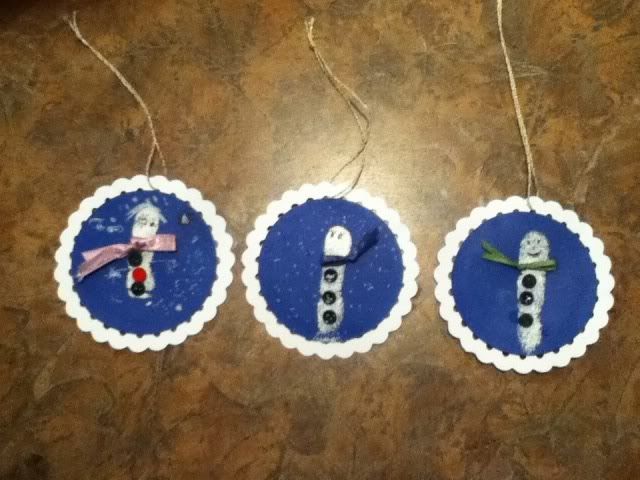
I think this idea was in last month's Family Fun magazine - I love that magazine, it's the only subscription I have and it's well used!  I've always loved the fingerprint creations but never tried them before.  We started with these snowmen using the whole finger - next year I want to do the reindeer, I'm hoping to do a new one each year.  The kids wrote their name and the year on the back.
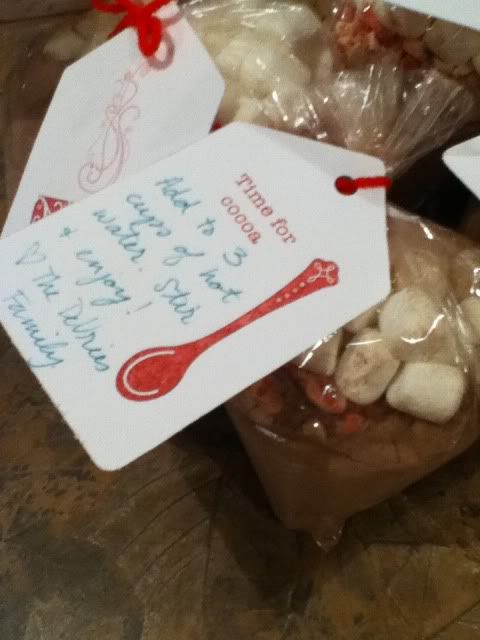
Along with the Peppermint Oreo Balls, Peanut Butter Balls, cookies and dipped pretzels, I also included these little individual packets of hot chocolate mix layered with Andes Peppermint chips and marshmallows for our goodie plates that we delivered.  The tags were cut using my coluzzle and stamped using the A Sip stamp set.

Remember this Flower Topiary that I made for my MIL?  Well, I got one done for Brianna as well.  The furniture in her room is black so I used the black pearl corsage pins.  I used the retired Breeze cardstock - glad I stocked up on lots of that before it was gone as it's her favorite color plus it matches her walls.  I sponged the edges of the flowers with Pacifica ink to tie in the darker blue from the pot that I picked up on clearance.  These iPod pics really don't do the colors justice - it's much brighter a prettier in person!  Maybe I'll get some better pictures later.
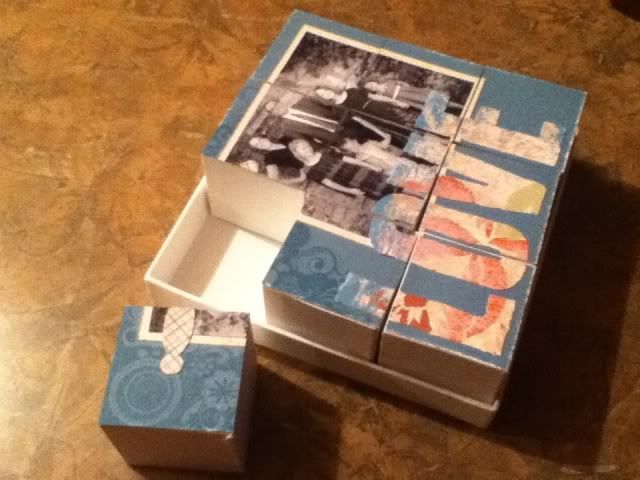
Here is one more project that I started but haven't finished yet.  It features a product from this month's Close To My Heart special, Rock the Block.  If you order just $25 in product, you can get this set for just $15 and it includes an E-sized stamp set!  The blocks will be available in the new Idea Book starting February 1st for $14.95, but the E-size set, exclusive to this special, is a $29.95 value!  It's really a great deal and a fun project!  I can't wait to finish it up and post it all - for now here's a quick peek!  Click here or contact me for more details on this special.

Thanks for looking!