Showing posts with label Good Work. Show all posts

Thursday, June 4, 2015

Deconstructed Sketch Guest Designer

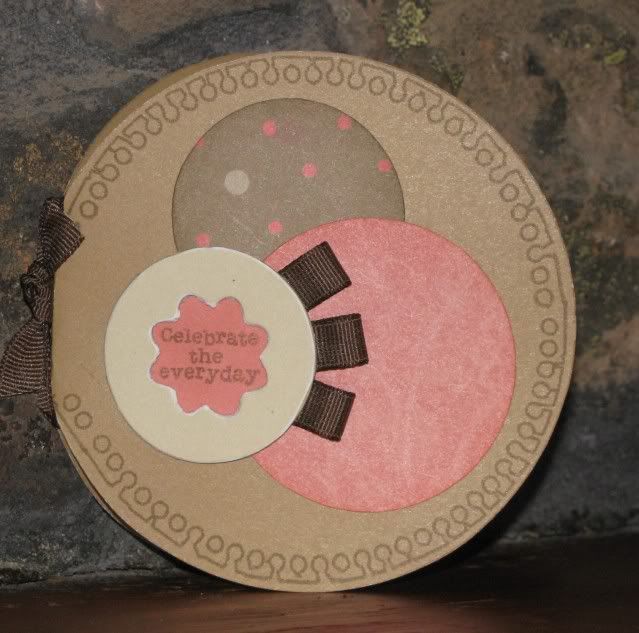
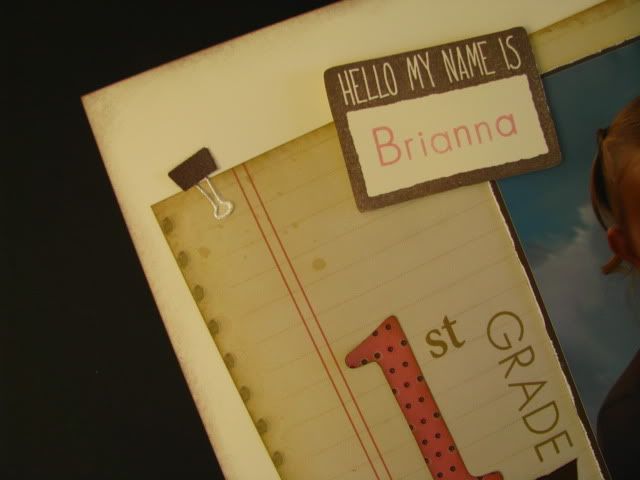
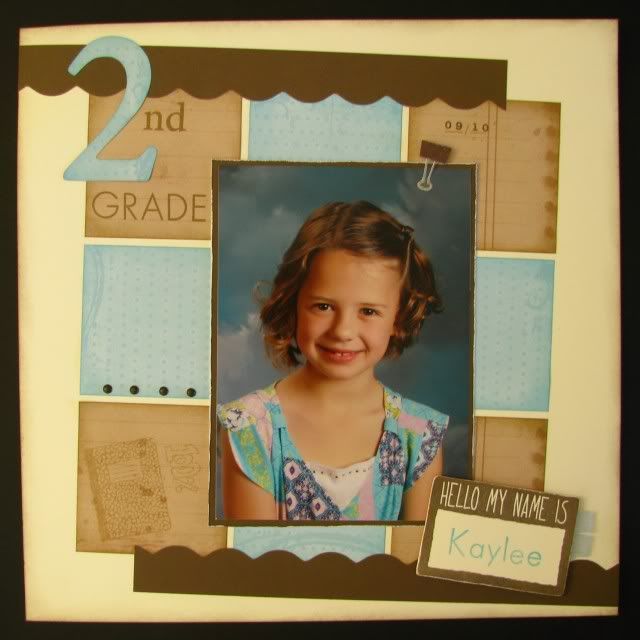
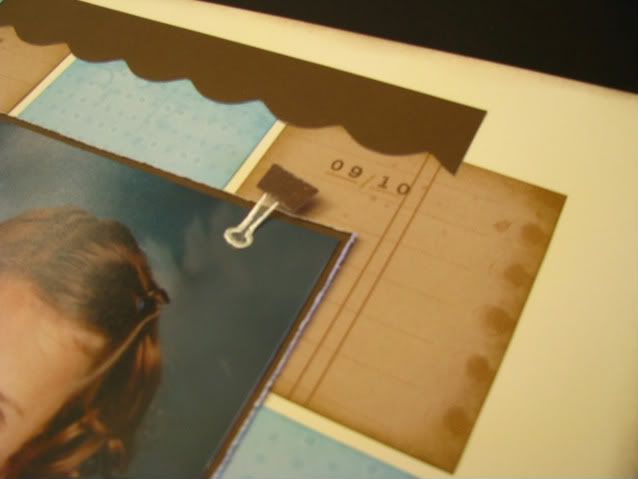
I was selected as a guest designer this week for Deconstructed Sketches. I always love the sketches that are provided weekly. They are fun and versatile and easy to customize to your style and theme. Here is the sketch for this week and the card I created based on the sketch. I used a retired CTMH paper pack - the name escapes my mind at the moment but if anyone remembers please help! The stamp is from the school themed set, Good Work, also retired. I have many years of accumulated supplies, I'm trying to use some up!
Notice how I changed the circles in the sketch to squares with rounded corners. The sentiment was stamped using my Colonial White pigment ink pad.
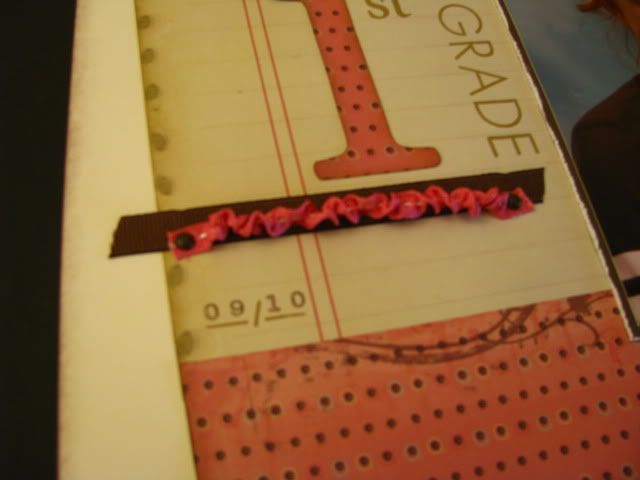
I created some fun custom brads for this card. First I punched some small circles out of coordinating cardstock. Then I attached some mini sparkles. Last I covered the circles and sparkles with Liquid Glass - one of my all-time favorite products, I always keep a bottle handy! Super easy, customizable accent!
Click the following link to visit Deconstructed Sketch - http://deconstructingjen.com/
I hope you'll play along and create something fun with this week's sketch. I'd love to see what you create!

Thursday, July 8, 2010

Convention, here I come!

No, I wasn't able to attend Close To My Heart's Convention this year in D.C. (which starts today) but I'd like to say a little piece of me is there this year! I was so honored earlier this year when I received a very special invitation from Close To My Heart. I was asked to participate in this year's Silent Auction to benefit Operation Smile. What an honor to be asked, but what pressure! I remembered a couple of last year's participants, Lisa and Tresa, and wondered how I could ever compare to the talented Consultants that would also be creating artwork for the auction. I finally accepted the fact that I could never compare but just to create something from my heart! I had plenty of time to work on it, luckily (though most of that time was spent just pondering my project) and finally the week that it was due to be postmarked, I started...and pulled it off!
***
I am really pleased with how it turned out, and I look forward to seeing the other auction items. I hope it helps raise a lot of money for a good cause! I have shared a sneak peek here, but now here is the entire calendar project, as many of you correctly guessed. I used the Splendor paper pack on the entire calendar, just added a color here and there to fit with the month/theme. I also used the Irresistables Lots of Dots - it was great to customize the color for each month.
***
January - also used Flurry Dimensional Elements and added Moonstruck CS - sponged the snowflake with Heavenly Blue and Moonstruck ink. It's hard to see in the picture, but under the chipboard snowflake and going up over the circle at the top, I stamped one of the snowy flourishes from the Flurries stamp set in White Daisy ink and chalked it with a light blue chalk.
February - also used the frog Stickease from Splendor, and a Heart Dimensional Element (but wish I would have sponged it a different color)
March - also used Bunny Love stamp set and Heavenly Blue buttons from the Spring Craft Button collection. The bubbles have the Glitz Stardust Glitter Gel on them to make them sparkle.
April - also used the Springtime stamp set, accented with Colonial White brads.
May - also used the Childhood stamp set for the kite.
June - also used Pizzazz Irresistables colored with Moonstruck and Topiary ink, and Splendor Designer Brads - dry embossed and sanded the border.
July - also used my new favorite stamp set Over the Rainbow - this month's page is one of my favorites - check out what I did with the window from the new A-Door-Ables. Here it is closed...can you see it?
and open...the balloon has the Glitz Stardust Glitter Gel on it.
August - also used the Summer Sweetness stamp set, Liquid Glass on the seeds, Tulip ribbon, and Topiary brads, and Tulip ink.
September - also used the Good Work stamp set and a bracket from the Pizzazz Irresistables inked with Heavenly Blue ink.
October - also used the Creepy Cobwebs stamp set and added black ink and black brads for the spiders.
November - this is another one of my favorites - I made the pumpkins using my oval Coluzzle cut from different Goldrush patterns from the Splendor pack and sponged the edges - I also added Splendor Designer Brads and Autumn Terracotta and Topiary Brads. This page got a little too thick with all of the brads but I still like it. I will be doing a lot more pumpkins like this - so cute and so easy - and you can do them any size you want!
December - I also used the Holiday Trinkets stamp set, some ricrac Stickease from the Splendor set, and added Tulip ink and CS. To create the scallop corner I took my Irresistables Lots of Dots 'leftovers' (the circles from the insides of the letters o, d, b, etc), colored them, and just added them under the corner.
Well, that's it - thanks for looking! I'd love to hear what you think - which month is your favorite?

Monday, November 30, 2009

December SOTM Blog Hop!

Welcome to another fun Stamp of the Month Blog Hop! I look forward to seeing all of the wonderful inspiration that is going to be shared along the hop - I hope you'll join us!
***
When you're done here, the next stop is Helen's Blog, so don't forget to keep hopping!
***
The first creation I am sharing today using this stamp set is a fun circle card - the pattern came from Wishes and it's called Center Circles. This is also a *very* small peek at the beautiful Felicity papers that will be available starting December 15th! This card uses a stamping technique that is so simple yet makes the stamps so versatile - I curved the stamp on my block to fit around the edge of the circle card - let's see you try that with wood mounted stamps! The sentiment is stamped inside a fun Dimensional Element shape from the On Target set. I covered the chipboard with Bamboo paper and sanded the edges with the Finishing Files to give it a finished look.

Now on to my next two projects using this stamp set. I thought this was a fun stamp set that paired up well with the Notebook paper pack and Good Works stamp set so I used them all together to scrapbook my girls' school pictures that were taken this fall. I used the same 2 paper patterns on both of these layouts, I just used the back of the paper to give two completely different looks. I LOVE that feature of CTMH papers!
Brianna's layout used the following sketch #40 from The Scrappiest:


I embossed the clip on a transparency and cut out - I did half in Cocoa EP and half in Silver EP...

...I also used the dashed lines from the stamp set for the years...

Kaylee's layout used sketch #39 from 52 Sketches, I just added an extra row of squares:


I used the same stamps from Notice the Details on this layout as the last one, but this time I used a foam square to give it extra dimension...
If you would like to see one more page that I created using part of this stamp set, just click here.
***
Thanks for visiting - don't forget to leave a comment and keep hopping along to Helen's Blog and all the rest of this month's participants to see all of their fabulous creations! Enjoy!