Showing posts with label Altered Projects. Show all posts

Friday, October 8, 2010

Creating in my new town!

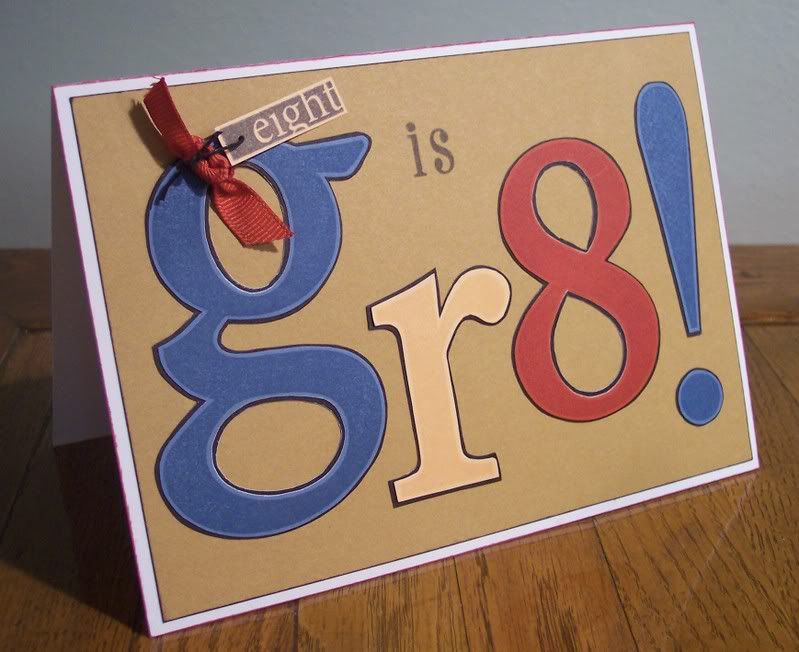
So I finally had a chance to create something with real paper this week, and I am so excited about it!  I am planning my first workshop/open crop here in my new town to get together with fellow scrappers and hopefully meet some new ones and this is the project I planned.  Now, keep in mind that I kept it really simple as all of my scrapbooking supplies are still boxed up (remember, no craft room...yet) so I had no stamps, no ink, no embossing powder, etc. to work with.  I placed a small order when the latest Autumn/Winter Idea Book was released and received some inspiration from page 38 for my first project in my new town!  Using the following items...
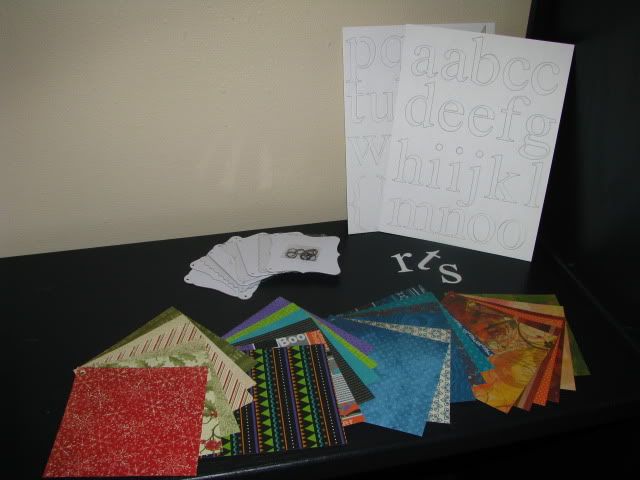
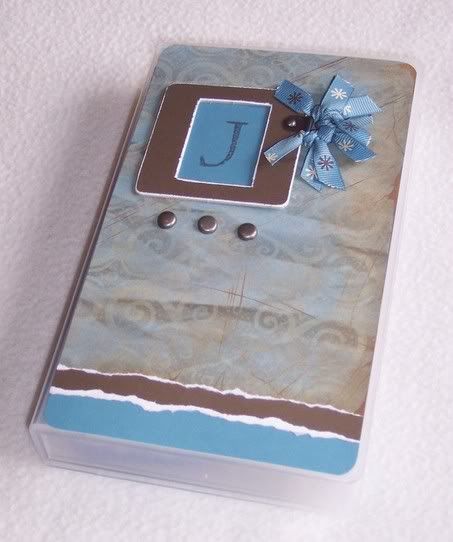
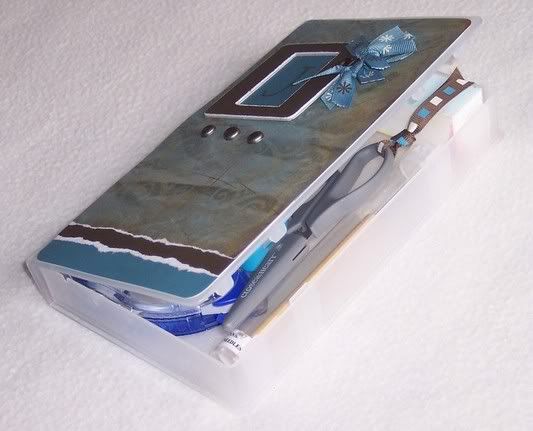

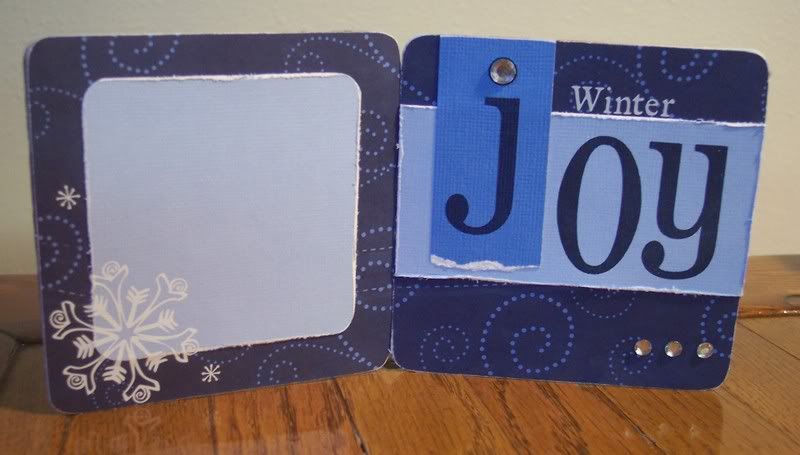
And on the other side...
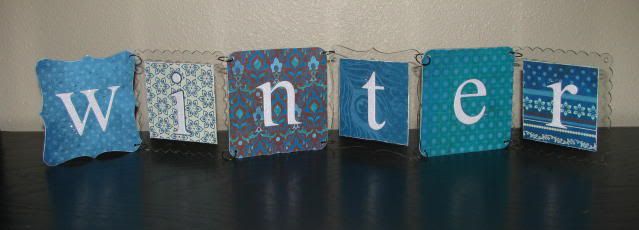
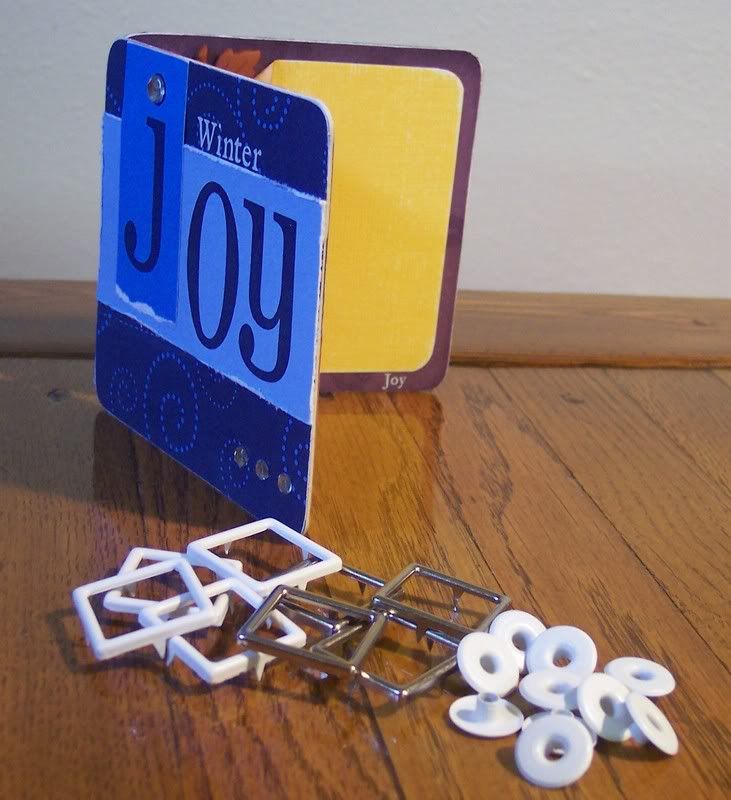
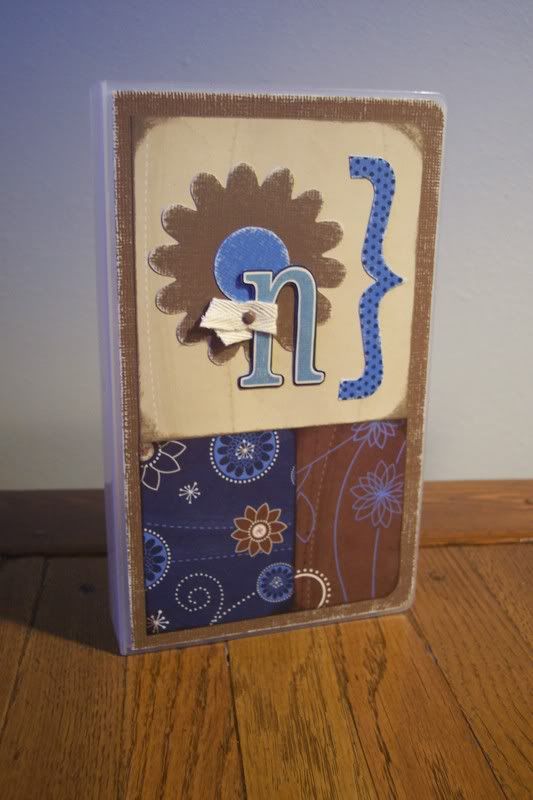
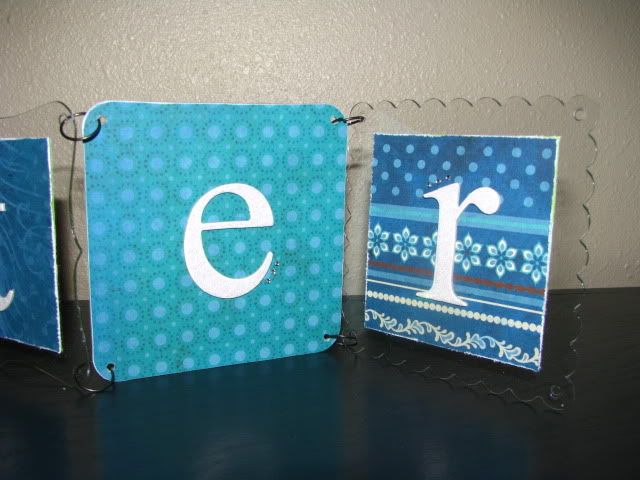
Here is a close-up of some of the letters...you can't see it very well in these pics, but for the WINTER side I used the Stardust Glitz Gel on the letters to make them sparkly and accented them with 3 Bitty Sparkles
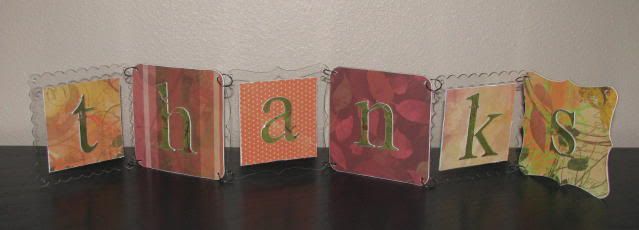
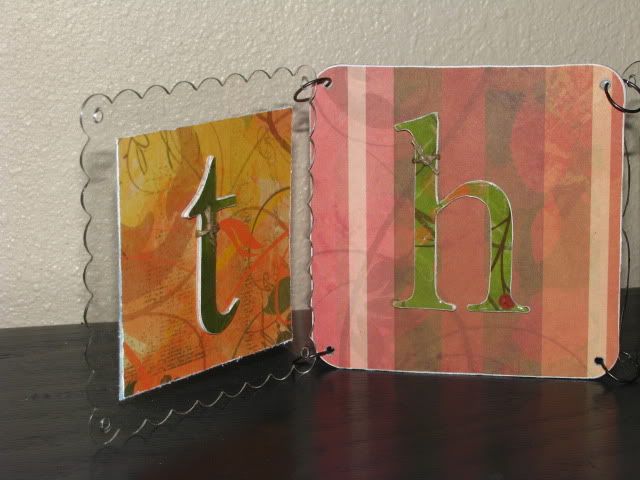
For the THANKS side I covered the letters with paper, finished them off with the Finishing Files, covered with Liquid Glass and tied with a bit of Hemp.
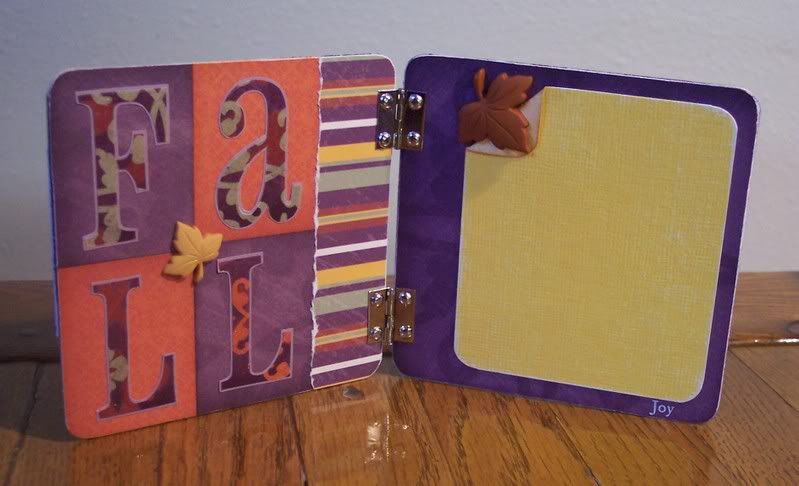
With the leftover paper, letters, and mix 'n mingle pages, I created this coaster frame.  I think I like the way this mini project turned out better than my original project!  One side is for Halloween - if I want I can add a small picure to the right side:

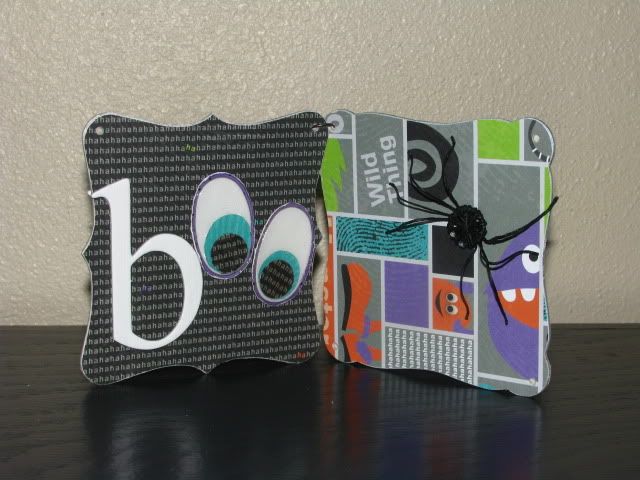
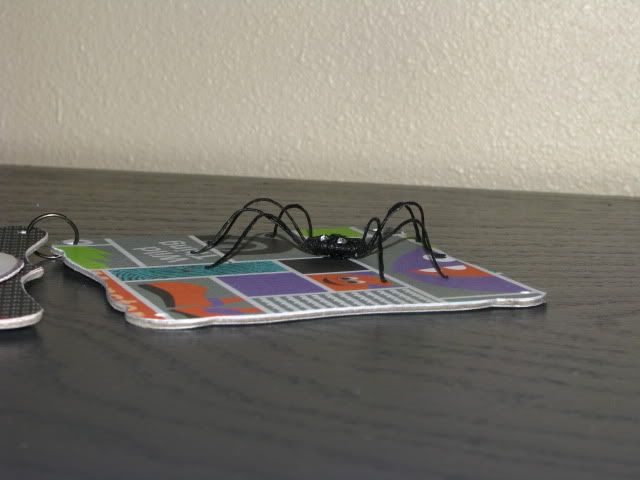
I was going to use the actual letter 'O' but thought the insides to the letters looked so much cuter when I turned them into eyes!  I also covered the eyes with Liquid Glass to really make them pop.  And as much as I hate spiders, I just love this little guy...can anyone guess how I made him?

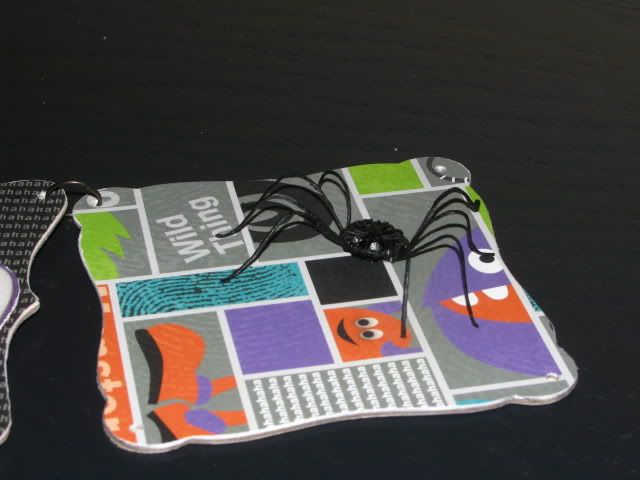
I was wanting to make a spider out of a black brad and some black wire like I have done before, but all that stuff is packed who knows where, so I had to improvise.  I had a big pack of Black Waxy Flax in my available stash, so I took a leftover jump ring from the Mix 'n Mingle Album and wrapped the waxy flax around that to create my body - I also used the waxy flax to create the legs.  I finished him off with a couple of Bitty Brads for the eyes!  I love that you can really play with and shape the waxy flax to get the look you want - he'll probably get smashed when I pack him up and put away the Halloween decorations, but he'll shape right back up next year!
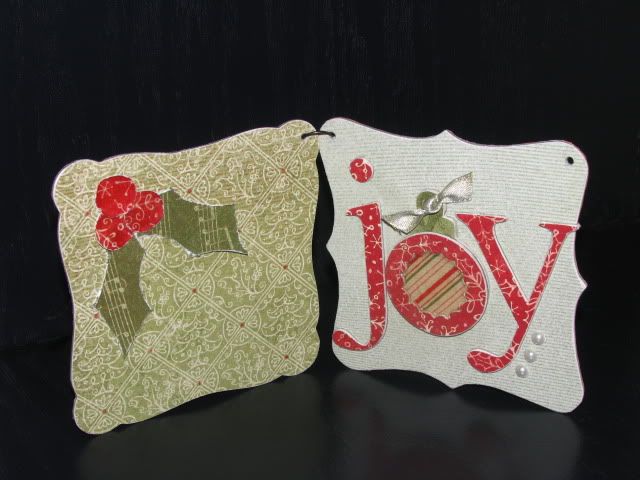
Then this is the other side of the same coaster frame - this one is for Christmas.  I left room to add a picture to the left side of this project as well.  I added a Dimensional Element Ornament for the 'O' in JOY - used Liquid Glass to fill the ornament and cover the holly berries, and added some Opaque Gems to finish it off.
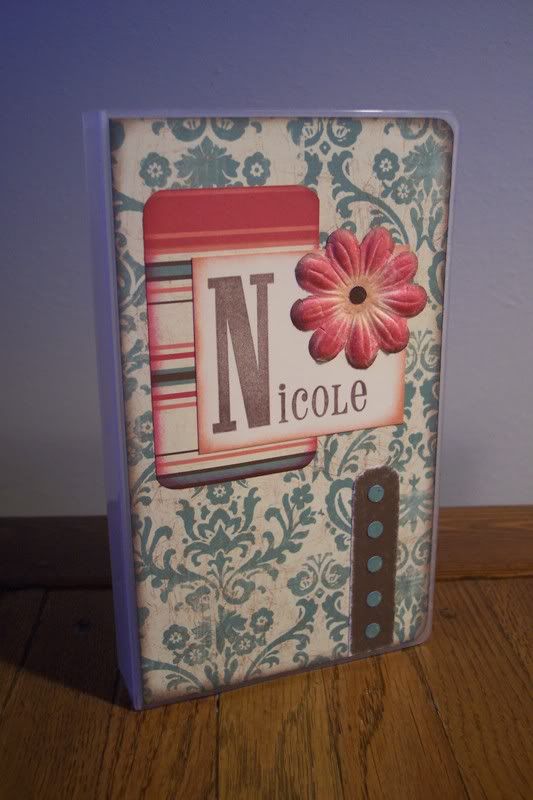
I've also been brainstorming other words you can use to create these fun signs - here is what I have come up with so far, but I'd love to hear any other ideas!  There are 8 pages to the Mix 'n Mingle Album, so you can use any word with up to 8 letters...I still have lots of letters left over from my original project, plus by using different papers you can really customize this project to whatever theme you want!  Another fun idea would be to do a family's last name, or a kid's name.
THANKFUL
BROTHERS
FRIENDS
SISTERS
BLESSED
JOYFUL
FAMILY
THANKS
WINTER
SUMMER
SPRING
BEWARE
BLISS
HAPPY
SMILE
PEACE
FALL
LOVE
HOME
HOPE
BABY
GIRL
CUTE (thanks Mom!)
JOY
BOO
BOY
***
Thanks for looking!

Tuesday, June 2, 2009

Teacher Gifts

These were the gifts I made for the girls' teachers on the last day of school - seriously, I should win the Procrastinator of the Year Award ;-P

I used some blocks that I ordered from Oriental Trading ages ago but just hadn't used yet - all other products I used are from CTMH. I covered the top with paper from the Animal Cookies Creative Basics paper pack, the alphabet block look was created using cardstock (White Daisy, Tulip, Dutch Blue, and Clover Meadow) and the Essential Alphabet stamp set. I then tied just a bit of White RicRac on the photo holder to finish it off. The girls wrote a note to their teachers on the papers with their picture. The 'My favorite teacher' stamp came from a retired set called School and the paper lines and paper clip stamp came from a new stamp set called Comments.

Thanks for looking!

Monday, February 23, 2009

More pictures!

Since I take a couple thousand pics a year ;-P be prepared to see a lot more here on my blog, especially with a new baby to take tons of pictures of! Here are some pictures from last week...
***
First, here is a picture of Trysten getting ready for church yesterday - can you tell how I made his shirt? It's a different kind of 'altered project' - scroll down for details.


I made a bunch of these 'Tie' shirts about 5 or 6 years ago and gave some to my SIL when she had a little boy. Then when she gave me a couple tubs of boy clothes when Trysten came along, there they were again - so I couldn't wait to make more using some of the great CTMH papers.


I decided to try something different for the first one I made for Trysten and create a vest and tie look. I used some paper and Stickease buttons from the Stardust kit - unfortunately, my scanner was acting up and I could only get it to copy the image instead of scanning it, so the color and pattern is off but I still think it turned out cute and he looks handsome! I have one more plain white onesie, I will be making another one but this time I want to get a decent scan first, plus I have to decide which paper I want to use this time!
***
First create the image out of paper...


Then scan/copy it onto Iron-On Transfer paper - I wasn't sure how the layers would iron on, so I decided to do it all in one piece instead of each piece seperately...


Then cut out the image and iron it onto the plain white onesie! With this picture, you can see the difference in the color from the original to the ironed on piece...


Here is Kaylee giving Trysten sweet kisses...


Check out Trysten's 'scowl' - he pulls this face quite often, ever since the day he was born. You'd never know he's such a good, happy baby by this look on his face ;-)


This is one of my current favorite pictures, even though the coloring is way off and it's out of focus, I just love the look on each of their faces!

Here is Brailee helping with Trysten's bath one morning - she sometimes ends up quite wet! She is such a big helper, she wants to help me do everything, even change the stinky diapers ;-P

Friday, January 16, 2009

Emporium Clock

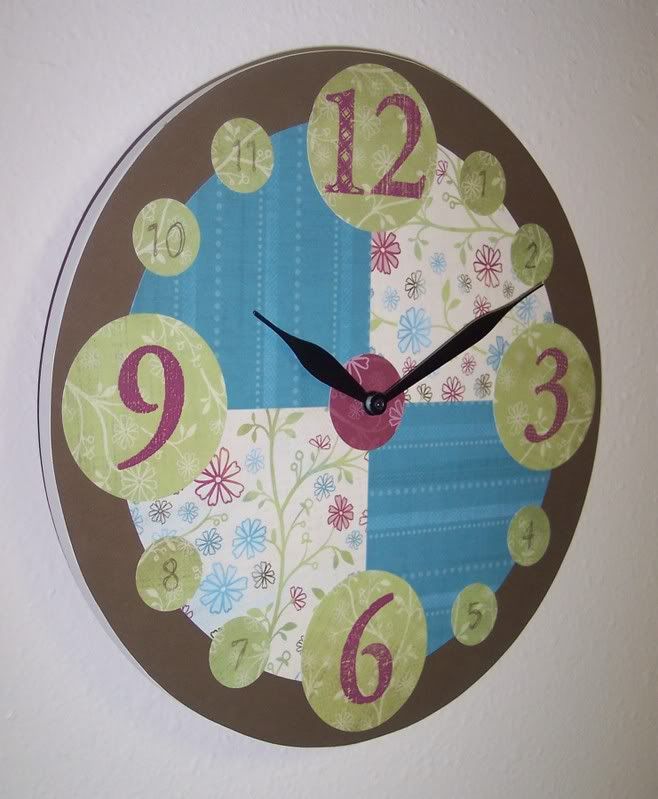
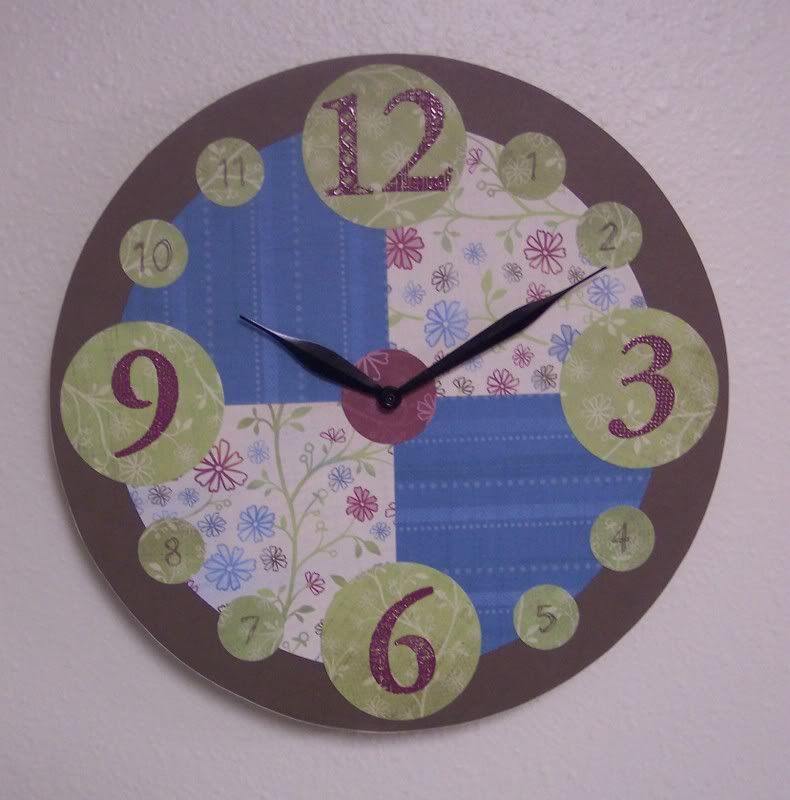
Here is a clock I made for my SIL Sandy - using the NEW Emporium Creative Basics Paper, my absolute favorite from the new Idea Book!


I ordered the clock through Oriental Trading - they also have square ones. Here are a couple more clocks I have done before...


Thanks for looking!

Tuesday, January 13, 2009

Mini Calendar

Here is the project that I made for my club that is meeting today - it's a mini calendar on a 4x4 coaster, using this month's Stamp of the Month, Moments in Time, and the NEW paper pack Unforgettable. I also used the numbers in the small Friendship Alphabet set for the year. There are six 2 1/4 x 2 1/4 squares for all of the months (one month on each side) and they can just pull it out when that month is over. These were inspired by those mini calendars that you get from various businesses each year. The clip that holds the months on also serves as a hanger.
Thanks for looking!

Monday, January 5, 2009

Card Organizer

Here is a fun card organizer that I made for a friend for Christmas. Her favorite color is orange, so this Boom-Di-Ada paper was perfect!

Tuesday, November 4, 2008

My First Canvas

This was a gift I made for my MIL for her b-day last month. It is a 10x10 canvas - I sponged Blush ink directly on the canvas and added the Cocoa textured CS for a border and then added the title and pictures. I used the Friendship Alphabet set (I just cannot get enough of that set, I LOVE it!) clear embossed on Cocoa textured CS and then cut out for the title, along with the pink dot paper from the Notebook pack, and Chocolate Rub-Ons.
***
Thanks for looking!


Wednesday, October 22, 2008

Oops...Blog Candy Winner!

Sorry, I had this post started and a winner picked last week, I just forgot to move it past the draft mode ;-P I had Brianna draw out a winner for my blog candy - congrats to...Yvonne! I love her fun costume she told about in her comment...
***
"One year I made two heads out of nylons (using buttons for eyes and I put winter hats on the heads). I put my son in a sweet top and sewed a head on each sholder of the sweet top. He was the 3-headed monster! It was cute!"
***
Here is what she won...
...some fun accessories - Hugz and Big Eyelets and a seasonal coaster frame that I made - this one just includes Fall and Winter, maybe by my 200th post for another blog candy I'll do Spring and Summer that time ;-)
I was only planning on doing a Fall side, but couldn't stop - if I would have known I was going to keep going, I wouldn't have used the Joy rub-on for the fall side - I guess I was in a joyful mood!


Thanks for stopping by!

Tuesday, October 21, 2008

Altered VHS Cases

Here are some projects that I have been working on for the last few weeks - I didn't want to post any until I got them ALL done and in the mail. The project got delayed by our house rearrangement, but I finally got them all sent out early last week, so hopefully they have all received them so I'm not spoiling anything ;-) These are some altered VHS cases that I made for some of my blogging/stamping friends - these are gals who have sent me fun cards and stamped images or have just been a huge support to me since I started my blog. I made my first maybe a couple years ago and still had a stash of cases to use, and since I don't have any fun images to stamp and return the favor, I decided these would be fun. I use mine as a tool box for my scrapping supplies - just a fun way to hold scissors, tape runners, etc. These were inspired by Yvette West (? - correct me if I got the last name wrong) she is a fellow CTMH Consultant who shared her fun idea on the CTMH boards.

First here is mine that I made quite a while ago...
And here are the gifts for my friends - it was fun to make these - each one became my favorite as I finished them ;-) I hope they like them!
This one is for Nicole
This one is for Ramsey
This one is for Laurel
This one is for Marjorie
This one is for Stacy
This one is for Nona
This one is for Kari

Monday, October 20, 2008

Birthday Cards & Gifts

Here are some birthday cards and gifts that I have made recently and haven't posted yet...
***


For my SIL Liz - she likes orange - or at least I hope she still does ;-P Happy Birthday yesterday, Liz!


For my SIL Hannah - I really had fun with this card and I took a lot of pics of this one so you get how it looks. I took inspiration from Originals: Window Cutout, but instead of a 3 1/2 x 2 1/2 card, I turned it into a standard sized card (4 1/4 x 5 1/2). I embossed the star from Shining Star with Cranberry EP onto black CS and cut it out - then I mounted it on a piece of white CS and cut out again. then I cut out the center of the front of the card leaving a 3/4 inch border and attached the star. I also used the dot paper from Silhouette (I LOVE that pattern!), some Cranberry Ribbon, Black Waxy Flax, and some Black Bitty Brads.


I played a little more with it after my original pic, adding dashed lines around the star - did I add too much? Which do you like better, the first or second version?


For my nephew Damon who turned 6 last month - just a simple card using the most boyish stamps I own - when you have 3 girls there's just not too much boy stuff around ;-P Brianna picked the color since he is her bud. I stamped the Tool Time stamp sets using White Daisy pigment ink - and used Moonstruck B&T papers, Say It In Style stamp set for the sentiment, and some fun blue staples.


for my nephew Isaac who just turned 8 and was baptized this weekend! I used MCC #34 and Solos (G, R, 8, and the new Punctuation set). I was inspired by a sign at a local fast food place, advertising 'Join a GR8 team!' So I thought it would be perfect for an 8th birthday!


I also made him this journal/notebook - inside the front cover is a picture of Christ getting baptized. This was inspired by Originals: Tie Back Tag but created an 8 1/2 x 11 cover with it.


for my MIL - Happy Birthday today! She loves pink, can you tell? I took inspiration from Originals: Ribbon Envelope but turned it into a 6x6 card. I used Adorning Corners and For Every Occassion - I used some mini clear window circle stickers on the dark side of Blush textured CS to create the embellishment in the corner. I used the light side of the Blush textured CS for the front of the card, along with paper from the Paper Garden pack.

Here is another baby gift - that is LONG overdue! This is a fun puzzle (?) frame that I found - I don't know how else to describe it - each of the squares slides around like those puzzle games. I started this gift right after she was born, then the pics she e-mailed me, I couldn't get to print, so after I finally remembered to tell the mom I needed another picture, I was able to finish it up a few weeks ago when I finally got that picture. I just hadn't given it to the mom and baby yet (sadly she is almost 6 months old now) - I scheduled it to post here so I would finally remember. What a horrible friend I am ;-P