Showing posts with label Circle Around. Show all posts

Tuesday, November 15, 2011

CTMH Spotlight Blog Hop - Embossing

Hello and welcome to this month's CTMH Spotlight Blog Hop!  This month we are featuring projects using an Embossing Technique.  If you came from Luisa's blog then you are on the right track!  If you are starting here, then just keep hopping along to check out what everyone else has created.
***
I love embossing, whether it's heat embossing or dry embossing, it's always a fun addition to any project.  Click HERE to view all items available from Close To My Heart to meet your embossing needs.  Today I am featuring some projects using heat embossing.
***
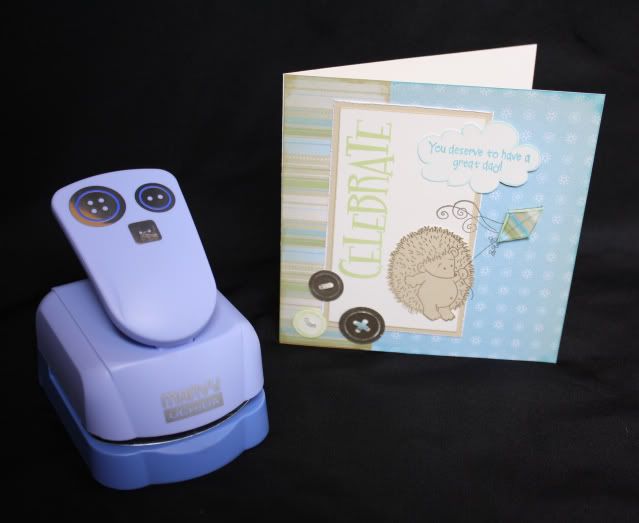
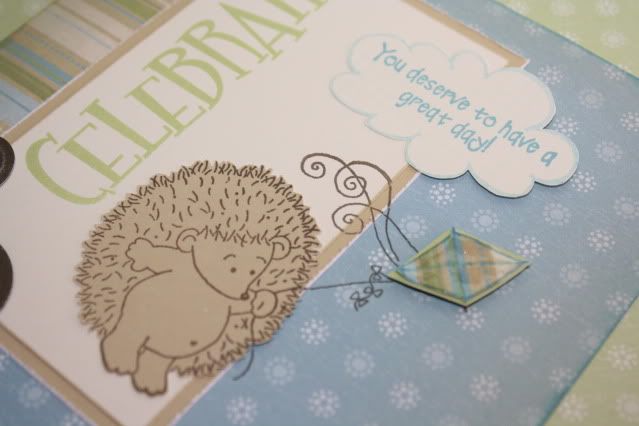
I gave a little sneak peek last week, here are a few of the full pages.  I created these pages for a friend's baby shower.  She only scraps in 8 1/2 x 11 so I had to challenge myself since I've never scrapped this size before.  On these following pages, I heat embossed on a clear transparency to create my own type of overlay.
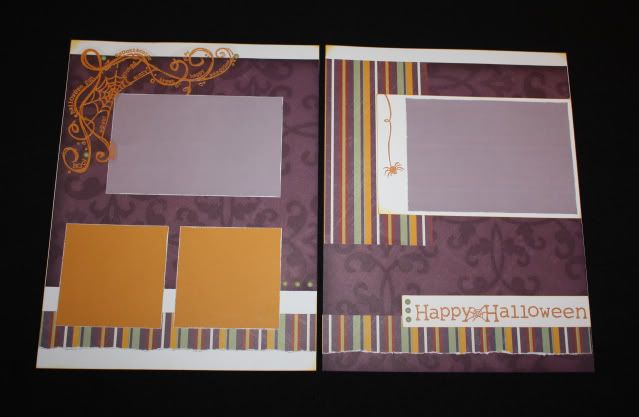
For these Halloween pages I modified the Dialogue pattern from Imagine.  I also used some retired Enchanted papers and Creepy Cobwebs stamp set.  I heat embossed the title and the spider on the right page directly on the white paper.  I heat embossed the spider web on the transparency and trimmed around it.  I attached it with carefully placed dots of Liquid Glass (to hide under the image) and a few coordinating brads.
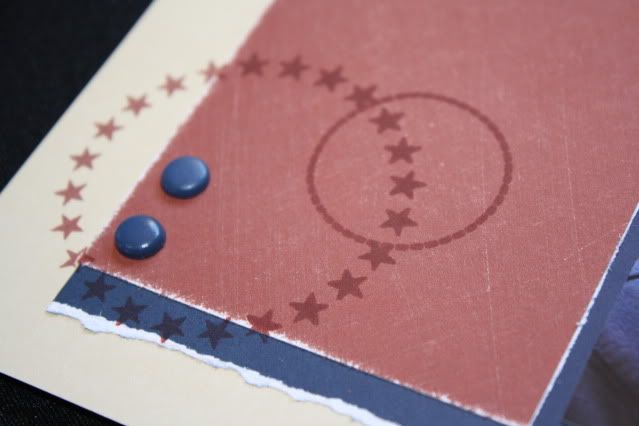
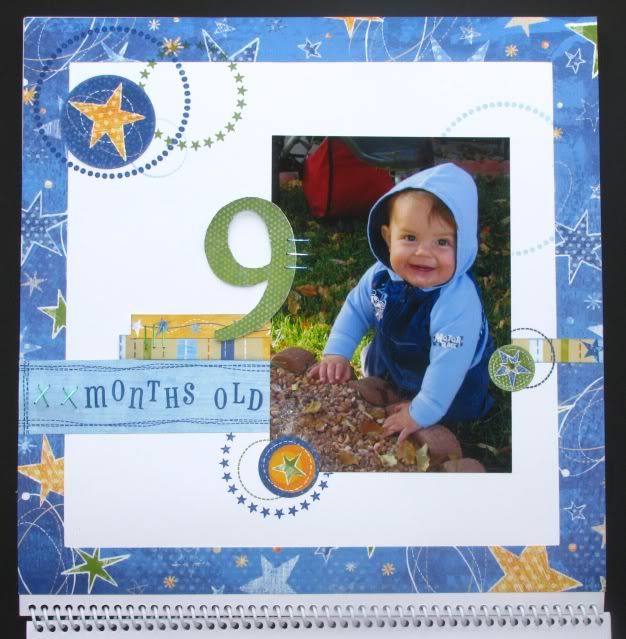
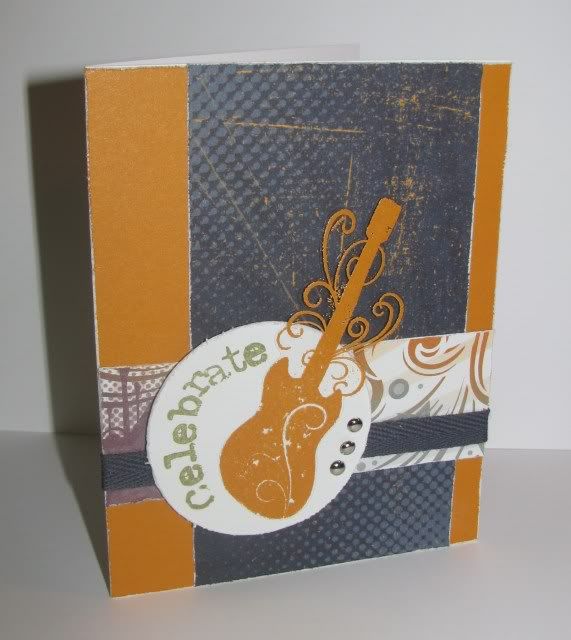
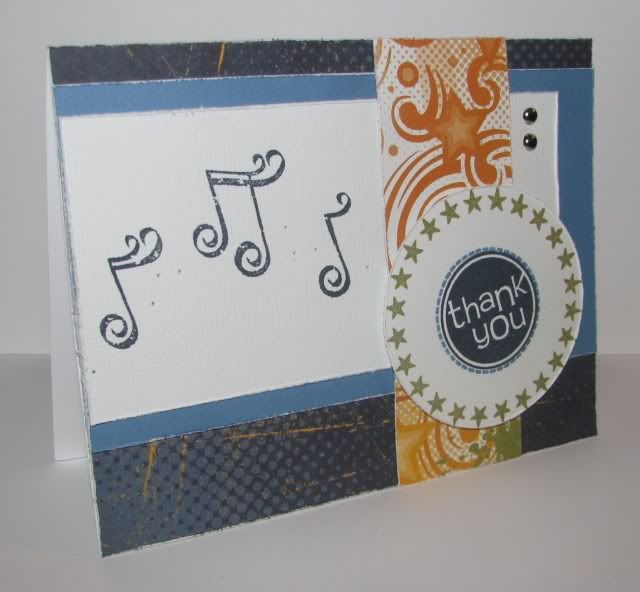
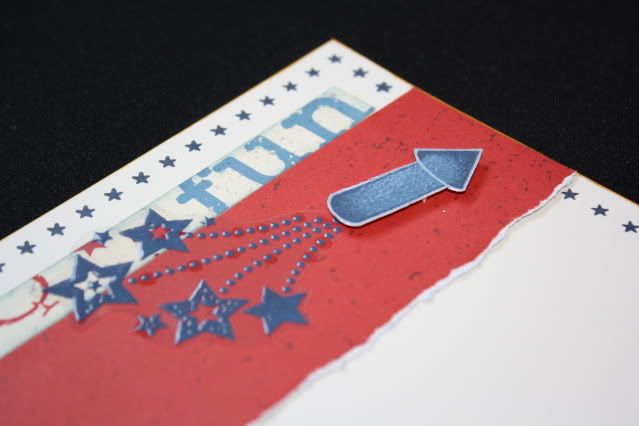
For the following 4th of July pages I modified the Levitate pattern from Magic.  I used some retired Blue Ribbon paper, along with a Stamp of the Month from this summer, American Celebration, and an old favorite stamp set, Circle Around.
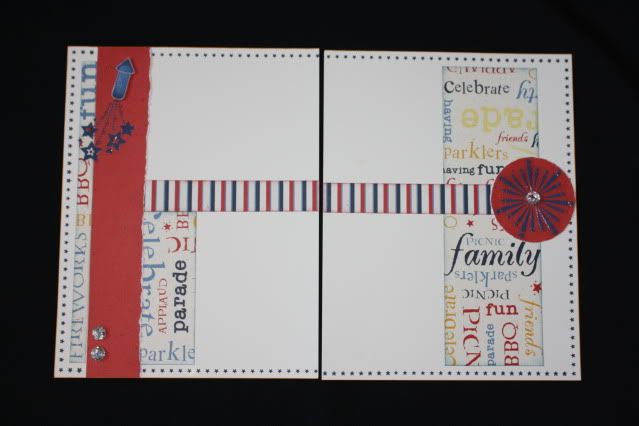
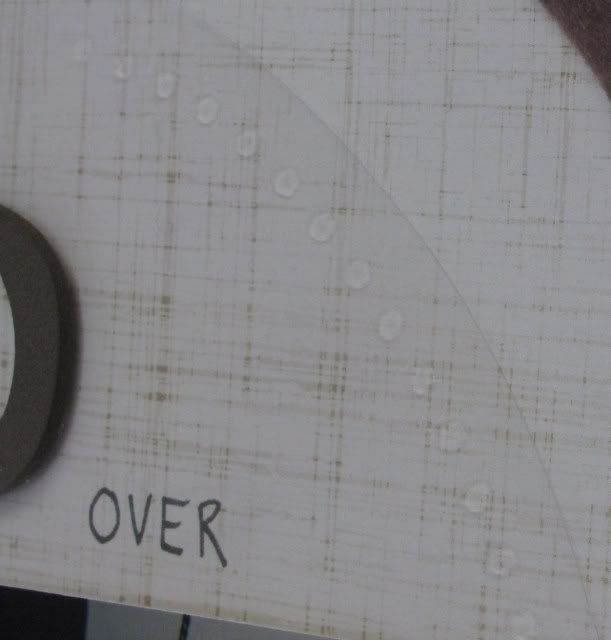
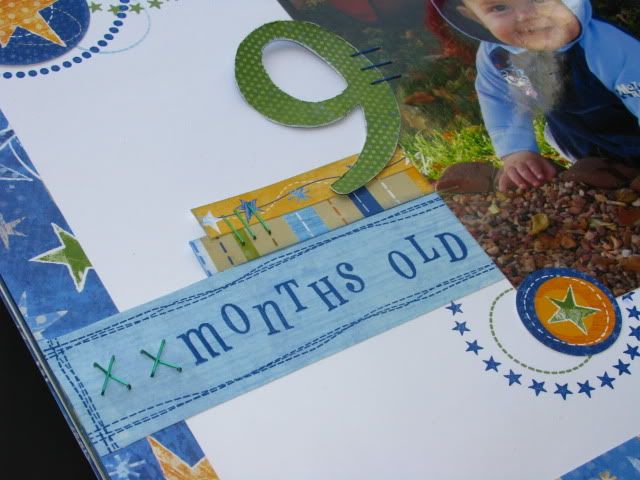
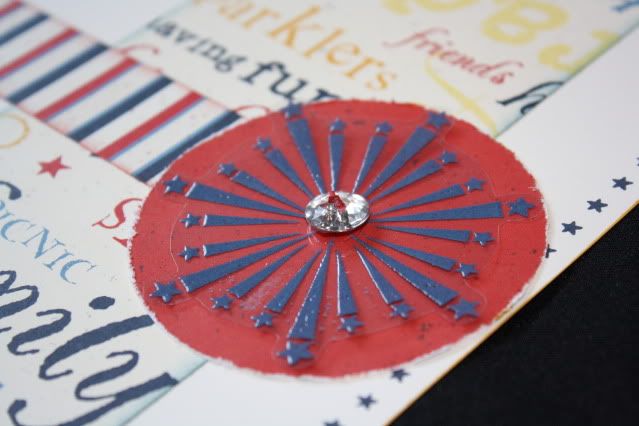
I embossed the firecrackers on the transparency and added a touch of Prisma Glitter to the image while the embossing powder was still hot.  It added just a touch of sparkle.  Like the spider web, I trimmed around the image and attached it to the page using Liquid Glass behind the stars and a few dots.
I added a few Bling Buttons as well - this one covers up the glue dot that I used to hold the transparency down.
Here are some pages for Baby's First Christmas with a few different embossing touches added.  I modified the Full House pattern from Imagine.  I used the retired Jingle papers on these pages.  My title was cut using the Cricut Art Philosophy Collection.
I used white embossing powder mixed with Prisma Glitter to color this Dimensional Element Ornament.  It adds just the perfect touch of sparkle and shine.

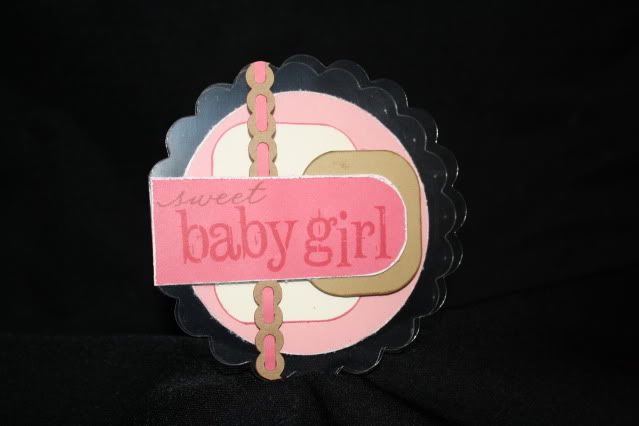
Another thing I like to do with Embossing Powder is color brads with it.  I took some plain white brads here - heated the brads with a heat gun then dipped them in Baby Pink powder and heated them again.

For some regular embossing, I did a little bit of that here on the Blessing Day pages.  To create these pages I modified the Simple Contrast pattern from Cherish.  I used the retired Silhouette papers.  The title was cut using my Cricut Art Philosophy Collection - with a little help from my Cricut Design Studio I was able to change the look of the alphabet by making it taller and skinnier.  I do NOT use my Cricut without the Design Studio anymore - I know exactly what I am cutting and get the exact size I want without guessing, plus I am able to use my paper better and really customize the look.
I embossed the word DAY on these black banner pieces (also cut using the Cricut) using white embossing powder and Felicity stamp set.
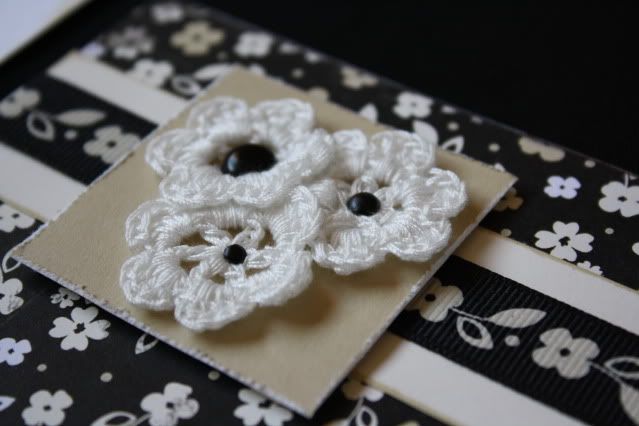
A few more close-ups from these pages just because I love them so much ;-)  Here's a cluster of crochet flowers attached with various sizes of black brads.
The journaling piece was stamped using lines from the Comments stamp set and accented using the Cherish the Moment stamp set.
Thanks for stopping by - to continue along the hop, your next stop is Nikka!

Monday, August 15, 2011

CTMH Spotlight Hop - Circle Cards

Welcome to this month's Close To My Heart Spotlight Blog Hop! If you came here from Nikka's blog, you are on the right track. If you are starting here, then just keep hopping along to see all of the other creations.
***
This month we are featuring Circle Cards - I forgot how much I love circle cards, I really should make them more often!  I like using the Colonial White and White Daisy circle cards and envelopes - I love that they come with their own envelope, I always struggled finding the right size before.  I also love the Clear Cards, I need to play around with those some more!
First up I have a card that I made for a niece's first birthday.  This one was really simple, I just cut a Hollyhock ring, a Blush piece for the sentiment, stamped and cut the candle using the Candlelight stamp set and Sophia papers, and added a few pink buttons.  I will admit, I always like to thread my buttons before I put them on a project, they just seem naked without something.  This time I made myself leave them plain - not so bad, right?
Here is another circle card that I made a while ago but haven't posted yet.  I also used the Sophia papers but this time with the You're Sweet stamp set.  I used Liquid Glass on the orange.
I have more circle cards posted below, but if you are ready to continue along the Blog Hop, the next stop is Amie!
***
These cards have been posted before, but if you missed them and want more details, just click on the card title to go to the previous post and find out more!

Thanks for looking - don't forget to hop along to Amie's Blog!

Monday, June 27, 2011

H2H Color Challenge - Take Me Out to the Ballgame

This week over at the Heart 2 Heart Challenges Blog was a color challenge - it was also my final week as the June Guest Designer.  I had a lot of fun playing along and look forward to participating in future challenges - stay tuned this fall as I'm also going to be a sponsor!
***
The colors for this week's challenge are Barn Red, Bamboo, and your choice of blue.  As I was reviewing the challenge, I came across these pictures that I took 2 weeks ago and knew they'd be perfect.  I added some Outdoor Denim as my choice of blue since it matched his jacket.  Here is the page that I created using a sketch from the PageMaps 2 book.
Gotta love the faces he pulled as he enjoyed his ballgame hot dog!
I ran out of Outdoor Denim Bigger Brads for the right page, so I created some more.  I used some Gold Bigger Brads that I had - holding them with my tweezers I heated them with my craft heater.  Then I dipped them into Outdoor Denim embossing powder and heated them again, and set them aside to cool.  This is such a great way to customize your brads!  Anyway, I didn't notice until after I took the pictures and sent them to the H2H coordinator that I forgot to actually add the brads once they cooled - oops!  We were out of town until last night so I will try to get a chance today to update my layout picture.  For now here is the right page.
One of my favorite things about the page is my stitched title.  It did kind of intimidate me at first because I was afraid it wouldn't turn out like I envisioned it, and it was the very last thing I did to complete my page (besides adding on my missing brads).  Once I finally did it, I was really pleased with the results!  I used Cranberry Waxy Flax, even though the page uses Barn Red, and I actually divided the waxy flax - I used 2 strands for my stitching.  For the title I used the Poster Board Alphabet and Giggle Caps and Giggle Lowercase alphabets.  For the circle element on the right page I printed my journaling on some Twill StickStock - I wish CTMH still carried it!  I also used the wood grain stamp from the Universal Backgrounds stamp set to create the piece between the two pictures on the right page - you can see a bit of it in the following picture.
I also used the On This Day stamp set for the tickets that mark the date, and Circle Around stamp set for the circle elements on both pages.
Thanks for looking - I hope you'll play along over at H2H this week and share what you've created!

Monday, April 25, 2011

Miracle

I love the versatility of the Miracle papers.  Here is a variety of cards that I have created using these papers.
This was a card for my SIL Sandy's birthday - I used the button punch that she gave me for my birthday - love that thing!  I used the On The Side pattern from Originals.

Here is a close-up of the buttons - the punch embosses them as well so I sanded the Cocoa ones and inked the Colonial White one with Sweet Leaf ink.  I then 'tied' them with strips of paper instead of string.

I just love this Hedgehog from the Happy Forever stamp set - this was the first time I've used this set which was a Stamp of the Month last year, I just remember getting it around the time we moved so it hasn't seen ink until now.  I also used the A Little Everything stamp set and Over the Rainbow stamp set on this card.

One of David's coworkers had a new baby boy - this is the card I made for him using the Center Circles pattern from Wishes and the retired Little Boys stamp set for the dinosaur, Circle Around stamp set for the stitches, and Sweet Baby stamp set for the words.  I added more faux mini brads here.

I thought it matched the gift nicely.

We hosted David's family Easter party - these were the invites that I created.  I started off just cutting the frames using my paper cutter...
...then I remembered that I did have my Coluzzle once again so I cut the frames with that and liked it better when I angled it...

I used one of my dot cuttlebug folders and thanks to the past Stamp of the Month Easter Eggs stamp set, each one was unique!

Here are some long lost projects the girls helped me make - we did these last year when Miracle was one of the monthly specials.  This was a note holder for Kaylee's piano teacher.

These were for Brianna's dance teachers.

I also started working on a page using these papers for Brianna's dance recital pics, but they got packed up before our move and I haven't found them yet - I'm hoping to get them done soon, especially now that Miracle is a full paper pack - they matched Brianna's recital costume perfectly!

Tuesday, March 9, 2010

Head over Feet

This week's challenge over at Sketches! {by tamara} is a Recipe Challenge from Rachel - use the following items on your project:
*Vellum or Transparency
*Felt
*Embossing
I used the following sketch from Imaginisce...
...and created this layout. My journaling is hidden behind the pic on the left - just pull the tag to read. This page is about one of "Our Songs" - Head over Feet by Alanis Morissette.
Since the transparency and embossing is hard to see in the picture - here is an attempt to give you a close-up ;-P I heat embossed a line of circles around the edge of the transparency circle using clear embossing powder.
CTMH Products Used: Caprice paper (retired), Heartfelt Wonder Die-Cuts (brown felt scallop circle), Large Coluzzle Circle, Clear Embossing Powder, Circle Around stamp set, Chocolate Marker, Chocolate ink pad, Save the Date stamp set, 3-D foam squares
Other Products Used: SU! tag punch, Brown Thickers, Office Transparency
***
Thanks for looking - don't forget to check out what the rest of the Design Team has created this week!

Tuesday, February 16, 2010

9 Months Old

This week's challenge over at Sketches! {by tamara} is a Recipe Challenge from Marcia - use the following on your cards or layouts.
*Staples
*Stitching (faux or real)
*Stamping
I decided to use these items on another one of Trysten's calendar pages - I'm hoping to get caught up on that soon! I used a sketch from the December 2009 PageMaps, I just rotated the sketch once to fit my vertical picture.
I had so much fun with this layout, but don't I always! I did lots of faux stitching using stamps, so I killed two birds with one stone! Plus there are stitches on the patterned paper as well so it all worked nicely together.
***
Products Used (all CTMH): Stardust paper pack and Stickease, Solo 9 stamp set, Circle Around stamp set, Togetherness stamp set, Friendship Alphabet stamp set, blue and green staples (retired), Topiary, Moonstruck, and Heavenly Blue stamp pads.
***
Here is a close-up of some of the stamping, stitches, and staples.
Don't forget to check out what the rest of the Design Team created for this week's challenge! Thanks for looking!

Monday, February 15, 2010

You Rock - Blog Hop

Welcome to our CTMH Product Spotlight Blog Hop! This month we are featuring the stamp set D1346 You Rock. This was a fun stamp set to play with - I used it on my upcoming Workshop featuring the You Rock papers as well! I used the Workshop On The Go for the You Rock papers, but instead of using the Rockin' Top Coats and the Just Be You stamp set that comes in the Workshop Kit, I changed things up and used the You Rock stamp set instead.
***
Here are the pages and cards that we will be creating at the workshop...remember you can click on any of the images to view them larger.

Here are some close-ups of the pages...


Since I didn't have the Rockin' Top Coats to use, I created my own by heat embossing on a transparency and then cutting out - I used Pansy Purple, Olive, and Goldrush (retired) Embossing Powder.


When I stamped the word 'YOU' I accidentally got an edge of the block in the ink and it transfered to the paper - so I made it look like I meant to do that by adding more and voila, I created journaling lines! I think the rough look goes along well with the paper. Here you can also see the crown from the You Rock stamp set that I embossed on a transparency and cut out to add to the page.

And here is my corner accent - I combined two different stamps 'I Love to Play' and 'You Rock' to make it say {I Love You} instead.

Here are the cards...


...for this one I heat embossed the guitar on a transparency and cut out...


...for this one I also used the Circle Around stamp set and Thanks stamp set...


...for this one I didn't use the You Rock stamp set, instead I used the Star Struck stamp set along with the Happy Birthday stamp set...


***
The next stop on this blog hop is Tracy, so don't forget to keep on hopping and check out all the fun artwork using this stamp set.
***
If you get lost or find links not working along the way, here is a complete list of hoppers...

Wendy K http://www.myscrapbookingblog.com/
And for those who would like to see the original Workshop On The Go designs - here is what CTMH created - you can see how I changed mine up.

Thanks for looking - I hope you enjoy the Blog Hop!