Well. it seems I finally have my photobucket issues resolved - yay! So now I will attempt to play catch-up! Here is something different that I've never shared before - with a Tutorial for Tuesday - I hope you enjoy!
***
With all the snow and cold weather we've been having over the last week, I realized that Trysten doesn't have a warm winter hat that fits him anymore, so last week I whipped him out a quick hat from some fleece scraps I had in my fabric stash. He also doesn't have any shoes that fit him (love those chubby baby feet) so I broke into my yarn stash and made him his first pair of slippers to help keep his feet warm. It felt good to knit and sew again, even if it was just for a minute - but it got me excited and started on some more projects - I can't wait to share them - fun, fun!
***
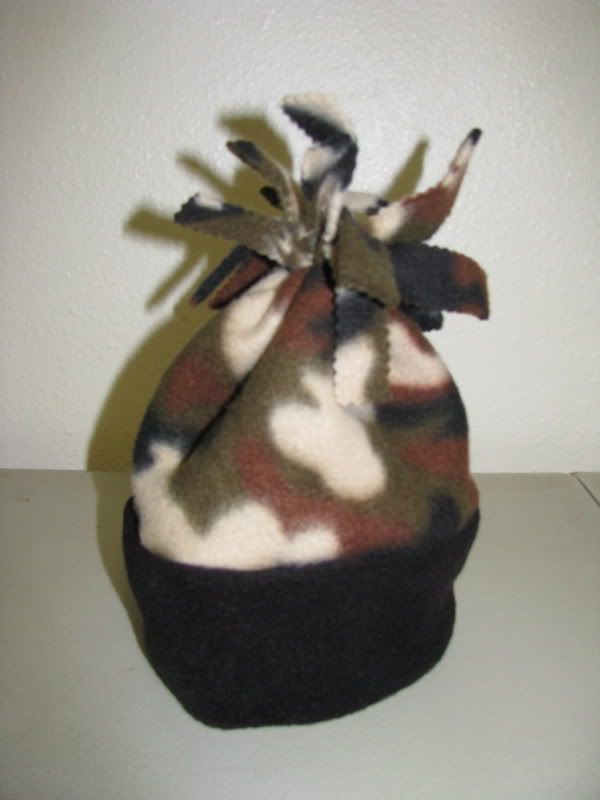
Here are some pictures of Trysten and his new cozy wear - I think he looks adorable in camo - all ready for hunting season ;-)


And here is how I made his hat - super quick and easy! My SIL borrowed my regular sewing machine so all I have is my Serger, but you could use either for this project. I prefer the Serger, just because of the finished edges! I hope this makes sense - let me know if you have any questions!
***
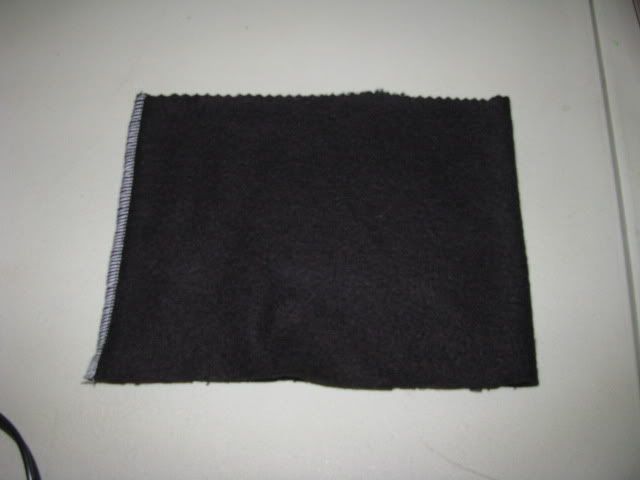
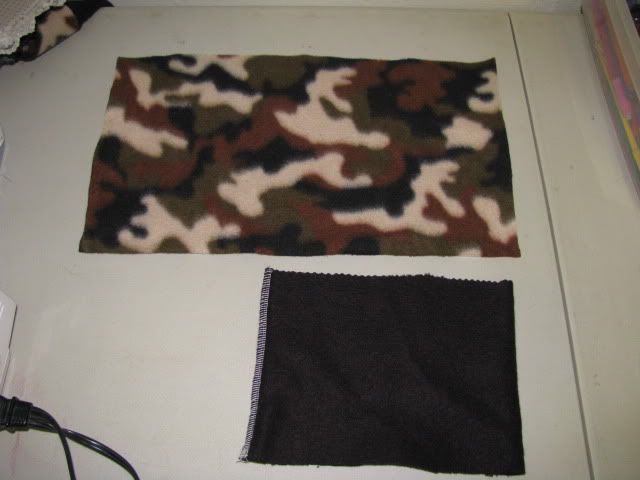
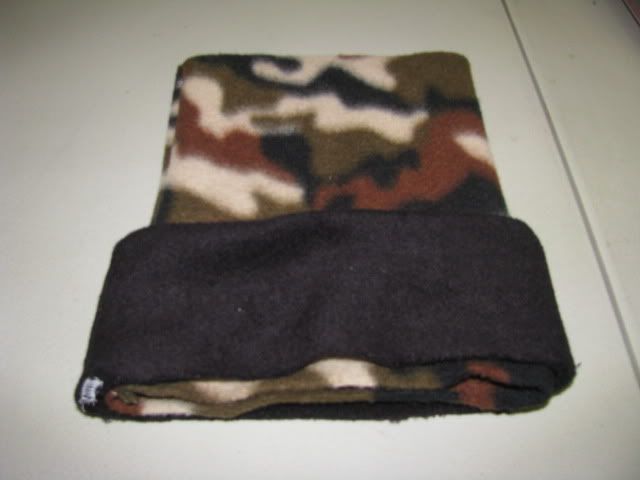
Cut your band for the hat - make it twice as wide as you want the band and make the length long enough to fit snuggly around the head. Be sure your fabric stretches the right way - along the length that goes around the head. Fold the fabric in half and sew the two edges together to create a 'loop.'
Cut your piece for the top of your hat. You can make it as wide as you want but the length will be the same as your band - to fit around the head. I actually like to make the top a just a bit smaller than the band so they fit together nicely in a later step.
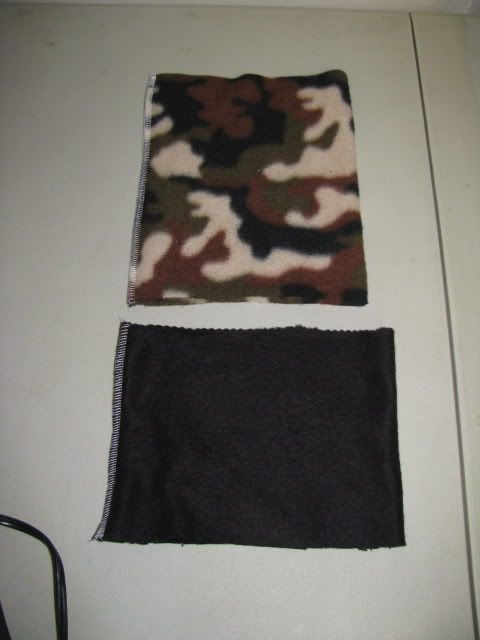
Fold that in half and sew the edges together like you did with the band. Now you have two loops of fabric - one for the band and one for the top.
Now fold your band loop in half so the seam is on the inside and will be hidden - like this: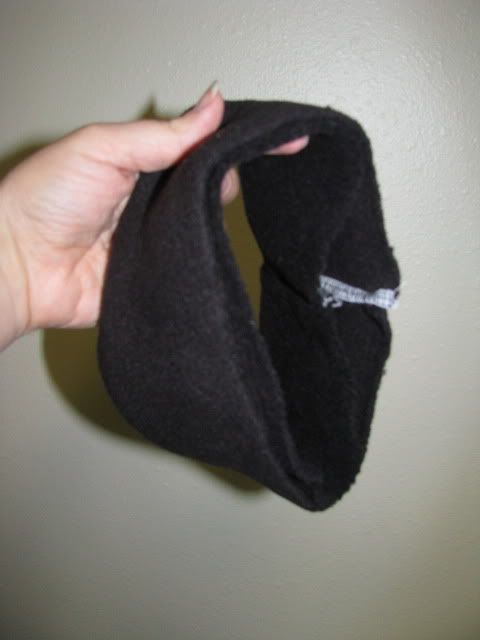
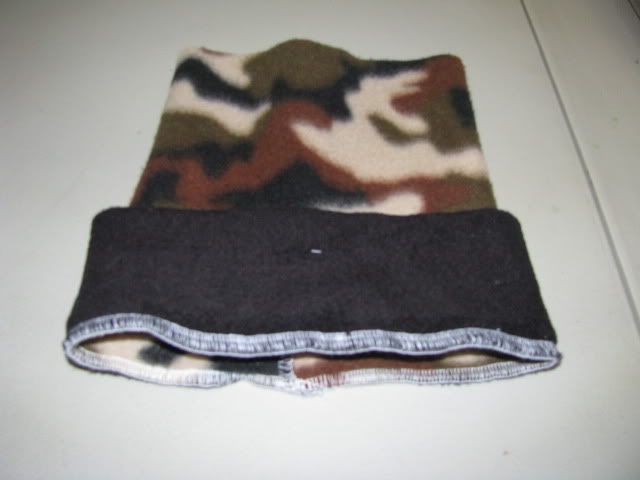
Turn the top piece right side out. Fit your band over the bottom edge of the top piece (this is where it is helpful if the top is slightly smaller than the band) - the raw edges should be together like this:
Sew the edges together in a loop to create your hat...
Fold your band down now so the seam is hidden on the inside of the hat...
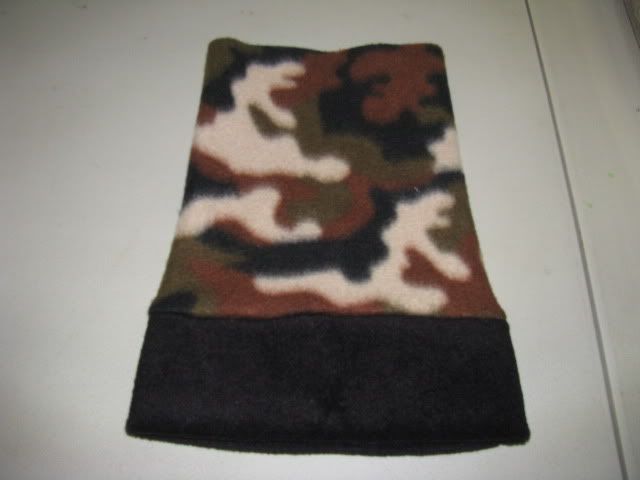
Fold your band down now so the seam is hidden on the inside of the hat...
Now I like to cut the top into tassles - I like to use Pinking Shears to make it fun. You can make these tassles as wide and as long as you want - just be sure to leave enough at the top of the hat for it to fit on the head. The wider (or 'taller') your fabric is on the top, the longer you can make your tassles.
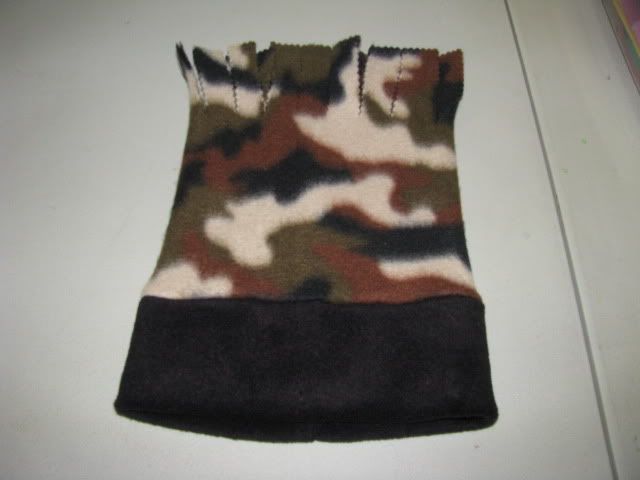
Using a coordinating piece of yarn, securely tie the top of the hat together at the bottom of the tassles you just cut.
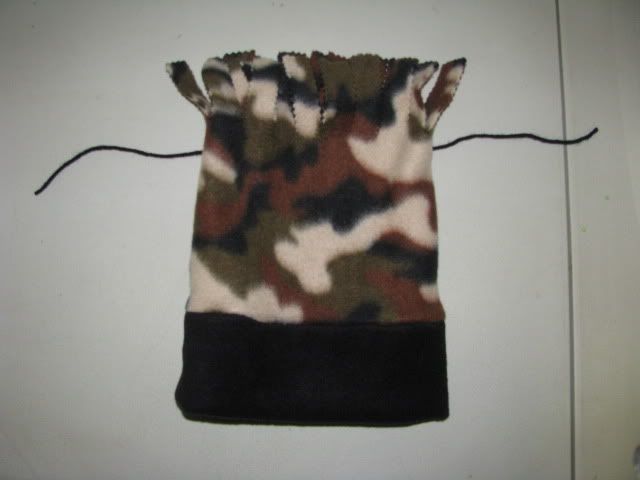
Voila - a cute cozy hat!
Thanks for looking!
6 comments:
Tres chic! The slippers you made are just adorable. And so is the hat. :) Your picture tutorial is really nice.
How cute is he!! And the hat looks sooo easy to make. Thanks for posting it!
I never ever thought I'd say that camo was cute, but it sure is when presented this way! hee, hee! Good for you in sewing and stitching a bit. Bet it felt wonderful!
Awww...Trysten's hat and slippers are too cute! :)
so cute! I love how you 'just whipped them up'. That would take me a week!!!
I can't believe how old he looks!
Sorry it has taken me so long to get back to you. Things have been crazy :)
We are taking our new playset with us. We will just have to build a new playground :( Too bad. At least we have the sweet playset.
Post a Comment