Friday, April 30, 2010

Flashback Friday

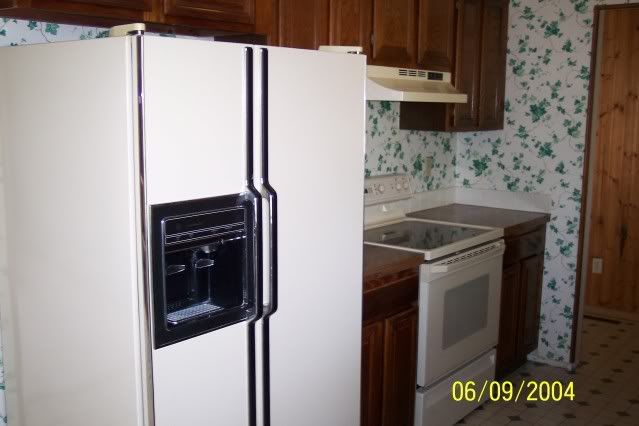
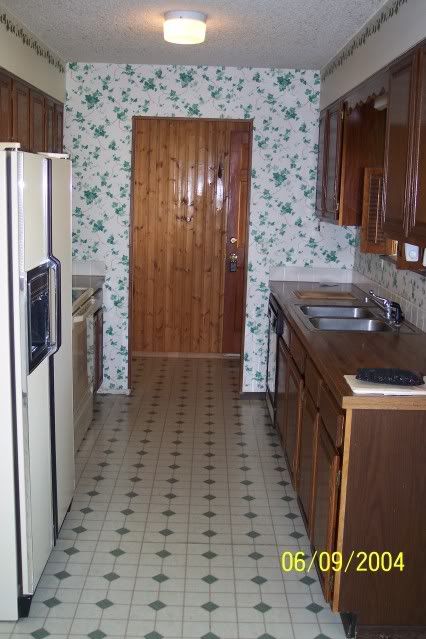
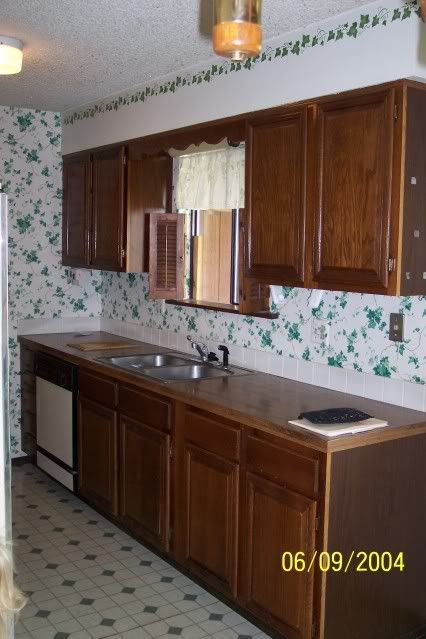
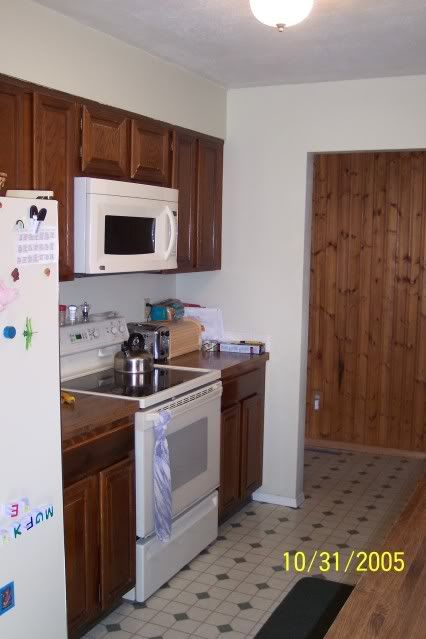
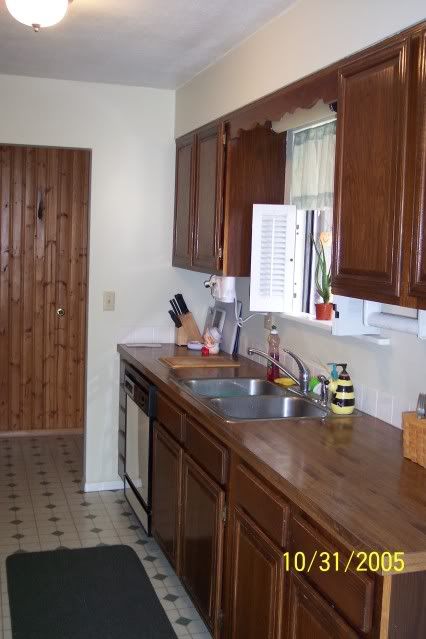
This week's flashback is our kitchen and dining room. Here it is before we bought the house - what did I tell you about the WALLPAPER in this house! I will say the kitchen is probably my least favorite feature of our house, even updated. I wish I had a bar to do projects and cookies and stuff at with the kids, and the flooring and countertops need to be updated, but this is what we've got for now! Here is the kitchen - BEFORE:


Notice the shutters - you'll see them again later - or not!


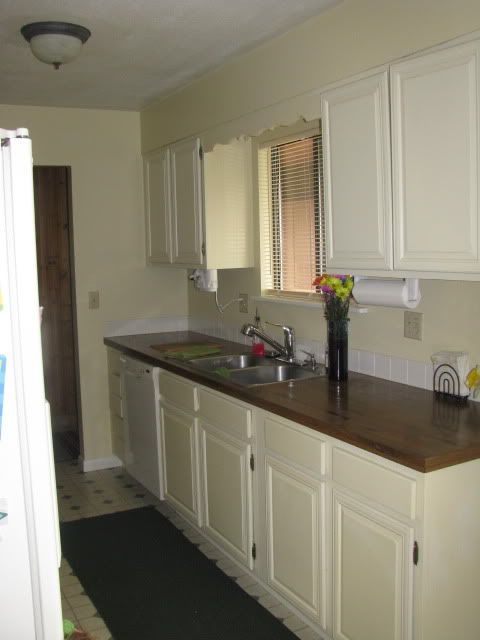
And here it is after we got our hands on it - we took down all the wallpaper and painted, and we also installed a microwave/vent over the stove. We did this work right after moving in, but for some reason the only pictures I could find were taken almost a year and a half later.


Notice the shutters again - we painted them at first but scroll down to see what we did to them with our latest update.

Then in the Spring of 2006, we painted our cabinets (but I couldn't find a picture from when we did that) and last week we finished replacing the baseboard and repainted the kitchen walls again just to freshen it up. It's amazing what a coat of paint can do to some outdated cabinets. I have always wanted to do a wash technique with glaze on them but I've never gotten around to it.


We also eventually replaced the light fixtures. Oh, and remember the shutters? Well, when David took them off so we could repaint last week, I was just amazed at how much bigger that window seemed, so I said leave them off and I LOVE my window now! We put up some mini blinds for privacy since this window faces the front of the house, but it's just so much brighter now. I think I may add a valance or some sort of window treatment - any suggestions?


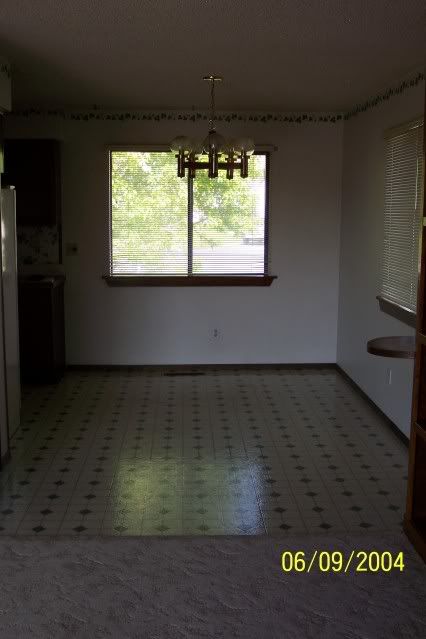
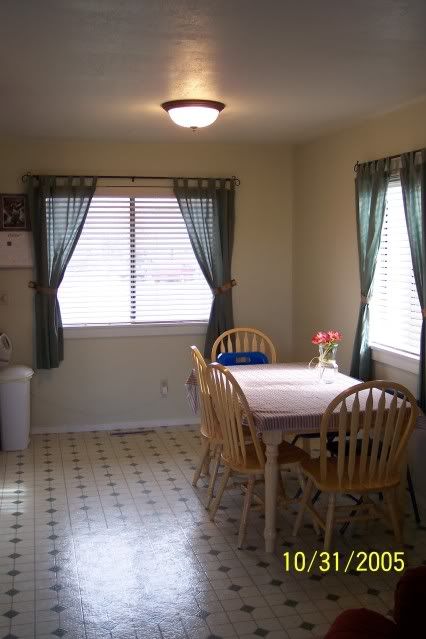
And the dining room:

BEFORE:


AFTER - but this is not a completely updated picture, we just replaced all the baseboard so it looks a little better now:


Thanks for looking and joining me on my little Flashback!

Thursday, April 29, 2010

Today...

...marks my 5 year Anniversary as a CTMH Consultant! I signed up just for the discount (before I had EVER seen or played with the products) but after I got my Consultant Kit just a few days later, and had my Jump Start Gathering a few days after that, I was HOOKED! I am continually blown away by the amazing products that CTMH produces, and I have learned so much and really played with my creativity over the last 5 years. I haven't had a chance to attend any Corp events yet, like Convention or Album Retreat or anything, but I have made lots of friends through CTMH - hopefully one day I'll get to go and meet all of the fabulous people that I have met online. I have won a few artwork contests, which is fun, and have something *in the works* that you'll have to stay tuned for. It's been an exciting adventure - thanks for letting me share!

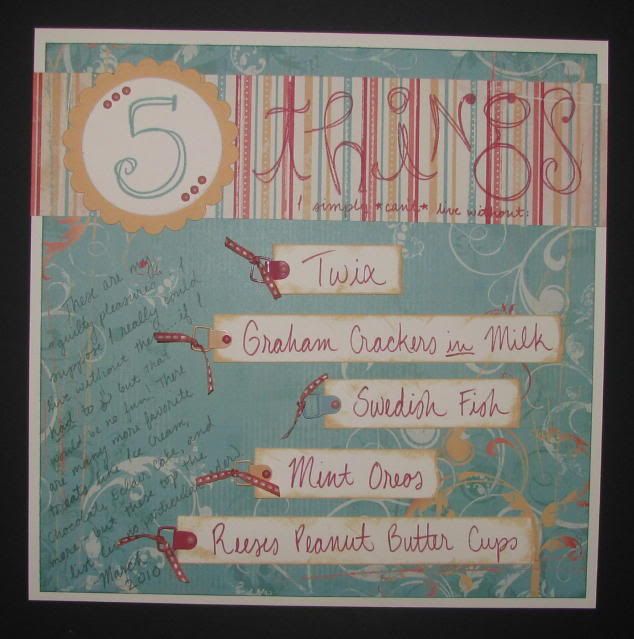
5 Things...

...I simply can't live without! This week's challenge over at Sketches! {by tamara} is a journaling challenge from Joan, one of the Design Team Members. The challenge is to make a layout about the 5 Material Things you cannot live without. This was a bit of a challenge for me since I did this layout with NO pictures - I guess I *could* have taken pictures of myself eating these goodies, but that would NOT have been pretty ;-P With all of these journaling challenges, I have also challenged myself to use my own handwriting! I don't like my handwriting, and I like to have things centered or lined up just perfect, so using my own handwriting is difficult for me sometimes, but I know it is important to have in my scrapbooks! Anyway, here is the layout that I created - I chose treats for my topic...
This was the last month for this current Design Team - I sure had a lot of fun and I was really challenged, especially to find the time to get my projects done! I hope to be on more Design
Teams in the future, but for now I have a lot of other things to take care of first. Hopefully I still find the time to get creative once in a while!
***
Thanks for visiting!

Tuesday, April 27, 2010

Studio J Release!

Studio J is now available to the public! Scroll down to find out more - I've posted some FAQ's about Studio J. Or hop on over to my website HERE to start your Studio J projects now! Here is another fun layout that I created using Studio J.


This is one of my favorite layouts! I used one of my absolute favorite paper packs, Life Delights - this paper is retired, but available on Studio J, so I don't have to worry about ever running out! I also ordered 2 of this layout and gave a copy to Kayt's mom - I very rarely duplicate a layout because of the time and effort but this just took a click of the mouse to change the quantity to 2! I also love being able to see my pictures in place to see if that's where I really want them to go. I originally had a different picture as my 5x7, but changed it to this one instead. When I scrapbook Traditionally, I admit that I waste lots of pictures because they end up being the wrong size or the wrong picture - with Studio J there are no wasted prints!


What is Studio J?
Studio J™ is free online scrapbooking design software brought to you by Close To My Heart. Studio J helps you easily create custom-printed two-page layouts using our foundational scrapbook patterns, exclusive color palette, and themed designs all delivered in 12" × 12" custom prints ready for your albums. It’s a snap!

Is Studio J easy to use?
Studio J software is extremely intuitive and easy to use. The program walks you through five steps that include:
*upload some of your favorite photos
*choose from one of the 54 awesome My Reflections Kits (including most of your faves from our Idea Books plus some that are exclusive to Studio J).
*choose a layout pattern. There are MANY to choose from. They are like the patterns you'll find in our wonderful "how to" books like Cherish, Imagine, Reflections. The possibilities are endless because all the patterns you can choose from can be rotated 3 ways and flip flopped.
*now personalize! You get to drop your photos in, add text, choose cardstock and background and texture papers from the kit, add accessories (just about every accessory item you can imagine!), distressing, titling, MyStickease, and so much more.
*save and/or buy your layout(s).
It’s super simple and extremely fun to use!

I love Close To My Heart products. Will Studio J use the same great papers, patterns, colors, and embellishments?
Of course! If you love Close To My Heart’s scrapbooking philosophy, then you will love Studio J.

Do I need to download any software to my computer to use Studio J?
Not at all! You only need an Internet connection, and then you simply log in to my MyCTMH website and click on the Studio J link to get started. Feel free to design to your heart’s content—you are not required to buy anything or provide any personal information to get started!

Can I save what I am working on and come back to it later?
You bet! You can create a customer profile that allows you to save and return to a project in progress at a later time. Your active projects will be saved for up to 90 days, giving you plenty of time to work on them. You extend that timeline for your active projects by 90 days each time you make a purchase, and your purchased projects will remain archived for one full year after purchase.

Do I need a printer that can print 12" × 12" pages to use Studio J?
No. Your Studio J layouts are not available for you to print from a home computer. In fact, we take care of the printing for you. When you purchase your designed layouts, we print and ship them quickly and directly to you using only top quality printing technology and archival-quality papers.

What is the price?
You are not charged a thing until you order your custom prints. The price per printed two-page layout is $12.95. We also offer some fantastic rewards for larger orders. You can receive FREE Memory Protectors® to protect your layouts in your albums, and FREE shipping/handling based on the number of layout prints you purchase in a single order as follows:

*For 5–9 layout purchases: You’ll receive a pack of 5 Memory Protectors FREE!
*For 10–20 layout purchases: You’ll receive FREE shipping/handling PLUS a FREE pack of 5 Memory Protectors for every 5 layouts in your single order.
When can I begin creating with Studio J?
As of today, April 27th, you can now start creating layouts with Studio J!
Monday, April 26, 2010

Studio J Catch-up!

I had fully intended on sharing Studio J every day until the release date (which is tomorrow, BTW!) but our phone has been down since Saturday, which meant no internet, either ;-( We got it fixed this afternoon, so I'm back up and running and now I'm going to do a quick catch-up! This is what I was going to post the last three days that I've been MIA!


Something that I love about Studio J is that I can still distress my pages! You may not be able to tell in my pictures here, but all the edges of my papers are distressed - and my fingers are still clean ;-) You can also make your ribbon and accessories any color you choose (from within that paper pack) - here I chose Sunflower ribbon, which I would not have been able to do with a Traditional layout! So far with all of my Studio J layouts I have used the suggested accessories, or Toggle Accessories, just for ease of use, but you don't have to use them and you can accessorize the page as you see fit!


Something else I love about Studio J is that I can make the journaling and the title any color, font, size, etc, that I want to. I made the journaling Autumn Terracotta here and it shows up on the Cocoa paper - if I had done this as a Traditional layout, I would have had to create my journaling on a lighter piece in order for it to show up. I also had fun playing with the Stickease on this layout - lots of layers!


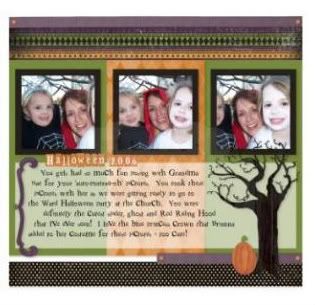
There are a few things that I love about Studio J that I did on this layout. First, I used a retired paper pack, but it's available on Studio J, so I don't miss out! Second, it's fun to play around with the same pattern - you may notice this is the same layout that Brianna used on her Halloween pages, I just used different paper. I also love that I can play around with the pictures and try them out in different places on the layout. I moved a few around to make them work with the embellishments and to tell the story.


Thanks for looking - I hope you're all as excited as me to see the endless possibilities with Studio J!
Friday, April 23, 2010

Studio J -

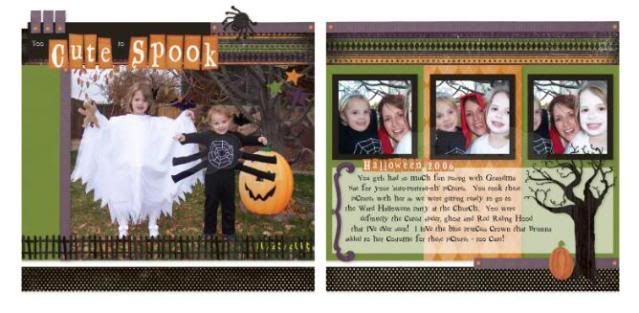
I love how quick and easy Studio J is - here is another layout that I did using some pictures from Halloween of 2006.
Something else I love about Studio J is the selection of paper. In addition to the regular paper packs, there are some exclusive and even retired paper packs available for use! Each Idea Book cycle, Close To My Heart adds one new, themed kit available only in Studio J. The kit I used here is called Boo! and is exclusive to Studio J. I also love that I can change the size of the Stickease - you can't do that with Classic Scrapbooking! It was so easy to work with the journaling and the Stickease all on the page and make it fit together just how I wanted it.


Thanks for looking - stay tuned for more Studio J artwork as we get closer to the release on April 27th!

Flashback Friday

For today's Flashback I'm going to share one of my favorite transformations. This is one of the bedrooms before we bought the house. I already warned you in a previous Home Improvement Post that there was some HORRIBLE wallpaper in this house when we bought it, and I have to say I think this bedroom was the worst - check it out!
***
BTW, if you missed my last house flashback, just click here!


And this is what we did to it - thanks to my brilliant Mom for the adorable fence idea! It took a lot of tape to mask off our design, then we painted the fence slats and then used a glaze and a fun woodgrain tool to make it look like real wood! I added some more depth by painting an 'edge' on every single slat. It was quite a project but I think so worth it! This was Kaylee's room after we got it done.
And here is Kaylee posing in her new butterfly garden room - she's always been our Little Ladybug! I love this smile in this picture - this is what she would do when we'd say smile, and I think it's because I'd be closing one of my eyes to look through the view finder of the camera, so she thought that's what she did too ;-P
I added some Tatouage (sp?) flowers and bugs around the room a little later but never got pictures of just those. You can see in some of the pictures the bugs and butterflies on the walls, they are basically just rub-ons for the walls. I love the little gate on the doorway of the room.
Look at the cute ladybug quilt my mom made for Kaylee. The room looks nothing like this now as it's now Brianna and Brailee's room and they sleep in bunkbeds - and it's not so clean anymore now that there are 4 kids!
Thanks for looking! Check back later for my Studio J Countdown!

Thursday, April 22, 2010

Studio J - Guest Designers, Kaylee & Brianna

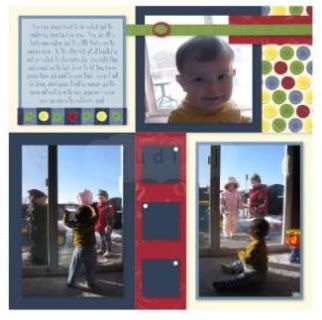
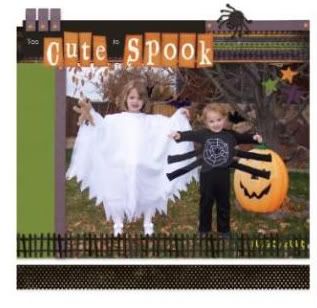
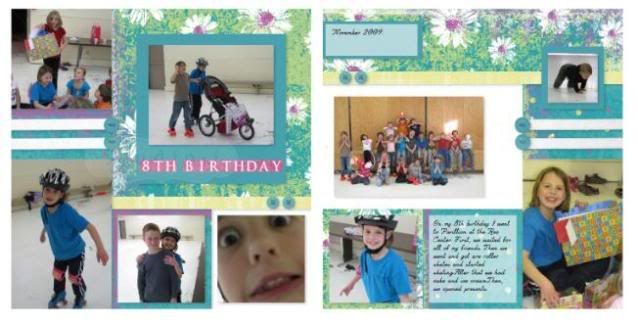
To continue with the countdown to the public release of Studio J, I've decided to share some artwork from some 'Guest Designers' - my dear daughters, Kaylee and Brianna! Here are their first attempts at using Studio J. The were so excited when our Studio J order arrived and they could see their pages in person.
***
The first is Kaylee's layout - she chose to scrapbook her 8th birthday party.
And this one is Brianna's layout - she wanted to scrapbook our most recent Halloween. She really had fun with the Stickease on her layout!
Something I LOVE about Studio J is how EASY it is to use - my girls picked up on it right away. All I did was upload the pictures they wanted, showed them how to use it, and they did it all. They picked the paper pack, the pattern, accessories, which pictures would go where, and they even did their own journaling - I didn't even 'proof read' it, I left it unique like them. The girls really enjoyed playing with Studio J and I like that they can scrapbook like Mommy - I don't have to print more pictures and they get to use the same papers as Mommy, too! I think they will really have a lot of fun with it as they get better at using all of the different options.

Wednesday, April 21, 2010

Countdown to Studio J!

For those of you who haven't heard, Studio J™ goes live to the public on April 27th! What is Studio J? Studio J is free online scrapbooking design software brought to you by Close To My Heart, an industry leader in scrapbooking and stamping products. Studio J helps you easily create two-page layouts using our foundational scrapbook patterns, exclusive color palette, and themed designs, all delivered in 12" x 12" custom prints ready for your albums. It's a snap!
***
As a CTMH Consultant, I have had a chance to play with it early and I LOVE it! I have never done any kind of digital scrapbooking before, and Studio J is so fun and easy to use. I have already completed over 10 2-page layouts and I placed my first order last Friday and they arrived yesterday - ready to slip right into my scrapbook! I am ready to countdown to the public release of Studio J and I hope you'll join me! Every day I am going to share one of my completed Studio J layouts and something that I love about the software. I still love Traditional Scrapbooking and will never give that up, but I love Studio J because it's a great way to attempt to catch up on my scrapbooking, especially since I take SO many pictures!
***
This is the very first layout that I created using Studio J...
Something that I love about this software is that I can play around with different paper packs to see which one will look best with my pictures. I tried two other packs before deciding on It's A Guy Thing.
***
Here is a close-up of the left and right pages. The Studio J watermark is not on the final printed layouts, this is what I get in Preview mode.


Cost to reproduce this layout Traditionally:
Paper Pack - $12.95
Stickease - $8.95
Buttons - $7.95
Waxy Flax - $3.95
Ribbon - not available in Barn Red
Photo Clips - no longer availble
Photo Prints -
*11 4x6 photos x $0.19 = $2.09
*1 5x7 photo = $1.59
Grand Total = $37.48 + tax and shipping - of course this total includes left-over supplies that I can create lots more projects with, but this would be the basic start-up cost for this particular layout if I didn't already have these supplies on hand. And what's nice is I don't have a mess to clean up afterwards and I have two more layouts to add to my list of completed for the year - I should reach my goal in no time thanks to Studio J!

Tuesday, April 20, 2010

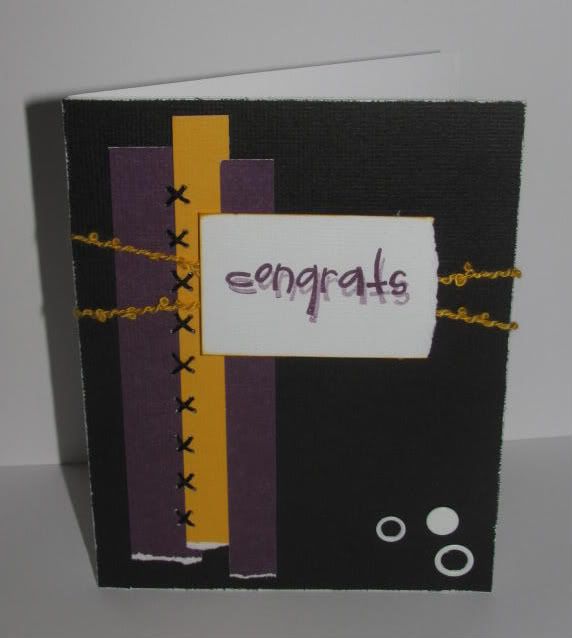
Challenge #116 - Congrats Card

This week's challenge over at Sketches! {by tamara} is the following card sketch:

And this is the card I created for this week's challenge. I made a Congrats card for David's nephew who took second place at State Wrestling this year. I created the card using his school colors.
All products came from CTMH, but most are retired or no longer available. I used Black, White Daisy, Pansy Purple, and Sunflower Textured CS, Spunky Greetings stamp set, White Daisy Accents, and Sunflower Sassy Strands, and Black Floss.
***
Don't forget to check out what the rest of the Design Team has created using this stamp set - just click here! Thanks for looking!

Monday, April 19, 2010

Flashback...Monday

I started this post last week, but got busy and didn't finish ;-) So, this was supposed to be Flashback Friday, but here I am on Monday finally finishing up! Since our life and house are currently under construction, I decided to do something a little different for my Flashbacks. We bought this house almost 6 years ago and have done a lot of work so I'm going to share some before and after pictures of our projects, and even some in between! It's been fun to look back and see how things have changed in this house!
***
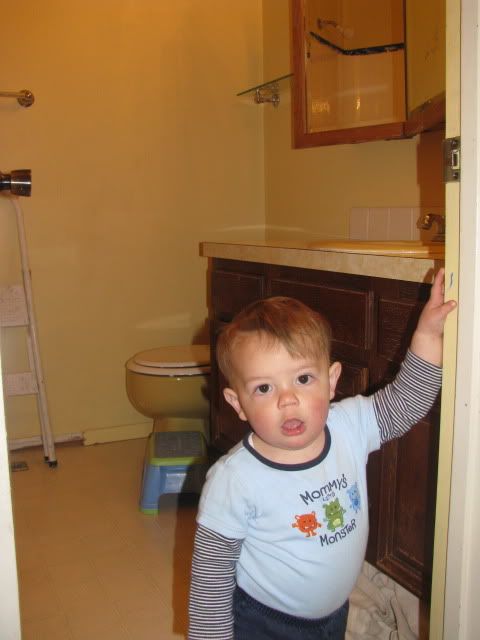
This week's Flashback is going to focus on the 2 upstairs bathrooms. When we bought this house, we knew it needed some work, but it was something we were willing to do. Unfortunately, some things didn't get fixed right away, but over the years we've done a little here and there - but a lot lately. Here are some before and after pictures...oh, and note that I say "we" a lot, but it's really David doing all of the work. I am mostly the "go-fer" and run to the store when David needs supplies. The only chance I have to get dirty is after the kids are in bed - I spend lots of my time chasing Trysten around and keeping him out of the paint ;-P
***
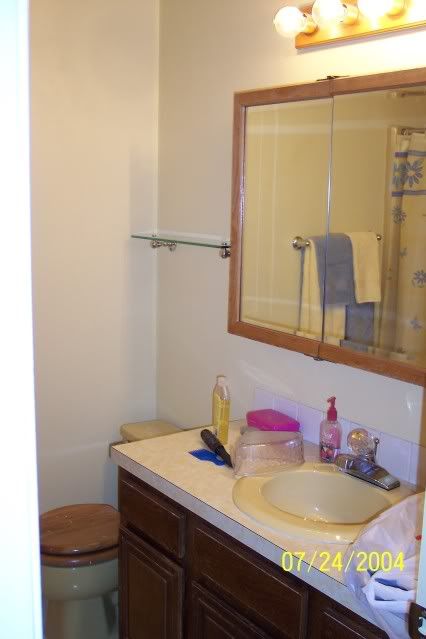
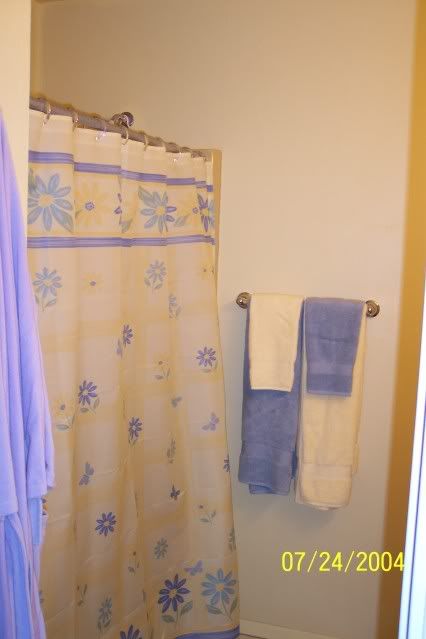
This was the main upstairs bathroom BEFORE we got our hands on it - check out that wallpaper! I have never seen so much ugly wallpaper in one house until this house. Just wait as I post more Flashbacks over the next couple of weeks and you'll see what I mean! And this bathroom had a yellow tub, yellow toilet, yellow sink, and yellow countertops!


And here it is about a week later - notice I couldn't even clean up before taking a picture ;-P I don't think you can tell in this picture, but we painted the walls yellow - it was better than before but we never really liked it.

Here are some pictures from when we started our latest update back in March. David "painted" our tub white - no more ugly yellow tub! It was a big, stinky mess, but SO worth it, and probably easier and less expensive than replacing the entire tub.

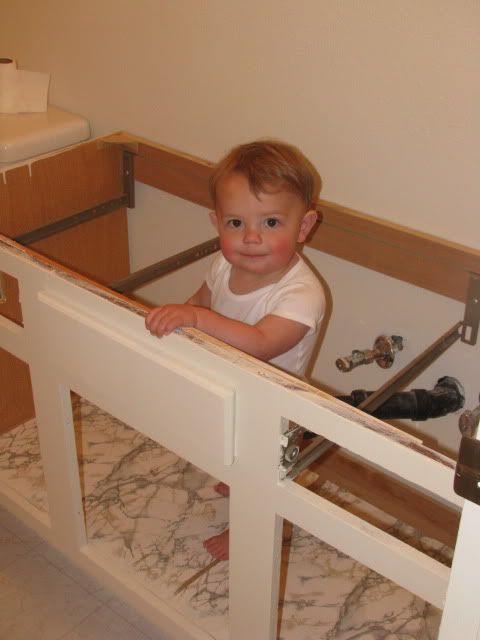
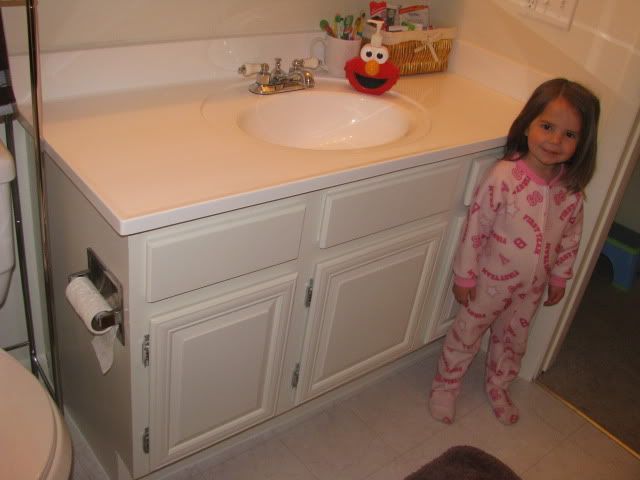
We finally pulled out our old vanity and just repainted it - what an amazing difference it makes!


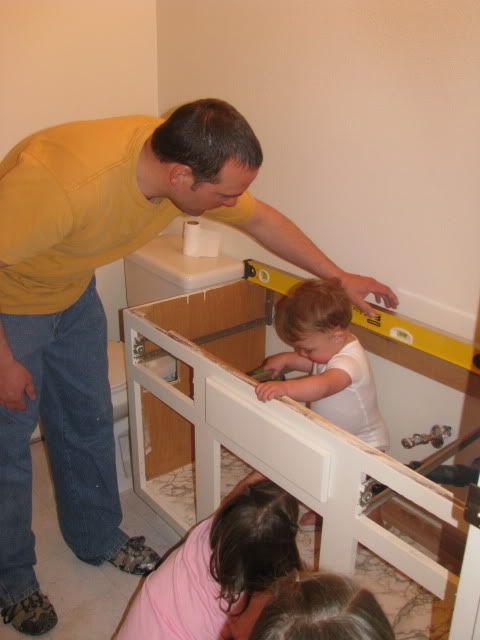
Here are the kids helping David put it back in.


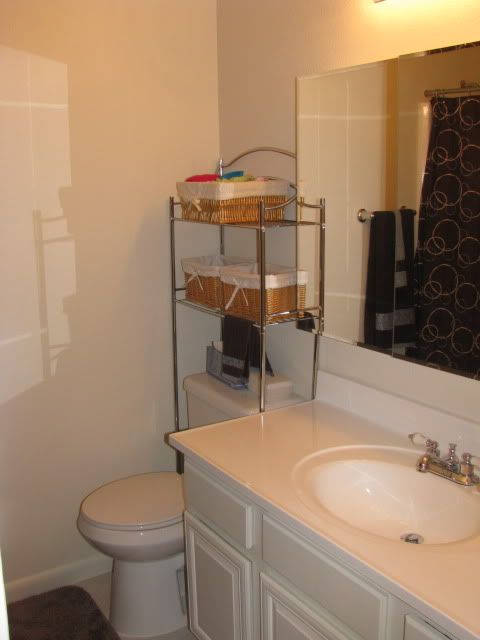
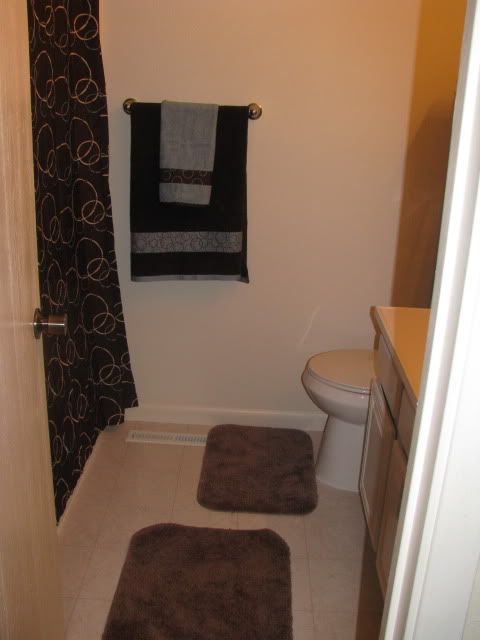
So we bought a new vanity top, mirrored medicine cabinet, lights, and new toilet. We re-textured and re-painted the entire bathroom and updated it with a much better shower curtain, towels, and rugs!


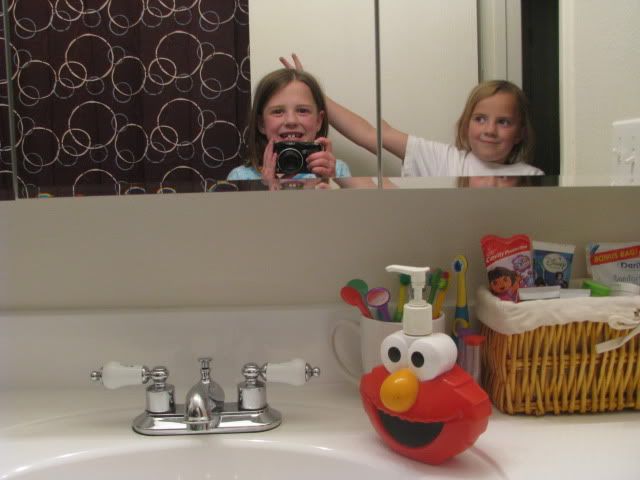
Kaylee and Brianna had to get in on the pictures as well - and don't you just love the Elmo Soap - completes the look, doesn't it ;-P

Oh, and we also replaced the flooring, put up new baseboard, and vents.

Brailee decided to help with pictures, too.


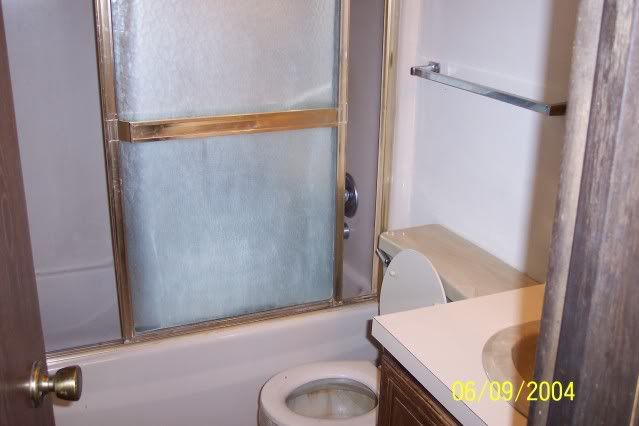
And here is our Master Bathroom before we even bought the house. The colors weren't as bad in this one, but the shower door was horrible - we tore that out right away.

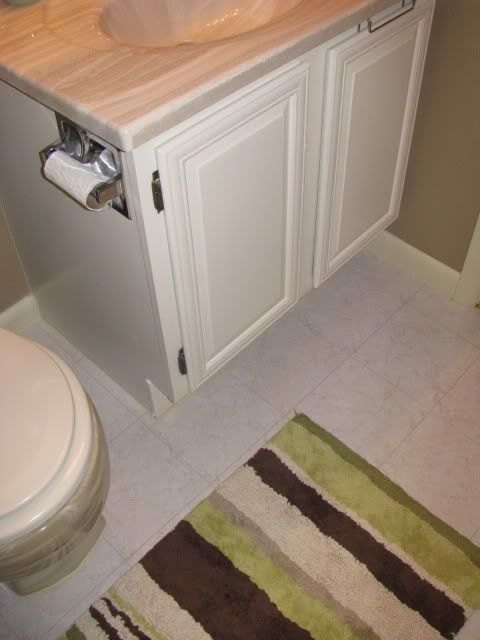
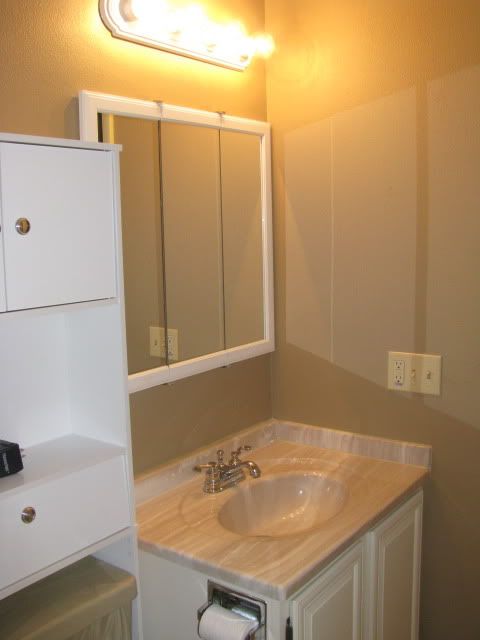
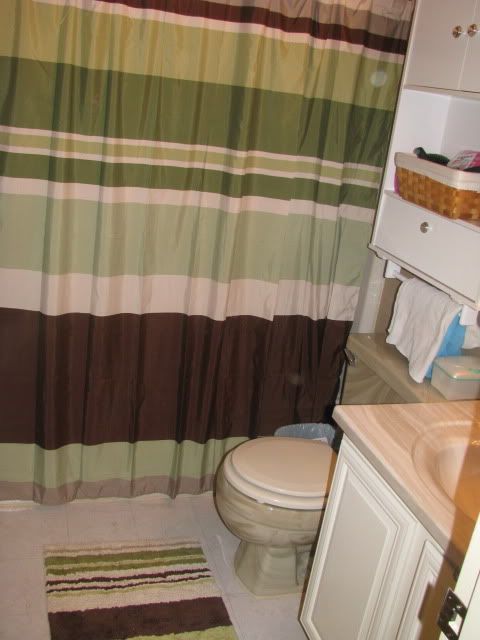
I don't have any pictures of our bathroom after we updated it after moving in, but we also recently fixed it up as well, so you'll just see the AFTER after pictures. There was carpet in this bathroom which I've always hated, and we finally got a chance to tear that out and put new flooring in.
We didn't replace the toilet in this bathroom (though now I'm wishing we had) but we got a new vanity top, new medicine cabinet and lights, and just painted the existing vanity. I think it looks much better!
Thanks for looking and thanks for letting me share!